LAN deployment using the Agent Browser (Windows only)
If one of the devices on the LAN has the Agent installed, the deployment to the remaining devices can be initiated from the Agent Browser and the web interface.
For information on deploying from the web interface, refer to LAN deployment from the web interface.
This method of deployment has prerequisites that weaken the overall security of the environment. It should only be used if Active Directory deployment is not an option.
IMPORTANT In the past, PsExec has been utilized by some viruses to remotely run malicious code. PsExec itself is not a virus, nor does it run malicious code on its own. Adding a registry key to enable access to the ADMIN$ share, making exceptions to any antivirus product, and opening ports is by definition going to weaken the overall security of the environment. By using this method of deployment, you acknowledge that you are aware of this.
TIP After you have deployed the Agent, reverse all changes you made to allow Agent deployment.
| Requirement | Description |
|---|---|
| Enable remote access to the Admin$ share | Starting with Windows Vista, UAC has by default required elevated privileges to access the administrative shares. Details on this can be found here: Microsoft Support Article (951016). You can enable this share either by accessing the Microsoft support article above and following the instructions, or you can copy the following into an Administrative Command Prompt window: reg add HKLM\SOFTWARE\Microsoft\Windows\CurrentVersion\Policies\System /v LocalAccountTokenFilterPolicy /t REG_DWORD /d 1 /f |
| File and printer sharing | File and printer sharing must be enabled on the devices you wish to deploy to. Ports 445 and 139 inbound must be open. |
| Password | You cannot authenticate as a user with a blank password. The user account with the correct permissions to enable an install must have a password to work using PsExec. |
| Antivirus | This process assumes that all antivirus programs are configured to allow the use of PsExec, which can stop the use of those programs. |
Initiate LAN deploy
- Connect to a device which is on the local network of the devices you wish to deploy your Agent to. The Agent Browser window will open.
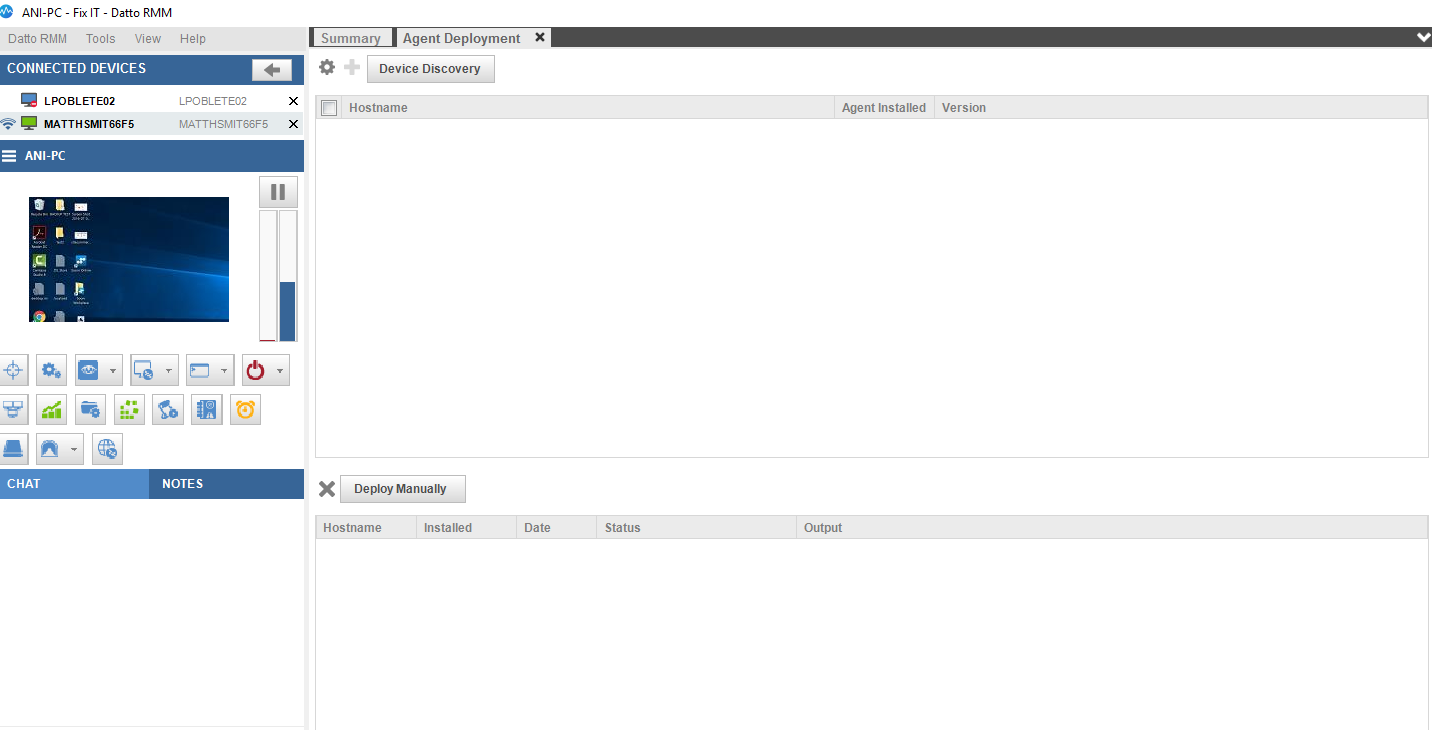
- Click on the Agent Deployment icon (the one with the three computer screens). The new tab you see will be split into a top and a bottom pane.

- Click Device Discovery above the top pane. The scan process will start and list all devices within the same domain or workgroup. It will display if an Agent is already installed on the device, and its version number.

NOTE The device discovery process is using UDP broadcast to identify if an Agent is installed on a device. UDP packets can get broken or blocked by network hardware which may lead to false readings. If no response is received, the device will be flagged as having no Agent installed.
- Check all the devices you wish to deploy to.
- Click Deploy.
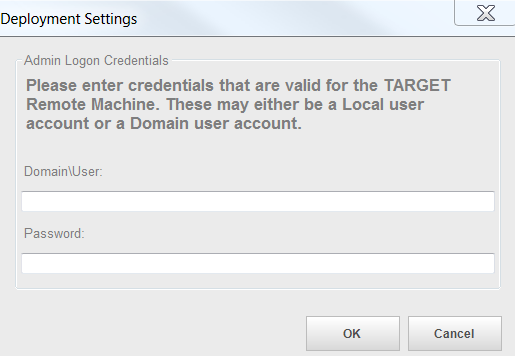
If you haven't already done so via the Settings button, you will be prompted to enter the credentials for the deployment.
NOTE All devices on the local LAN must have the same username and password, and the user account must have appropriate permissions to install the Agent. If the username or password is incorrect or the user account cannot access the Admin$ share, the installation will fail.
- Enter the domain\user and the password and click OK. This will initiate the deployment to the devices.

Each device the Agent has been deployed to will be listed in the bottom pane. The deployment status will be updated every 2 seconds. The results of each device's deployment are recorded in the Installed, Date and Output columns. Extended deployment information will appear when you mouse over the Output column.
NOTE There is also an option to add device names manually in the lower window. Once the hostname(s) are entered, click OK and the Agent installation will begin.


