Proxy settings in Datto RMM - Legacy UI
PERMISSIONS Permission to manage Site Settings
NAVIGATION Legacy UI > Sites > click on a site > Settings > Proxy
NAVIGATION Agent Browser
A proxy or proxy server is a connection (a program or a computer) between your device and the internet. It serves as an intermediary as it processes the requests your device sends out, and returns the information you need from the internet. Proxies are often used to hide your location or IP address, to control internet usage (by blocking or bypassing certain websites), or to improve security. In order for your device to access the proxy server, it needs to have the correct proxy settings.
Datto RMM can be configured with proxy settings so that it can be used in environments that use proxy servers. Proxy settings can be managed in the Web Portal within a site. Once configured, the settings will apply to any new device added to the site. Individual proxy settings can be applied locally within the Agent settings as well.
How to...
- Navigate to the Sites tab and click on the name of the site you wish to configure proxy settings for.
- Click the Settings tab to the right, and scroll down to the Proxy section.
- Click Edit.
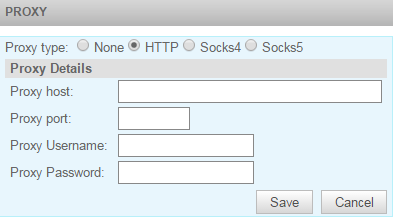
- Specify if the proxy type is HTTP, Socks4, or Socks5.
- Fill in the proxy details as required by your proxy server: host, port, username, password.
- Click Save to update the settings.
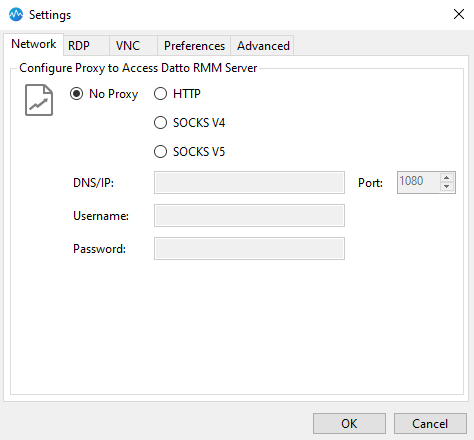
Once saved, the proxy settings will apply to any new Agent added to the site. Existing devices with an Agent installed will need to be manually configured. Refer to Configure proxy settings in the Datto RMM Agent.
TIP You can also configure proxy settings when creating a new site by entering the above details under Proxy type on the New Site page. Refer to Adding a site - Legacy UI.
Site proxy settings will not apply to devices that had already been in the site before the proxy settings were configured. Therefore, existing devices with an Agent installed will need to be manually configured. Follow the steps below on the device that you would like to configure proxy settings for.
IMPORTANT The steps below must be performed as root or via sudo.
- On a macOS device, navigate to /Applications/AEM Agent.app/Contents/MonoBundle/CentraStage.exe.config.
On a Linux device, navigate to /opt/CentraStage/UnixService.exe.config. - Locate the following section and edit the proxy details as required.
<!--0 = None-->
     <!--1 = Socks4-->
     <!--2 = Socks5-->
     <!--3 = Http-->
     <setting name=“ProxyType” serializeAs=“String”>
       <value>
       </value>
     </setting>
     <setting name=“ProxyIp” serializeAs=“String”>
       <value>
       </value>
     </setting>
     <setting name=“ProxyPort” serializeAs=“String”>
       <value>
       </value>
     </setting>
     <setting name=“ProxyUsername” serializeAs=“String”>
       <value>
       </value>
     </setting>
     <setting name=“ProxyPassword” serializeAs=“String”>
       <value>
       </value>
     </setting>
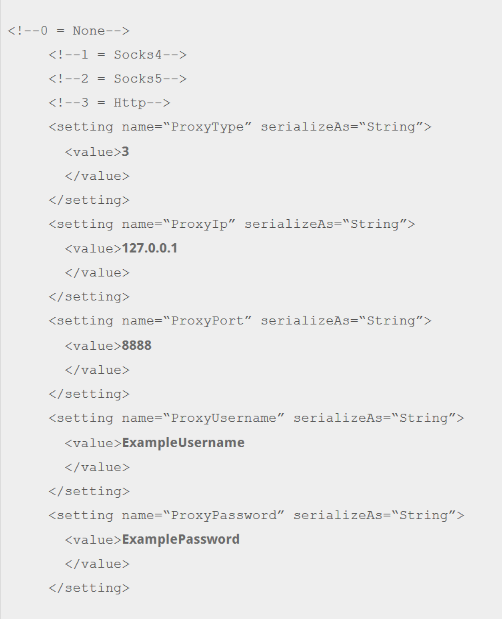
EXAMPLE For example, an edited file (where proxy type = HTTP, proxy IP = 127.0.0.1, proxy port = 8888, username = ExampleUsername, password = ExamplePassword) would look like this:
- Restart the Agent for the changes to be applied.


