Scripting
Datto RMM contains powerful functionality that allows users to create and share components (bundles of code, data, and even applications) that can be executed across multiple devices. Refer to Creating a component.
A typical component contains a script written in one of several available languages, and may also contain a program to install or an executable to run. This functionality guarantees that administrators have complete control over the technology they supervise. When creating or editing a component, scripts can be entered in the Script section. Refer to Script for more information on scripting components, including .
A scripting language is a programming language that supports scripts, which are programs written for a special run-time environment that can interpret (rather than compile) and automate the execution of tasks that could alternatively be executed one-by-one by a human operator.
Datto RMM supports the following scripting languages, which allow you to develop scripts that can be run across a wide range of devices and operating systems:
- Batch
- PowerShell
- Shell (Bash, macOS)
- VBScript
We will discuss the three most widely used scripting languages from that list.
The following environment variables are also available for use in any supported scripting language:
- CS_ACCOUNT_UID: The unique identifier for the Datto RMM account managing this device.
- CS_CC_HOST: The control channel uniform resource identifier (URI) used by the Agent to communicate with the Datto RMM platform.
- CS_CC_PORT1: The port through which Agent communications are facilitated: HTTPS 443.
- CS_CSM_ADDRESS: The address for the web interface to which this device connects.
- CS_DOMAIN: The local device’s domain, if it is connected to one.
- CS_PROFILE_DESC: The description of the site where this device is located.
- CS_PROFILE_NAME: The name of the site where this device is located.
- CS_PROFILE_PROXY_TYPE: 0 or 1 depending on whether a proxy server is configured for this site.
- CS_PROFILE_UID: The unique identifier for the site where this device is located.
- CS_WS_ADDRESS: The Web Service URI used by the Agent to communicate with the Datto RMM platform.
- UDF_1 - UDF_30: These fields report the data held within the web interface for the device’s user-defined fields.
UDF variables enable you to reference platform data in components and can be used in any supported scripting language. Use the variable name UDF_X, where X is the number corresponding to the UDF you want to reference.
EXAMPLE In Batch scripts, %UDF_1%, %UDF_2%, and so forth.
NOTE Refer to User-defined fields for information about how to configure UDFs.
NOTE Referenced UDF data is only valid at the time a monitor is pushed to a device. Should UDF data then change within the platform, it will not be reflected at the device level until the Monitoring policy definitions are refreshed automatically (at least once a day) or manually when a Monitoring policy is pushed to the device. Therefore, it is recommended that use of UDF data in monitors be reserved to data that does not change regularly. For more information, refer to Monitoring policy.
By default, all scripts are executed in the Windows LocalSystem Account (otherwise known as NT AUTHORITY\SYSTEM). This has the advantage of running with extensive privileges on the local endpoint, and script execution is possible even if no one is logged on or if the logged on user has Limited User rights.
Points of note for the LocalSystem Account:
- Does not have a visible desktop. Windows generated here will be hidden and cannot be interacted with. For example, installers with Next buttons will hang in memory waiting for input that cannot be delivered.
- Does not have a virtual keyboard or mouse, so no macro-based automation is possible.
- Does not have a password, so no network authentication is possible.
- Does not have access to resources defined per user, such as mapped network drives.
NOTE Quick jobs always run in the LocalSystem Account but it is possible to force the execution of a script to run in the context of the local logged on user by opting to a Scheduled Job and using the advanced options under Execution. Refer to Execution.
The Datto RMM Support team covers the following:
- Troubleshoot jobs associated to scripts/components.
- Investigate if a script runs successfully outside of Datto RMM but does not run successfully in Datto RMM.
Datto RMM Support does not cover custom script/component creation. Partners are advised to contact their account manager for a Professional Services engagement if they require assistance with script/component creation.
For more information, refer to Getting support for components.
How to...
About Batch scripts
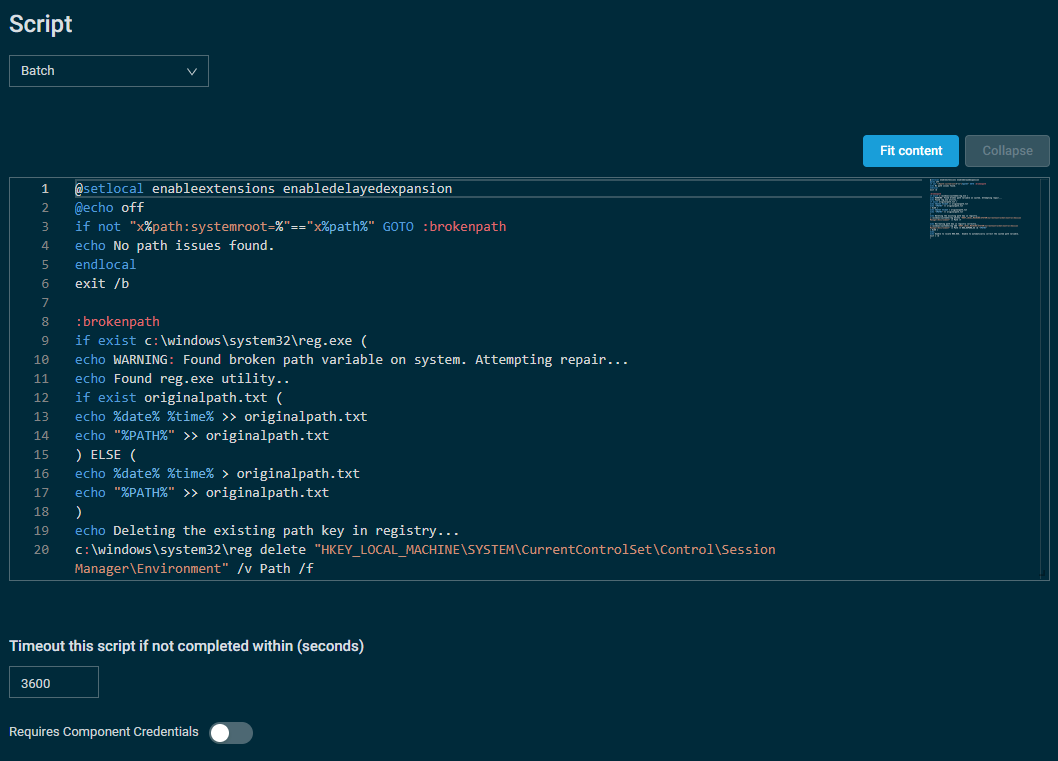
Batch is the most compatible and widely-used scripting language across Windows systems. Although it has been around since MS-DOS times, the syntax and certain commands have remained much the same.
A Batch file is a kind of script file in DOS, OS/2, and Windows. It consists of a series of commands to be executed by the command line interpreter, stored in a plain text file. It is typically created by using a text editor such as Notepad or a word processor in text mode and then saving it with a .bat extension.
The script could be as simple as a single line, or it could be a more complex process involving loops and subroutines. Generally, scripts that can be run locally can also be executed via Datto RMM on multiple devices either one time or on a recurring schedule.
Here is an example:
@echo off
set time=Morning
echo Good %time%
When executed, the following is displayed:
Good MorningTo input a command in Batch format, there are no special considerations. Your scripts will not require a header to begin the script and you are not required to precede execution of your script with any special steps. Simply prepare or paste your Batch scripts into the Command text box.
NOTE For Batch scripts, it is recommended to begin your script with @echo off. This will make the script's output more readable.
Using variables
In addition to UDF variables, Batch scripts support the use of the following variables:
- Windows environment variables
- Variables you define yourself in the script. The user running this script will receive a prompt to use the default value for the variable when running the script, or to enter a different value.

EXAMPLE %username% or %logonserver%
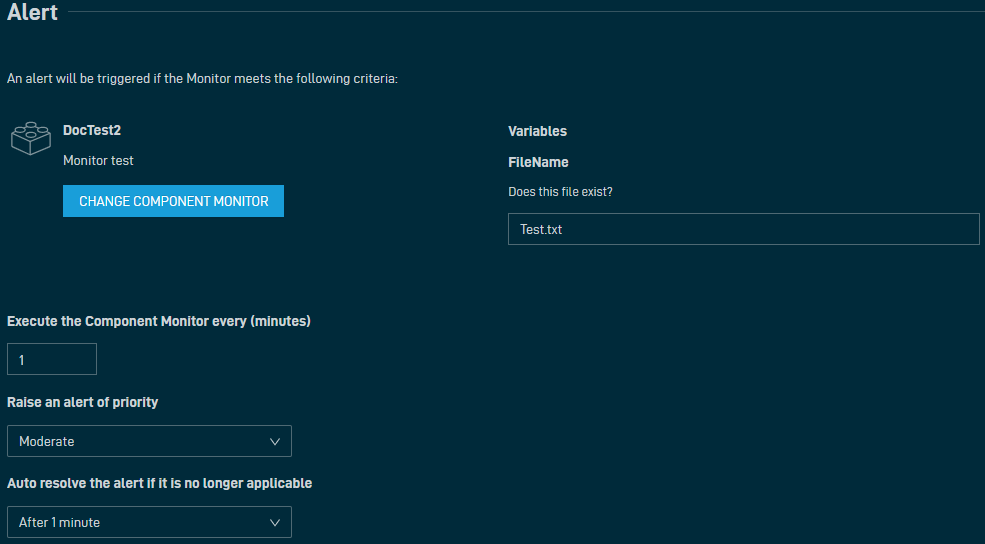
EXAMPLE In the preceding screenshot, we created an input variable called FileName with a default value of Test.txt. When we create a Component monitor, for example, we can specify the value that the component monitor should be set to when it runs:
NOTE Define temporary environment variables in the Variables section of the component page. Refer to Input variables.
- Variables defined at the Site or Global level. If a variable is referenced in a component script and it is not defined in the script, then Datto RMM will look to see if the variable is defined at the Site or Global level. For more information on using input variables, refer to Input variables.
Attached files
Files that have been attached to the component using the file attachment fields beneath the script edit box can be referenced directly. For example, if your component was meant to install the Windows Installer file install.msi, your code might look like this:
@echo off
msiexec /i install.msi /qn
echo Product Installed Successfully
exit
The file install.msi can be referred to without hard links, because the command shell is being launched from the same directory that contains the file.
Post-Conditions
It is also possible to set up conditions to look for certain text output strings and alert the user if they appear using the Warning Text function at the bottom of the page. This function will look at the output from a script the user has run and generate an alert if anything from the output matches a criteria the user has defined.
EXAMPLE If you place the string ERROR: (note that it is case sensitive) into the field, then run the script, Datto RMM will spool through the command’s output and, if a string containing ERROR: is found, the job running the component will exit with an additional warning status.
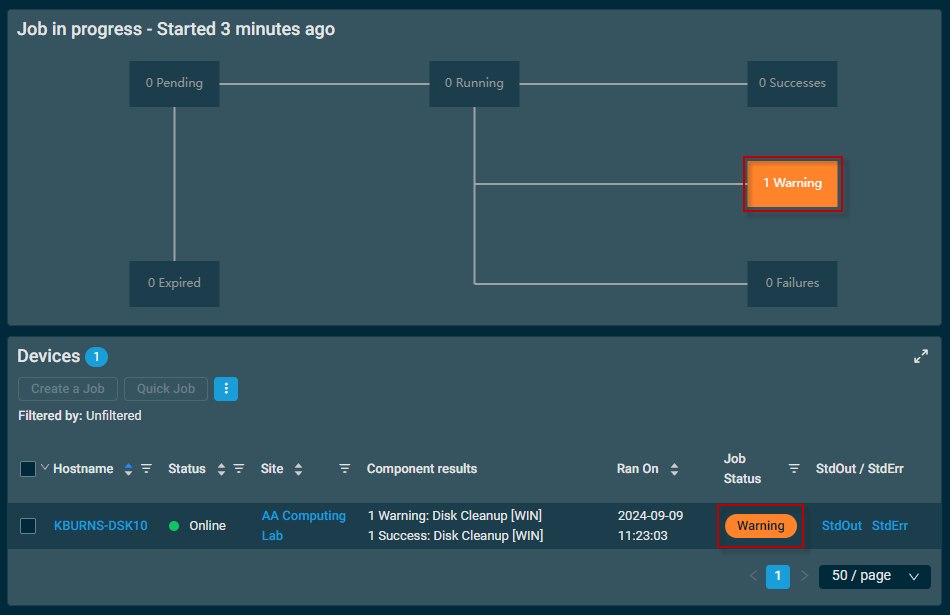
Warnings will show on the job results page as an orange Warning label in the job progress section and in the Job Status column next to any applicable devices.
PowerShell is Microsoft's answer to the highly-adaptable terminal systems offered by *nix operating systems. More extensive than Batch, it is constantly being developed and revised by Microsoft engineers (and 3rd parties) with modern computing tasks in mind. will return the path and directory Windows is installed in.
About Compatibility
Datto RMM can run PowerShell scripts on devices that support it. Version 2.0 ships with Windows 7 by default. It can be obtained for Windows XP and Windows Server 2003.
TIP Not all PowerShell versions are created equal. Version 2.0 (Windows 7) and version 5.0 (Windows 10) support a different feature set. In cases where scripts are going to be run across a varied selection of Windows Operating Systems, ensure your script is PowerShell 2.0-compatible to guarantee compatibility.
NOTE To set a minimum version for your PowerShell script, set "#Requires -Version 3" as the first line. The number can reflect whatever minimum version of PowerShell you are working towards. Versions beneath the set threshold will reject the script without running it.
IMPORTANT In order for a self-signed PowerShell script to run successfully on a remote device, the device must have the certificate used to sign the script installed within its Trusted Publishers store. The following steps outline one way this can be facilitated:
1. Create a self-signed certificate.
2. Use a tool like CertMgr to install the certificate into the Trusted Publishers Certificate Store on any devices that will have the self-signed components run against them.
3. Copy the contents of your component script to a locally saved .ps1 file, sign the PowerShell script with a tool like SignTool using the certificate you created, then copy the contents of the signed .ps1 file back into the component script.
Attached Files
Much like Batch, the scripts launched from any PowerShell command prompt are launched from the package directory of the respective script. This directory is produced by the Agent and typically contains the script itself. PowerShell scripts typically have a .ps1 extension (although when sent via the platform they are sent as .bat files) along with simple metadata and any files the user has attached.
Because of this, to refer to a file that has been attached to a component, no hardlinks are required. Simply add a dot backslash (".\") before the file name to refer to the attached script located in the current directory.
For example, if you are writing a script to enter the contents of an attached document .txt file so that it can be read in StdOut, your script would look like this:
#this comment line won't be parsed
Get-Content file.txt
Comment lines out in your PowerShell script by placing the hash (#) character at the beginning of the line and proceeding to type as normal.
Using variables
Variables are invoked using the dollar ($) character. When variables are set as part of a component, refer to them within the script as environment variables ($env:) instead. The following example relies on the variable day having been set as part of the component:
Example:
#Regular variable
$color="blue"
write-host "The sky is $color"
#Component variable
write-host "Today is $env:day"Unix (which includes Linux, as well as a number of other related systems) is less an operating system in and of itself and more a framework built to a set of rigorous standards (“POSIX") from which many compatible forks and projects have been started. Although inconsistencies do exist between *nix projects (referred to in GNU/Linux terminology as “distributions" or “distros"), the scripting technology typically utilized is surprisingly compatible.
macOS is based on one of these Unix projects (BSD), and as such we can use Unix scripting to run scripts and deployments to macOS devices.
Datto RMM provides an Agent and scripting capabilities for the *nix-based macOS and various Linux versions. For further information, refer to Supported operating systems and Agent requirements.
After you select Unix from the Install command drop-down menu, a line of code will appear in the script field.
#!/bin/bashThis line has been included for your convenience. As part of Datto RMM's functionality, this line (an operation to choose a command interpreter) must begin any *nix script, including those intended for use on macOS.
The line tells the computer which command interpreter to use; that is, it selects a program to manage the lines of the script with. *Nix machines typically have several command interpreters available, and while certain scripts may demand different interpreters, the Bash interpreter specified in the default line is the most compatible across *nix-based systems.
NOTE Recent versions of macOS prefer ZSH over Bash. When running scripts, the difference is immaterial. Do not edit the starting command unless you know what you are doing.
If you are a novice user or are unsure of this line of code's purpose, do not modify it. It will not alter the functionality of your code, and removing it may cause your code not to work as intended.
Using variables
Variables are invoked using the dollar sign ($). Unlike PowerShell, there is no difference at the script level between environment and script-level variables; everything is invoked the same way.
#comments are defined with the hash key
$color="blue"
echo "The sky is $color"
Attached files
As with the other scripting languages, the script is saved to a local file and executed in the same location as the files attached to it; as such, no directory needs to be given to refer to files that were attached to a Unix component.


