Microsoft 365 user management
PERMISSIONS Refer to Microsoft 365 in Permissions.
NAVIGATION Microsoft 365 > All Users > Create User
NAVIGATION Microsoft 365 > All Users > select a tenant > select the check box for a user > click the Row Actions icon > Edit User or Offboard User
NAVIGATION Microsoft 365 > All Users > select a tenant > click a user's Display Name > click the More icon > Edit User or Offboard User
To learn about the Microsoft 365 Integration in Datto RMM, which this feature is part of, refer to Microsoft 365 Integration.
Overview
If you are looking for an alternative to user onboarding in Microsoft 365, this streamlined user onboarding flow offered directly through Datto RMM can facilitate technician efficiency, faster ticket resolution, and reduction in human error.

Key functionality
Microsoft 365 user management in Datto RMM allows you to do the following:
- Populate standard Microsoft 365 user information.
- Assign roles and assign or unassign licenses.
- View your license count and determine when licenses have run out.
- Assign or unassign groups and view which teams and applications are associated with those groups.
- Edit user details and assignments after initial onboarding. Refer to Editing a Microsoft 365 user in Datto RMM.
- Offboard a user. Refer to Offboarding a user or revoking a user's access.
Creating a new Microsoft 365 user in Datto RMM
Once the Microsoft 365 Integration is enabled in Datto RMM and tenants are synced, the All Tenants page and All Users page can be used to view Microsoft 365 data. Refer to Enable the Microsoft 365 Integration and Sync Microsoft 365 client tenants to Datto RMM.
You can easily access these pages from the Microsoft 365 menu in the left navigation menu.
Complete the following steps to create a new Microsoft 365 user from within Datto RMM:
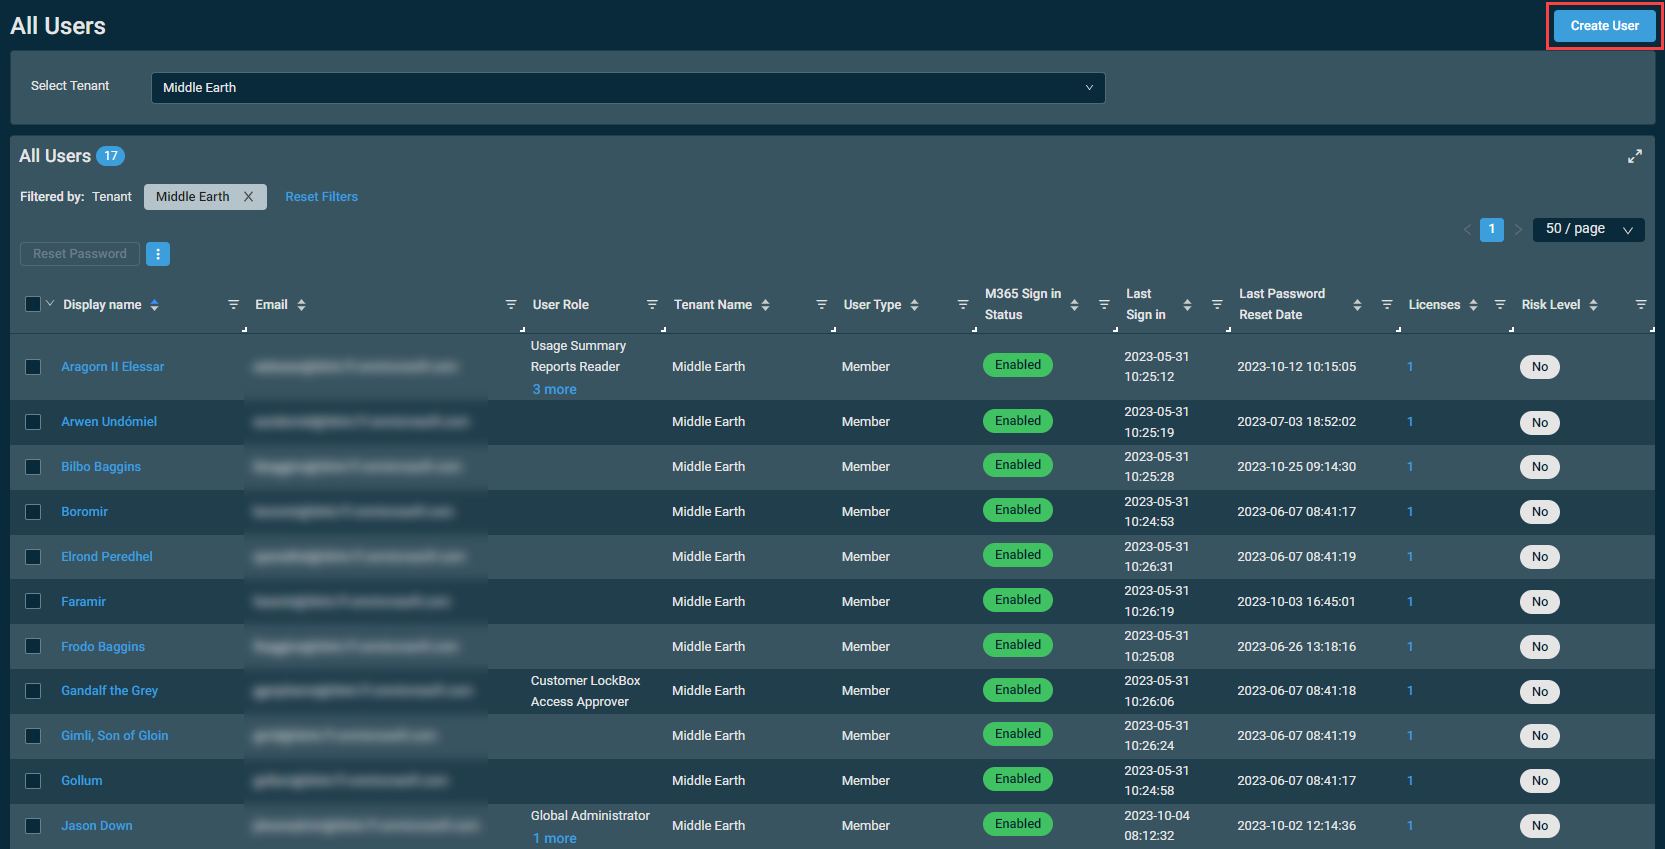
- From the left navigation menu, navigate to Microsoft 365 > All Users.
- In the upper-right corner of the page, click Create User.
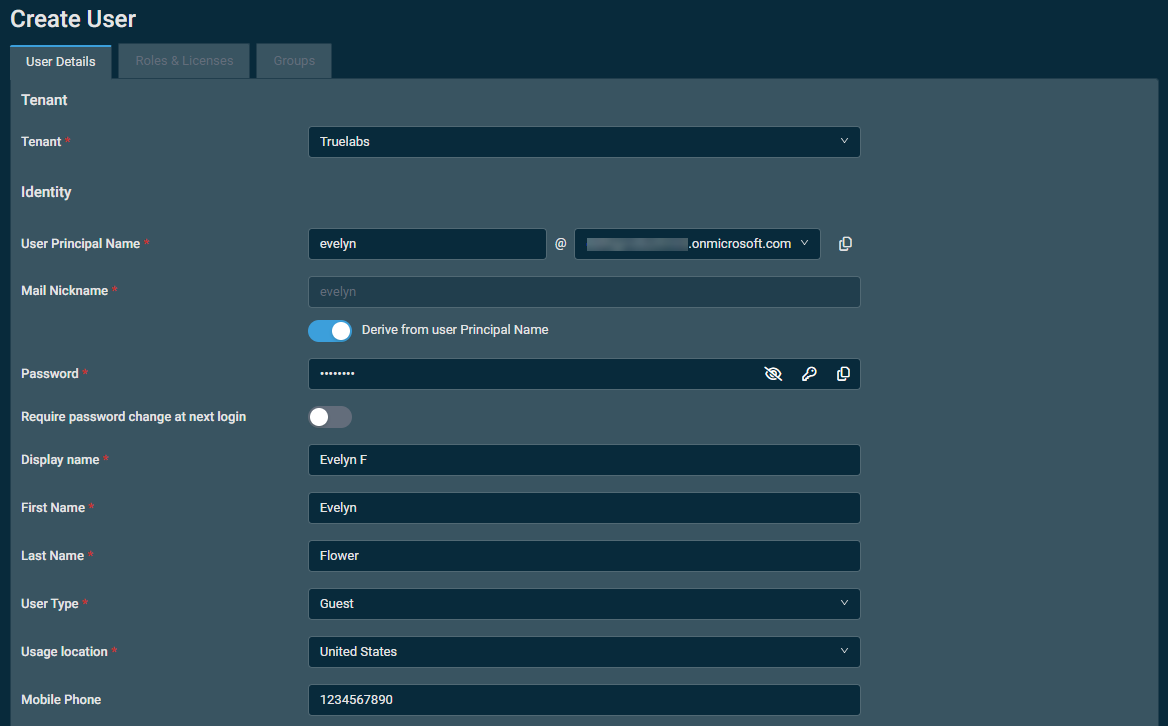
- In the User Details tab, fill in the standard user information. Refer to User Details. When finished, click one of the following options:

- Create User and Close: Immediately create the user in Microsoft with a generated user ID, and return to the All Users page.
- Create User and Continue: Immediately create the user in Microsoft with a generated user ID, and proceed to the Roles & Licenses tab in the user creation process.
- Cancel: Return to the All Users page without saving any entered data or creating a new user.
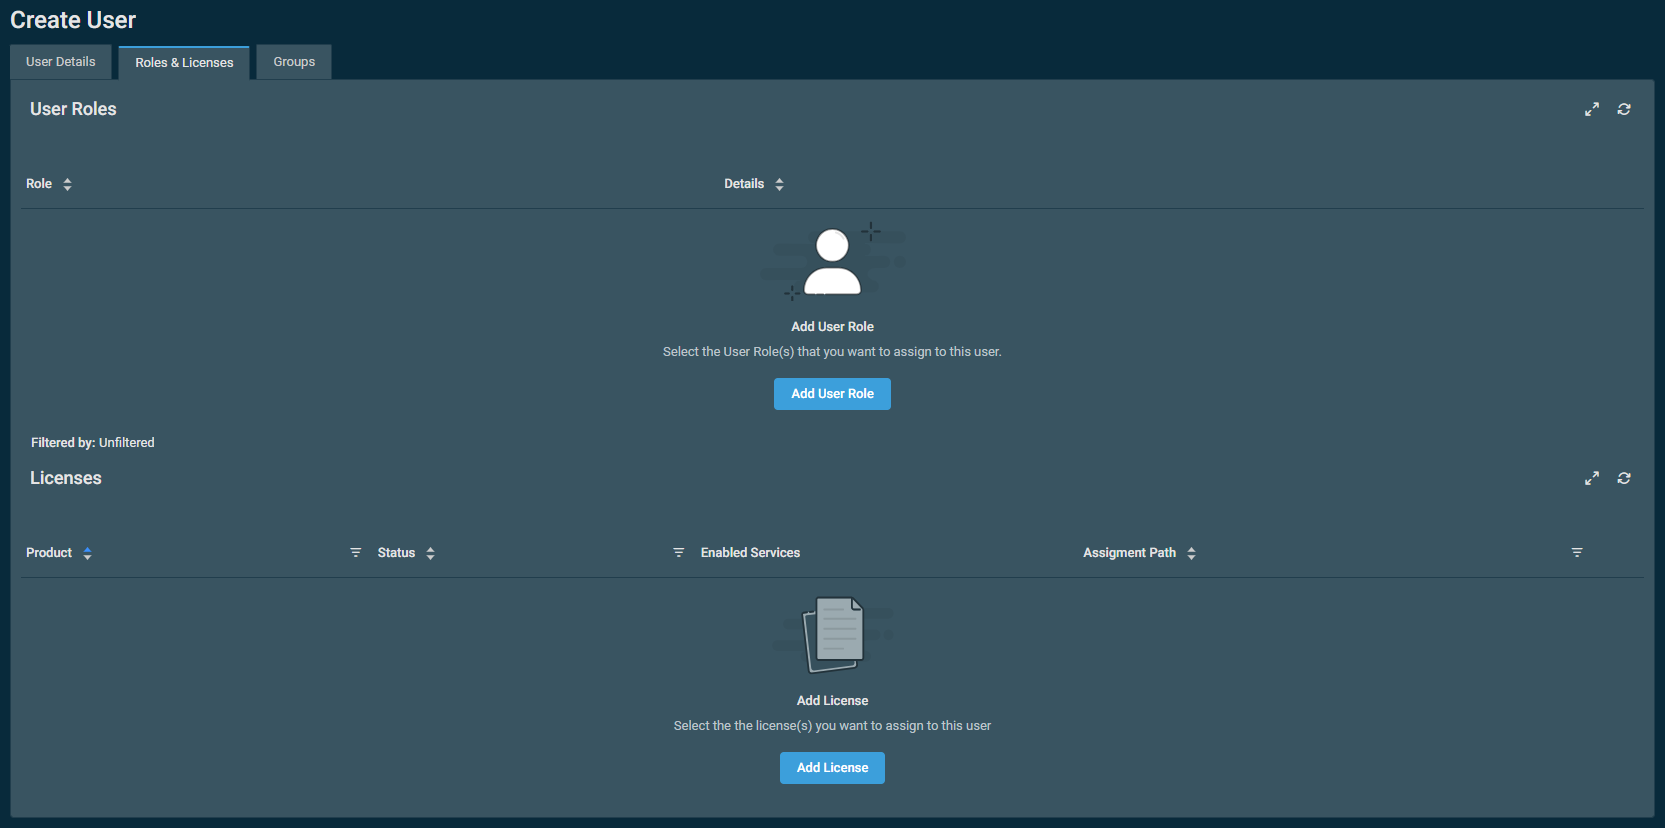
- In the Roles & Licenses tab, add user roles and licenses as necessary. Refer to Roles & Licenses. When finished, click one of the following options:

- Save and Close: Save any configured roles and licenses, and return to the All Users page.
- Save and Continue: Save any configured roles and licenses, and proceed to the Groups tab in the user creation process.
NOTE Because license information is dynamically retrieved, any selected licenses will be added to the user account even if you close out of this page without saving.
- In the Groups tab, assign groups to the user as necessary. Refer to Groups. When finished, click one of the following options:

- Save and Close or Save: Save any configured groups, complete the user creation process, and return to the All Users page. You will not be able to return to the user creation form after saving this page.
IMPORTANT If you close out of this page without saving, any manually added groups will not be saved.
NOTE If you click this option, you will be able to return to the User Details tab and make user data changes at any time during the user creation process.
Editing a Microsoft 365 user in Datto RMM
Complete the following steps to edit a Microsoft 365 user from within Datto RMM:
- To learn how to navigate to the Edit User page, refer to Security and navigation.
- Edit any desired fields in the User Details tab, Roles & Licenses tab, and/or Groups tab. Refer to the next section for details.
- When finished editing, click Save and Close.
NOTE The tenant the user is assigned to cannot be changed, so the Tenant drop-down menu is not available to edit.
Create User/Edit User tabs
The following fields are available to populate in this tab:
| Field | Description |
|---|---|
| Tenant | |
| Tenant |
From the drop-down menu, select the synced client tenant you wish to add the user to. To learn how to manage client tenants in Datto RMM, refer to Sync Microsoft 365 client tenants to Datto RMM and All Tenants. NOTE The tenant the user is assigned to cannot be changed, so the Tenant drop-down menu is not available when editing a user. |
| Identity | |
| User Principal Name | Enter the username you wish to create for this user, and select their domain from the drop-down menu. The username must be different from any existing username. Click the Copy to clipboard icon to copy the full user principal name to your clipboard. |
| Mail Nickname | If the Derive from user Principal Name toggle is turned on, this value is automatically populated by the entered user principal name. If the toggle is turned off, enter any mail nickname for this user. |
| Password | Create a password for this user, which can be configured as temporary. Turn on the Require password change at next login toggle to prompt the user to change their password when they log in for the first time. NOTE The web interface will display password requirements and will not allow you to create a new user or save a user until the password is sufficient. The password cannot contain the user principal name. You can use the icons to show/hide the entered password, automatically generate a password, or copy the password to your clipboard. |
| Display Name | Enter a display name for this user. NOTE This field is searchable via global search. Refer to Global search. |
| First Name | Enter this user's first name. |
| Last Name | Enter this user's last name. |
| User Type | From the drop-down menu, select Member or Guest as the type of Microsoft user. |
| Usage Location | From the drop-down menu, select this user's location. |
| Mobile Phone | Optionally, enter this user's mobile phone number. |
| Job Information | |
| Optionally, enter and select this user's job details: title, company name, department, employee type, hire date, office location, and manager (who may already exist as a synced user). |
|
Add Additional Information
Optionally, in this section, you can fill in the contact information of the user.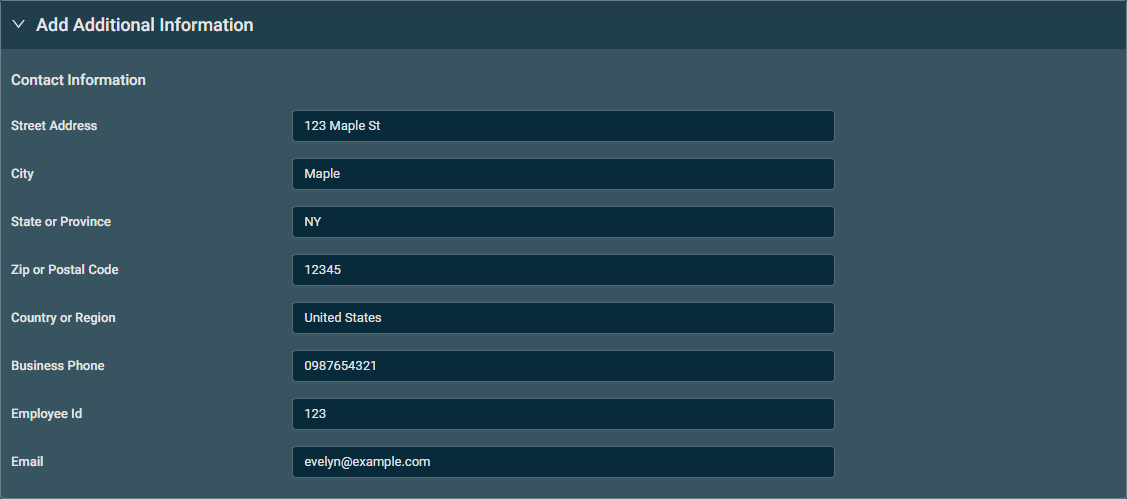
To assign any number of roles and licenses to this user, click Add User Role and Add License, respectively. The panes to add roles and licenses open on the right side of the page. Click Add or Remove to add or remove roles and licenses as necessary.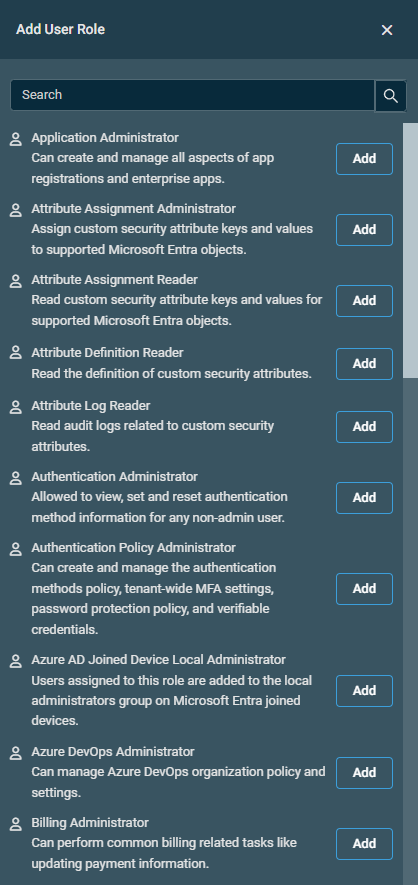
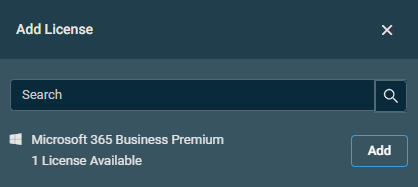
NOTE License information is retrieved live to ensure no conflicts are encountered during user creation. Upon adding a license, the license will be applied instantaneously to the user account.
To learn how to view license details for existing users or after user creation, refer to Licenses in User details.
Dynamic groups may be assigned automatically based on rules configured in Microsoft. They are denoted by the Dynamic icon and cannot be removed via Datto RMM.
You can assign any number of groups manually by clicking Add Group. The pane to add groups opens on the right side of the page. Click Add or Remove to add or remove groups as necessary.
Once a group is added, you can click Show Details to view the group creation date, members, applications, team channels, and SharePoint sites.
To learn how to view group details for existing users or after user creation, refer to Groups in User details.
Offboarding a user or revoking a user's access
To unassign user licenses, remove a user from groups, or completely delete a user, complete the following steps:
- Navigate to the Offboard [User] page, refer to Security and navigation.
- Configure the following available sections:
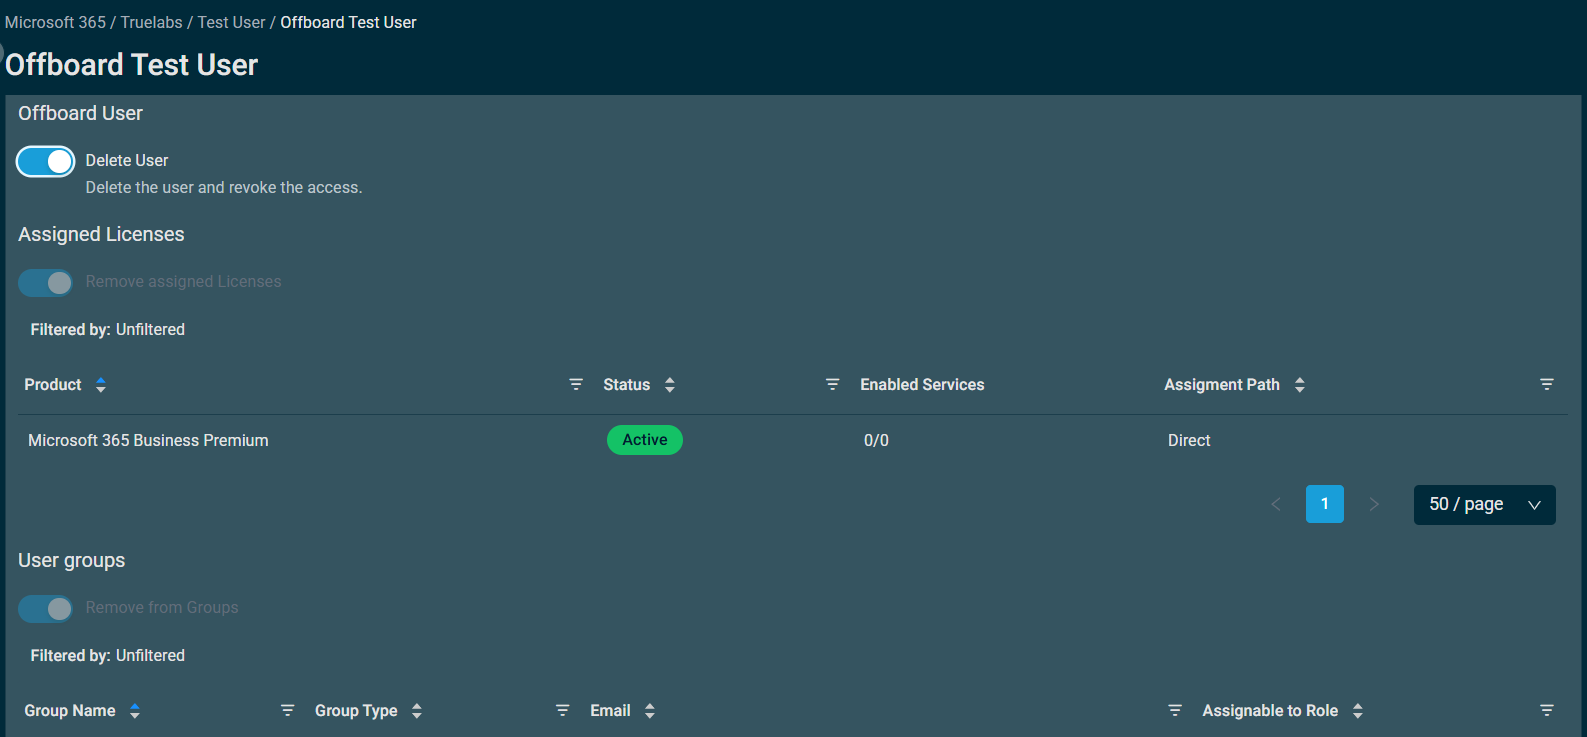
- Offboard User: If you wish to delete the user completely, turn on the Delete User toggle. All assigned licenses will be removed from the user, and the user will be removed from all groups.
- Assigned Licenses: This section displays the licenses the user is currently assigned to. If you turn on the Remove assigned Licenses toggle, all assigned licenses will be unassigned from this user.

- User Groups: This section displays the groups the user currently belongs to. If you turn on the Remove from Groups toggle, the user will be removed from all groups.
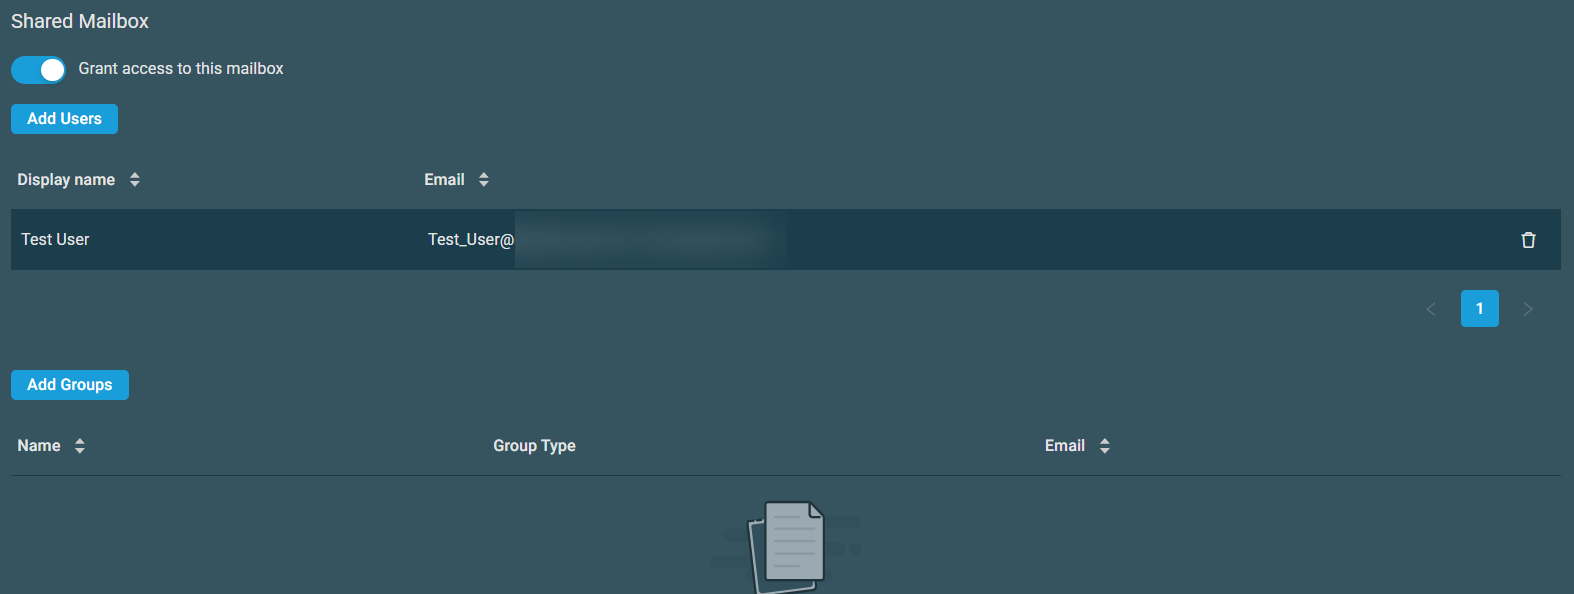
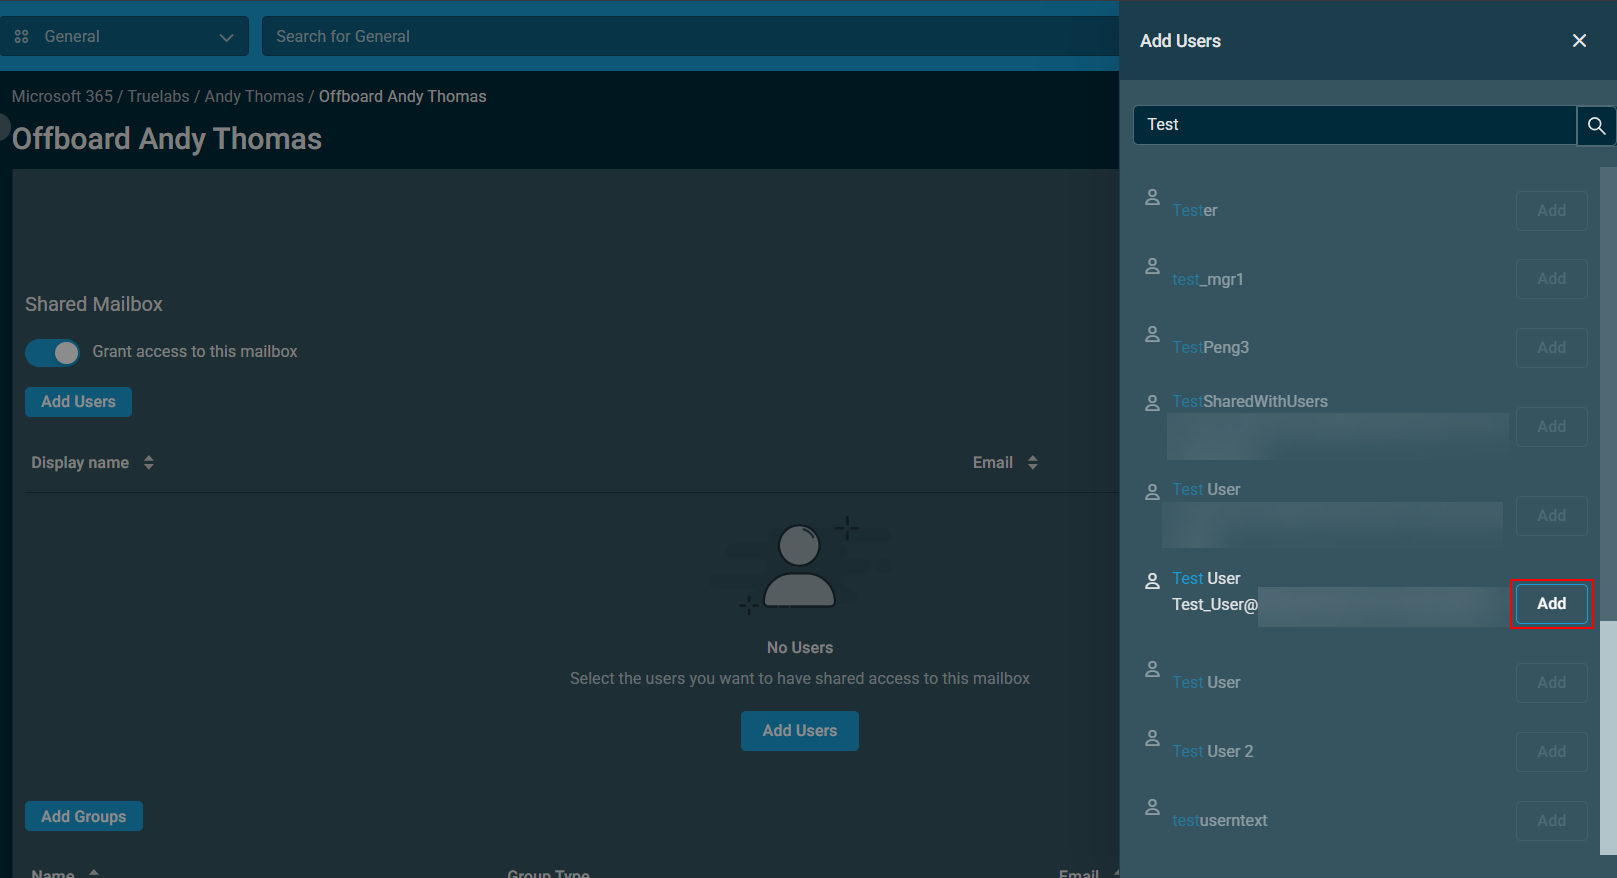
Shared Mailbox: If needed, you can enable the Grant access to this mailbox toggle in order to change the user's mailbox into a shared mailbox.
Once enabled, click Add Users and/or Add Groups to choose who will have access to the shared mailbox, clicking Add next to the users and/or groups that will need access.
NOTE Without a license, shared mailboxes are limited to 50 GB. If you find there are issues with removing the user's license, you may need to get access to their shared mailbox and delete large messages (for example, messages with image attachments).
If you need to increase the size limit of the shared mailbox to 100 GB, assign an Exchange Online Plan 2 license to the shared mailbox.
If you assign an Exchange Online Plan 1 license and an Exchange Online Archiving add-on license to the shared mailbox, you can enable auto-expanding archiving for additional archive storage capacity.
-
In the lower-right corner of the page, click Offboard User.
NOTE This option will not be available if only the Remove assigned Licenses toggle is turned on and the user is not assigned to any licenses or if only the Remove from Groups toggle is turned on and the user does not belong to any groups.
