Sites
PERMISSIONS Refer to Sites > Sites in Permissions.
NAVIGATION Sites > All Sites
About
Sites allow you to group devices together in a way that fits your business requirements. For example, if you are a Managed Service Provider, a site might mean a customer. If you are supporting one large IT organization and your devices are spread out over a number of locations, a site may be an office department or a location.
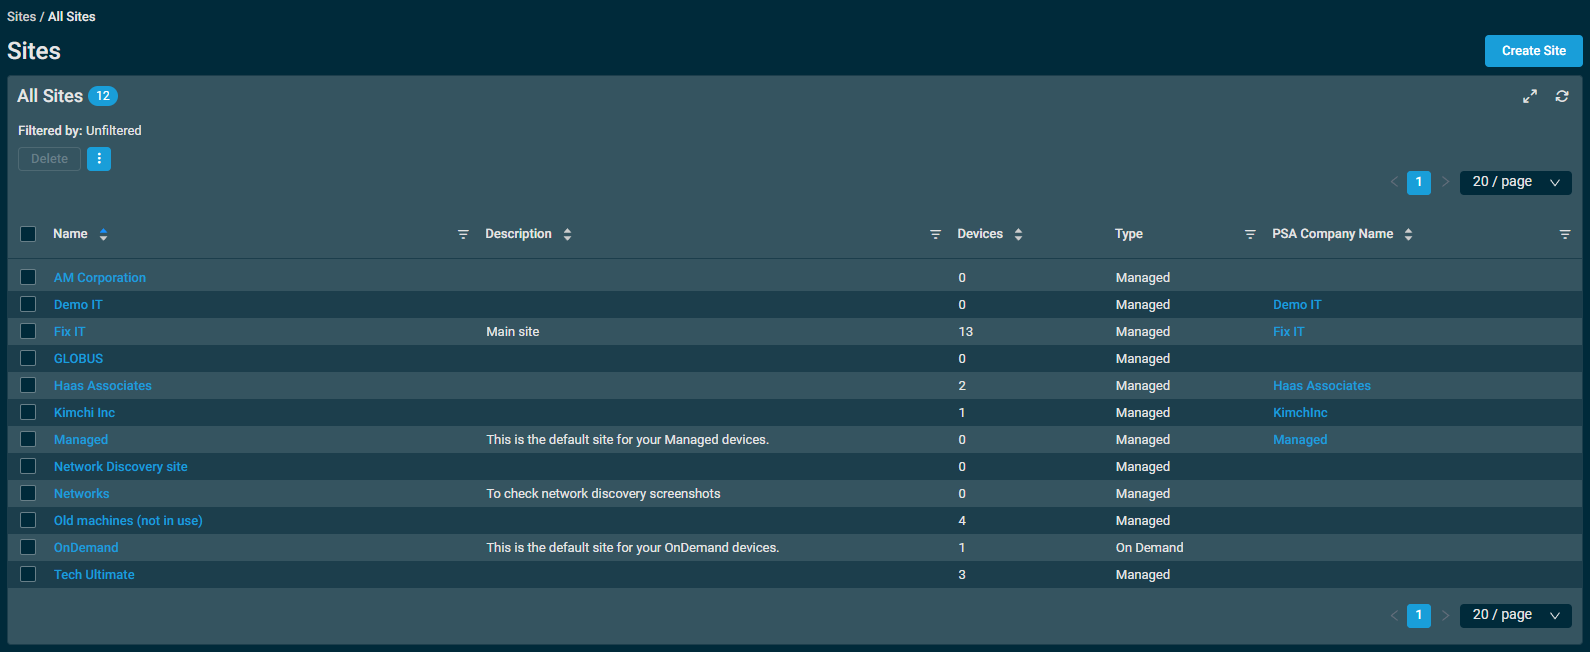
The Sites page displays a list of all of your sites.
Click Create Site at the top of the page. For more information, refer to Creating or editing a site.
The list displays the following information:
| Field | Sortable? | Exportable? | Description |
|---|---|---|---|
| Name |
|
|
The name of the site. Click the link to navigate to the site summary page. Refer to Site summary. To narrow the list, click the filter icon |
| Description |
|
|
A description of the site. To narrow the list, click the filter icon |
| Devices |
|
|
The number of devices this site contains. |
| Type |
|
Displays if this is a Managed site or an OnDemand site. Refer to Site types. Click the filter icon |
|
| PSA Company Name |
|
|
This column is only displayed if the Datto RMM account is integrated with Autotask. If a site is mapped to Autotask, the Autotask account name is displayed. Click the link to navigate to the organization page in Autotask. To narrow the list, click the filter icon NOTE One Autotask organization can be mapped to more than one Datto RMM site; that is, multiple Datto RMM sites may show the same Autotask account name in your Sites list. For more information about mapping rules, refer to Configure organization (site) mapping. |
You can filter any columns with the filter icon ![]() . The Filtered by bar displays all applied column filters. If a filter search term includes wildcard characters (for example, underscores and percent signs), they serve as normal characters if they are preceded by a backslash. For details, refer to Wildcard characters. Click the X next to any filter to remove that filter or click Reset Filters to remove all filters. If no filter is applied, the Filtered by bar displays Unfiltered. The filter selection will not persist the next time the page is accessed as the table will return to the default view (unfiltered).
. The Filtered by bar displays all applied column filters. If a filter search term includes wildcard characters (for example, underscores and percent signs), they serve as normal characters if they are preceded by a backslash. For details, refer to Wildcard characters. Click the X next to any filter to remove that filter or click Reset Filters to remove all filters. If no filter is applied, the Filtered by bar displays Unfiltered. The filter selection will not persist the next time the page is accessed as the table will return to the default view (unfiltered).
The refresh icon ![]() allows you to reload the data while keeping existing filters when already configured.
allows you to reload the data while keeping existing filters when already configured.
The table density is set to condensed theme by default. To change it to relaxed theme, click the density toggle icon. ![]() The selection will persist across all pages.
The selection will persist across all pages.
The number of results displayed can be specified by selecting the desired number from the pagination control. This selection will persist the next time the page is accessed.
Various table actions are available.
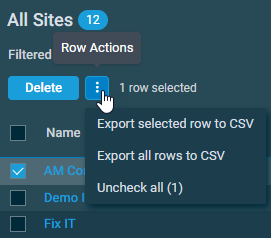
The action buttons are unavailable if no row is selected or if the action is not applicable to the selected rows. The check boxes allow you to select one or more rows. Select all rows shown on the page by selecting the check box in the table header. To access all action buttons, click the Row Actions icon. The table below lists all available action buttons.
| Action Button | Description |
|---|---|
| Delete | Refer to Deleting a site. |
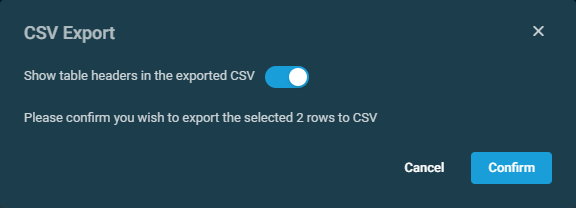
| Export Selected Rows to CSV | In the confirmation dialog box that appears, select whether to show table headers in the file by toggling the Show table headers in the exported CSV button. Click Confirm to download the file. The Export All Rows to CSV action is available without selecting any row in the table. |
| Export All Rows to CSV | |
| Uncheck All | Clears all selected rows. The number of selected rows is indicated next to the Row Actions icon. |
The following site types are available: Managed and OnDemand. The two types of sites differ in functionality:
- Devices added to a Managed site will have a Managed Agent installed and will be able to access all Datto RMM features.
- Devices added to an OnDemand site will have an OnDemand Agent installed and will have limited access in Datto RMM.
IMPORTANT Switching a site's type from Managed to OnDemand will cause all current and future Agents in the site to enter the OnDemand state. Agents will only connect once every seven days to update their audit data and they cannot be targeted by monitors, policies, or jobs. A remote user can use an OnDemand Agent to request support from the system tray icon.
If a site's type is changed from OnDemand back to Managed, the devices in the site will remain in their OnDemand state until the Agents next check in to Datto RMM. However, you can speed up this process by requesting support from the system tray icon of the devices.
To learn more about the differences, refer to Key differences between Managed and OnDemand Agents.


