Create an ESXi policy - Legacy UI
PERMISSIONS Permission to manage Policies at account and/or site level
NAVIGATION Legacy UI > Account > Policies
NAVIGATION Legacy UI > Sites > select a site > Policies
Refer to ESXi policy in Policies.
What is an ESXi policy?
An ESXi policy allows you to apply one or more ESXi monitors to one or more devices in a site or the entire account using filters or groups. An ESXi policy lets you monitor the performance, datastore, temperature and hardware status of your ESXi devices.
ESXi policies can be set up in the Datto RMM Web Portal at both the account and site level. Refer to Create a policy.
How to...
- On the Policy page, click New account policy... or New site policy....
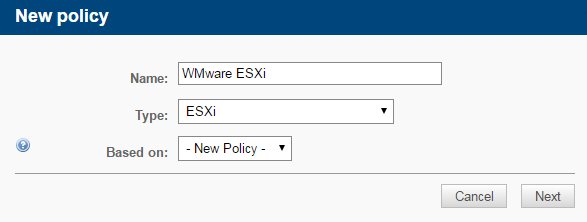
- Give the policy a Name.
- Select the type ESXi.
NOTE Only the default ESXi filter can be targeted; custom filters cannot be targeted with an ESXi policy.
-
To copy an already existing policy to use it as a template, choose it from the Based on drop-down list. To create a new policy, select New Policy.
- Click Next. You are now presented with the policy details.
You can target your devices with the policy using filters and groups. To find out more, refer to Add a target.
When creating an ESXi policy, you can apply ESXi monitors to your devices. For information on the ESXi monitor types and how to add a monitor, refer to Add a monitor.
Once you have added your ESXi monitor, you are re-directed to the policy details page. Here, you need to save and push the changes so that they can be applied. For further information, refer to Save the policy and push the changes.
NOTE If you click Save Only (legacy UI) or Save and Deploy Later (New UI) instead of Save and Push Changes (legacy UI) or Save and Deploy Now (New UI) when creating or updating a policy, the changes will still be deployed at midnight in your time zone because policies are automatically deployed every 24 hours.
For information on how to edit your policy, refer to Edit the policy.


