Datto Networking Integration
PERMISSIONS To enable the integration, refer to Setup > Integrations in Permissions.
NAVIGATION Setup > Integrations > Datto Networking
About the integration
The Datto Networking Integration is automatically available for configuration in the web interface. The following video and steps explain how to set up, use, and disable the integration.
The Datto Networking Integration allows you to join Datto RMM sites with Datto Networking networks, offering many benefits to make the support process more integrated and efficient. Some highlights include the following:
- Once the configuration is complete and a Datto RMM site is mapped to a Datto Networking network, all supported Datto Networking devices (Datto Access Points, Datto Switches, and Datto Managed Power devices) are kept in sync automatically with your Datto RMM site as long as that mapping is active. Refer to Datto Network Manager: Getting Started.
- Support technicians will not need to switch between different user interfaces; Datto Networking devices can be managed the same way as any other device in Datto RMM.
- Support technicians can resolve client networking issues faster by remotely resetting Datto Networking devices.
- Datto Networking devices will automatically be synced to PSA systems, which will make it easier to automate the billing process.
NOTE The Datto Networking Integration is free of charge, and Datto Networking devices do not count toward your Managed device limit.
NOTE Monitoring is not currently supported in the Datto Networking Integration.
Requirements
To configure the integration, you will need a Network Manager account with administrator access and REST API credentials.
How to...
- In the Datto Partner Portal, hover over Admin and click Integrations.
- In the API Keys > API Key Management section, click the More icon next to the API key you wish to obtain and click View keys.
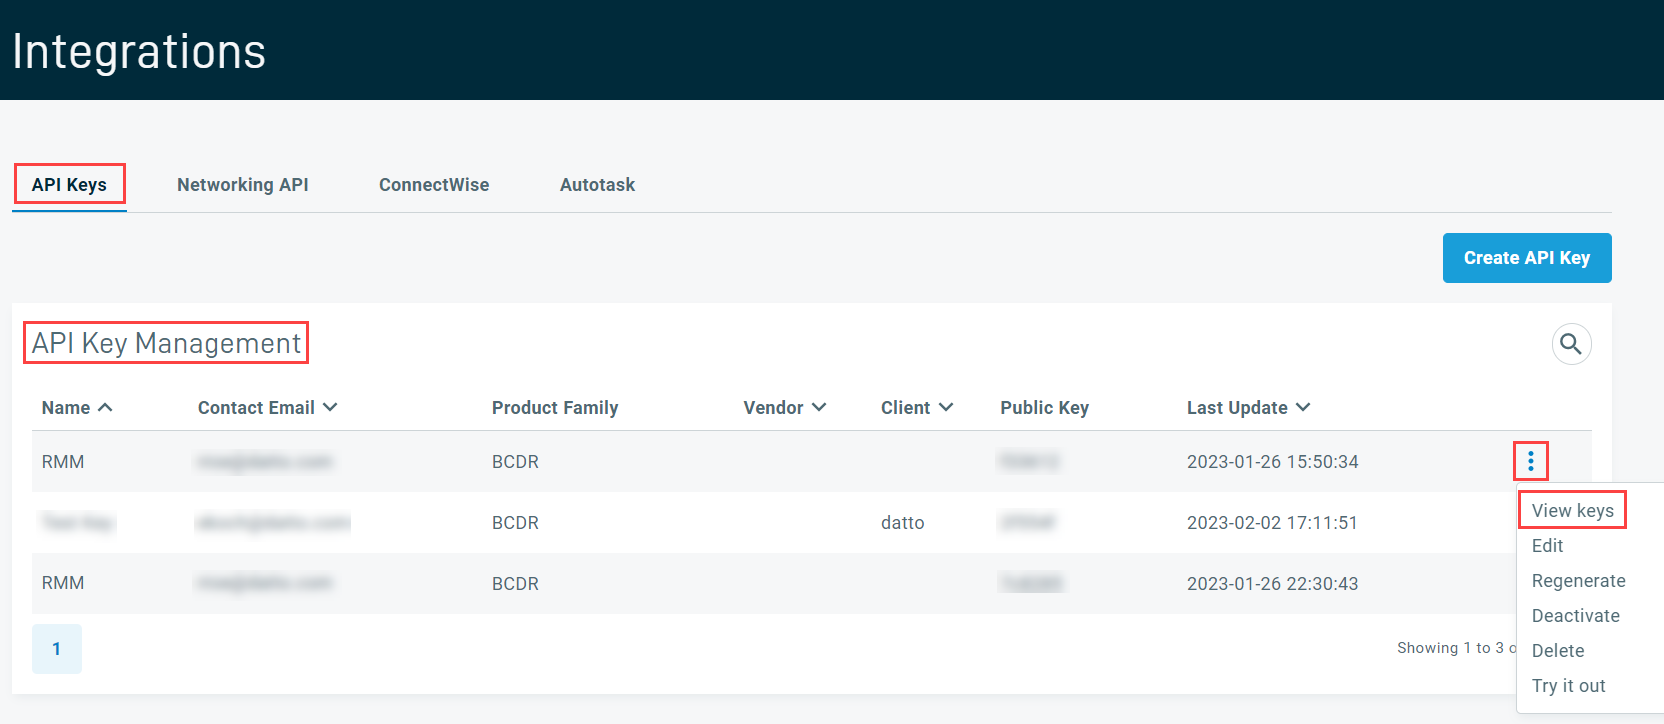
Alternatively, you can click the Create API Key button to create a new API key. Enter an API key name, leave the rest of the fields blank, and click Create.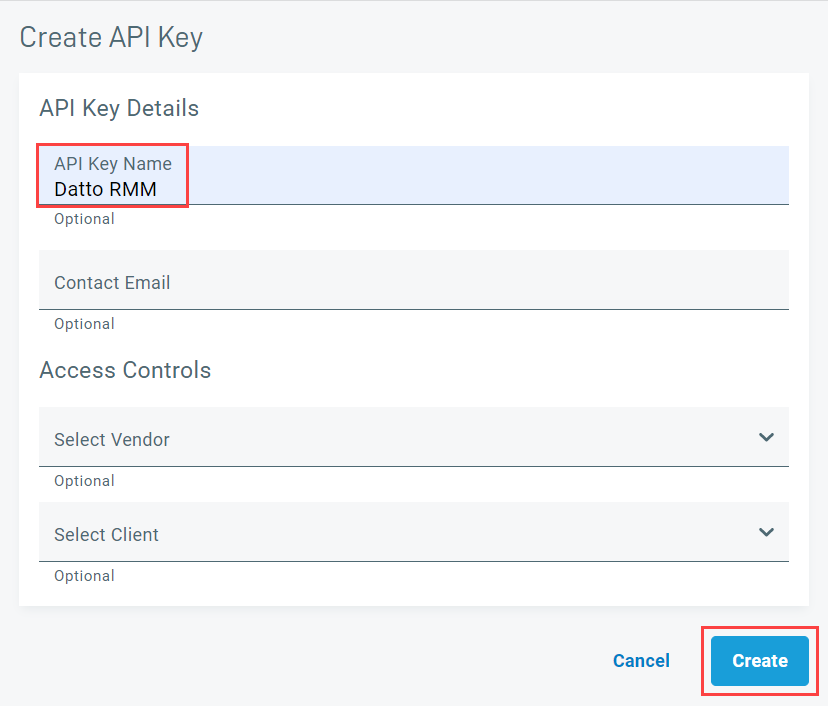
- Click Copy to copy the Public Key and the Private Key.
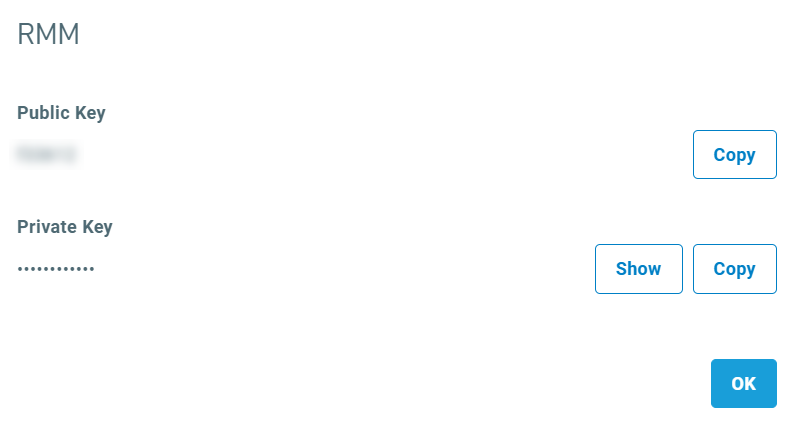
IMPORTANT Ensure that you are using the API keys from within the Admin > Integrations > API Keys section of the Datto Partner Portal. Attempting to use the API keys from the Networking API section will result in an error.
- In Datto RMM, navigate to Setup > Integrations > Datto Networking.
- In the API Details card, click Turn On.
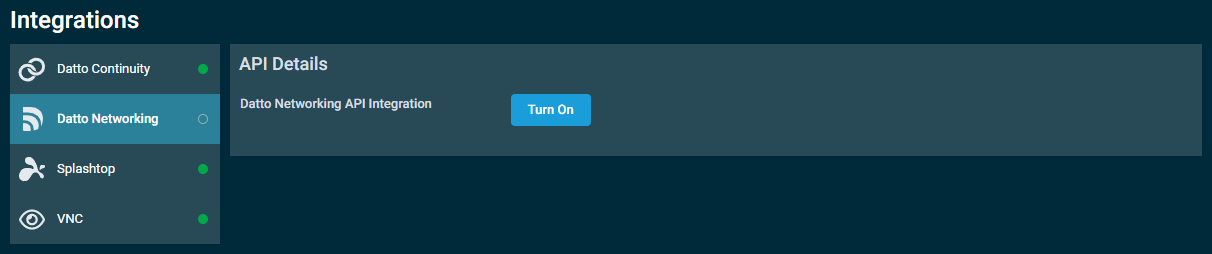
- Enter the REST API credentials.
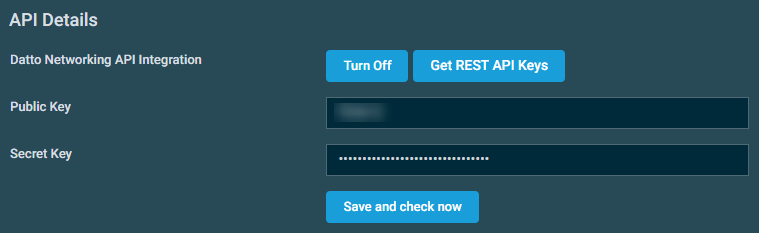
| Field | Description |
|---|---|
| Public Key | Refer to Obtain REST API keys from Datto Partner Portal. |
| Secret Key |
NOTE Both keys are required in order to complete the integration setup.
- Click Save and Check Now.
- Observe that a confirmation message will be displayed if the connection was successful.
The Datto Networking Networks section displays a table of networks available to map to sites in Datto RMM. Networks can only be mapped once; however, multiple networks can be mapped to a single site. Once a site is mapped to a network, the associated site is shown in the table, otherwise the Datto RMM Site column is blank. When a new device is added via the Network Manager, it will automatically be displayed in Datto RMM. When a device is removed via the Network Manager, it will be removed from Datto RMM. Datto Networking devices cannot be deleted from Datto RMM, or moved between Datto RMM sites.
NOTE Networks not currently mapped to sites are shown by default. Select Show all networks to see all networks.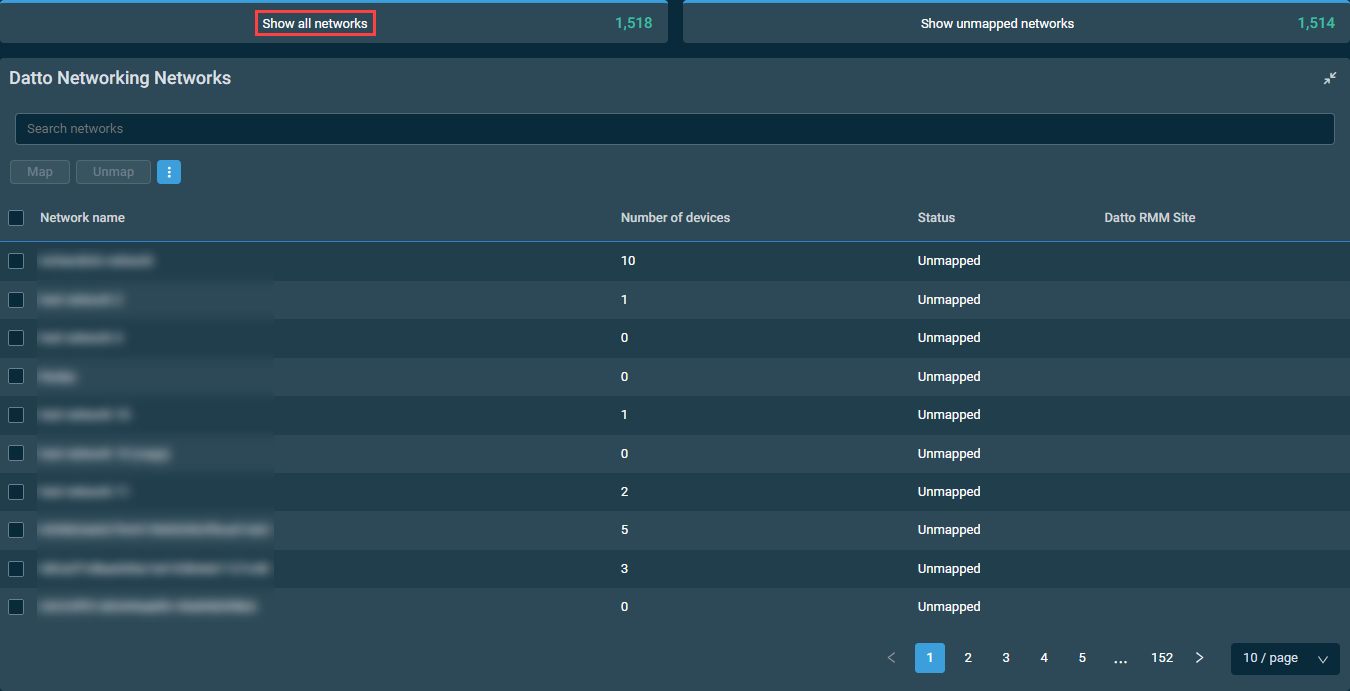
To map networks to a site, complete the following steps:
- Select one or more networks you wish to map.
- Click Map.
- In the confirmation dialog box that appears, enter and select the site you wish to map the network(s) to. The search results are narrowed as you type.
- Click Map to execute the action or Cancel to close out of the dialog box.
A pop-up notification will indicate if the mapping action was successful. The network's status is now Mapped, and the Datto RMM Site column shows the name of the mapped site.
Automatic device synchronization
The Datto Networking API controls what data the Datto RMM platform receives, and audit records are updated based on data changes. At times, Datto Networking devices may fail to send a change, or the change may fail to be received. To ensure any failures are detected, a synchronization job will run on all accounts on which the integration is enabled and refresh any data more than 24 hours old. Device synchronization occurs between 3 AM and 4 AM, depending on the time zone of the account. As with other Datto RMM devices, Datto Networking devices will be shown in device lists and have their own device pages. Refer to Device summary.
Unmapping a network in Datto RMM will unmap the site from the associated network. All synced networking devices are removed from the site. The unmapped network then becomes available again to map to a new site.
To unmap networks from a site, complete the following steps:
- Select one or more networks you wish to unmap.
- Click Unmap.
- In the confirmation dialog box that appears, click Unmap to execute the action or Cancel to close out of the dialog box.
A pop-up notification will indicate if the unmapping action was successful. The network's status is now Unmapped, and the Datto RMM Site column becomes empty.
Use the Datto Networking Integration to monitor and administer Datto Networking devices on your client networks from within Datto RMM.
Viewing networks
In the Datto RMM web interface, click Sites > All Sites and select the site that contains the network you wish to view.
Viewing devices on a network
- Click the specific device you wish to view from the list of all devices within the network.
- The device summary page will open. Refer to Device summary.
- In Datto RMM, navigate to Setup > Integrations > Datto Networking.
- In the API Details card, click Turn Off.
- In the confirmation dialog box that appears, select one of the following options:
- Keep API keys and mappings: This option is recommended if, upon re-enabling the integration in the future, you wish to restore the mappings you had previously configured. All Datto Networking devices will be deleted from their associated Datto RMM sites, but all of the integration and authentication settings will be retained until the next time the integration is enabled.
- Delete API keys and mappings: This option is recommended if you wish to completely reset the integration and remove all authentication settings and links between Datto RMM and Datto Networking. All Datto Networking devices will be deleted from their associated Datto RMM sites, and all sites will be unmapped from networks.
-
Click Confirm to execute the action or Cancel to close out of the dialog box.


