Autotask companion in Web Remote
PERMISSIONS Refer to Requirements and restrictions.
NAVIGATION Agent Browser > connect to a device > Web Remote > Control Screen > Autotask Ticket. For more information, refer to Remote takeover tools.
NAVIGATION Sites > All Sites > click the name of a site > Web Remote (last column in table) > Control Screen > Autotask Ticket
NAVIGATION Devices > All > Web Remote (last column in table) > Control Screen > Autotask Ticket
NAVIGATION Device summary page > Web Remote > Control Screen > Autotask Ticket. To view the various navigation paths you can use to access the device summary page, refer to Device summary.
NAVIGATION A targeted list of devices > Web Remote (last column in table) > Control Screen > Autotask Ticket. To view the navigation paths for the various targeted lists of devices, refer to Targeted lists of devices in Devices.
Web Remote toolbar overview
Once you are connected to a device via Web Remote, you can view information about and perform a variety of actions on it using the toolbar. Refer to View information about and perform actions on the connected device in Web Remote.
The Display section is initially open by default, but your preferences for which sections are open or closed will be saved for future sessions.
Autotask Ticket
The Autotask Ticket feature in the Web Remote toolbar menu allows you to access and manage Autotask tickets from within a Web Remote session.
First, be sure to review the feature requirements and restrictions. Then, expand the following sections to learn about linking relevant tickets to sessions, opening and updating tickets from within sessions, tracking and recording time spent on tickets while in sessions, and more.
Requirements and restrictions
- This section is available only if the Autotask Integration is turned on for the account. Refer to Autotask Integration. The feature will be disabled if the following requirements are not met.
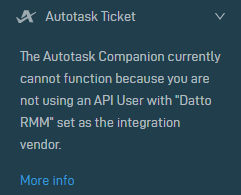
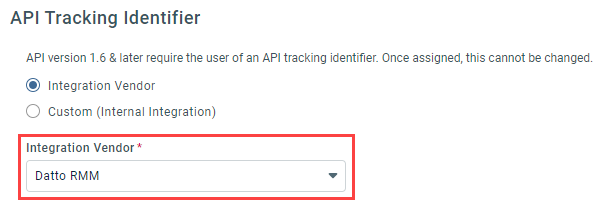
- The Autotask user account used for the integration must have a security level of API User, and Datto RMM must be selected as the Integration Vendor. Refer to Adding or editing an API user in the Autotask Help system.
- To ensure correct functionality of the Autotask platform, Datto recommends enabling pop-ups for Autotask in your browser. Refer to Allowing pop-ups in your browser in the Autotask Help system.
- This section is visible only to users with the Web Remote Autotask tool toggle turned on in their current security level. Refer to Web Remote Autotask in Remote control tools.
- Only users that have the Advanced Datto RMM Integration enabled for their user in Autotask can use this tool. Refer to Resource permissions for the Datto RMM Integration in the Autotask Help system.
- Users with the Web Remote Autotask Search tool toggle turned off in their current security level cannot search for or view results for Autotask tickets from within Web Remote. Refer to Starting from Web Remote in Link an Autotask ticket to a Web Remote session and Search for an Autotask ticket in Web Remote.
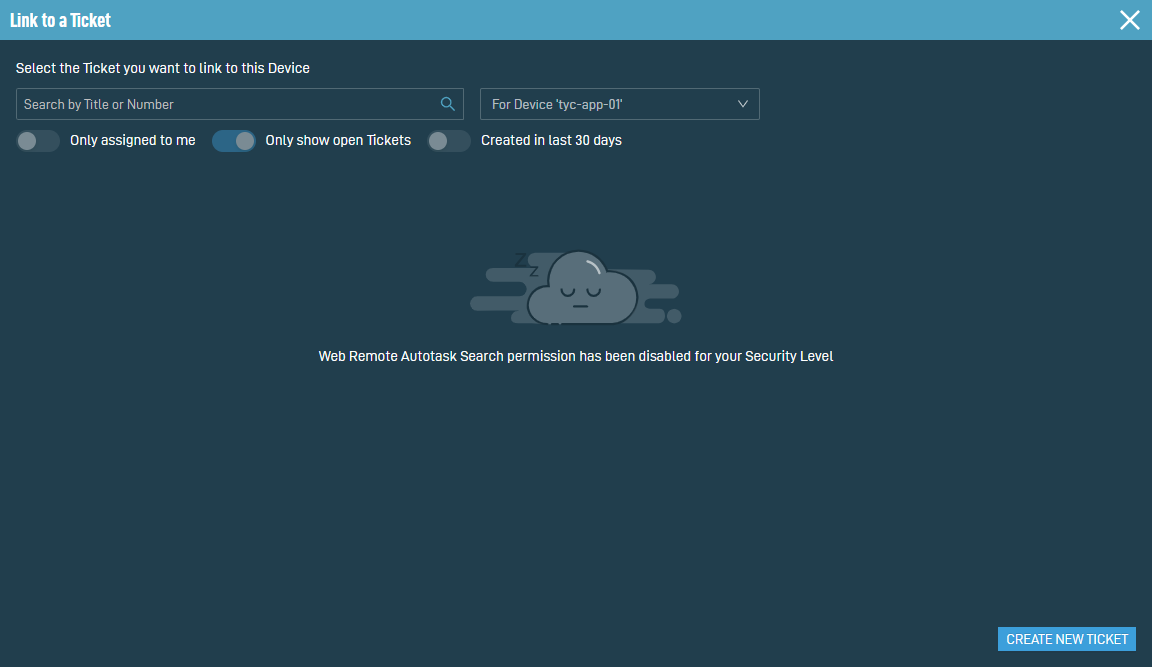
Alternatively, these users can link tickets to a Web Remote session starting from within Autotask and can create new tickets from within Web Remote. Refer to Starting from an Autotask ticket in Link an Autotask ticket to a Web Remote session and Create an Autotask ticket from Web Remote. - The Autotask ticket search results in Web Remote only include tickets within the Autotask company linked to the Datto RMM site the remote device belongs to.
How to...
You can link an Autotask ticket to a Web Remote session by initiating the session from Datto RMM or by initiating the session directly from the Autotask ticket.
Begin the process with either of the following workflows:
- In Datto RMM, initiate a Web Remote session for the applicable device synced to the Autotask Integration. Refer to Configure device synchronization.
For information about initiating a Web Remote session and factors that may affect the connection capabilities, refer to Autotask companion in Web Remote. - Expand the Autotask Ticket section.
- Click Link to a Ticket.
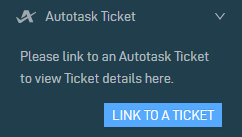
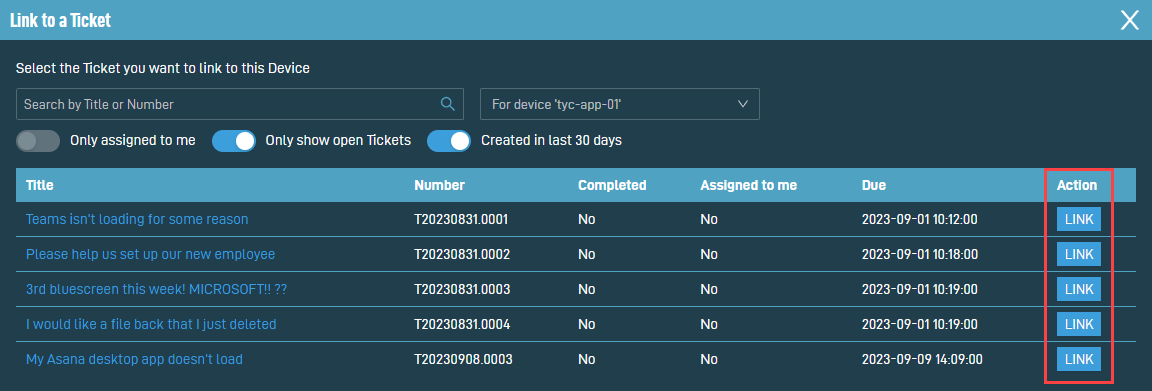
- In the Link to a Ticket window, click Link in the Action column for the ticket you wish to link to the session. Refer to Search for an Autotask ticket in Web Remote.
NOTE If the feature appears unavailable, confirm you have configured the correct permissions for the Autotask user account used for the Autotask Integration in Datto RMM. For details, refer to the note at the top of this section.
- In Autotask, open the ticket you wish to manage from a Web Remote session.
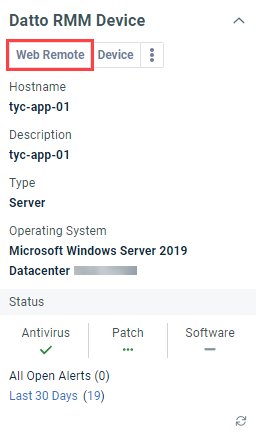
- In the Datto RMM Device Insight in the upper-right corner of the ticket, click Web Remote. For details, refer to Datto RMM Device Insight in Autotask alert ticket information and information specific to Datto RMM.
- Once connected to the device in Web Remote, click Control Screen.
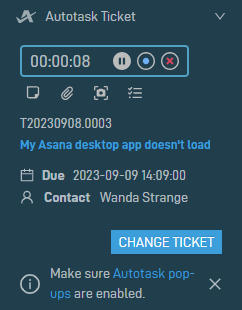
For information about initiating a Web Remote session and factors that may affect the connection capabilities, refer to Initiate a Web Remote session. - You will notice the Autotask Ticket section is expanded by default and the ticket has been automatically linked to the session.
NOTE If the feature appears unavailable, confirm you have configured the correct permissions for the Autotask user account used for the Autotask Integration in Datto RMM. For details, refer to the note at the top of this section.
Upon disconnecting from the device, the linked ticket is automatically unlinked but can be relinked upon starting a new connection. Refer to Disconnect from a device.
Changing the linked ticket
You can change the linked ticket at any time throughout the session by clicking Change Ticket. Refer to Search for an Autotask ticket in Web Remote.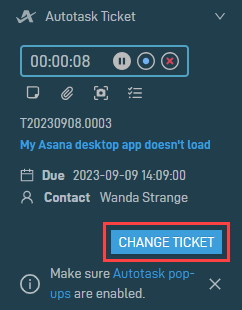
You can create an Autotask ticket directly in a Web Remote session as follows:
- In Datto RMM, initiate a Web Remote session for the applicable device synced to the Autotask Integration. Refer to Configure device synchronization.
For information about initiating a Web Remote session and factors that may affect the connection capabilities, refer to Autotask companion in Web Remote. - Expand the Autotask Ticket section.
- Click Link to a Ticket.

- Click Create New Ticket in the lower-right corner of the Link to a Ticket window.
For this button to be available, the device's site must be mapped to an Autotask organization. Refer to Configure organization (site) mapping. You must also have alert priority mapping and default ticket settings configured. Refer to Configure alert priority mapping and Default Ticket Settings section.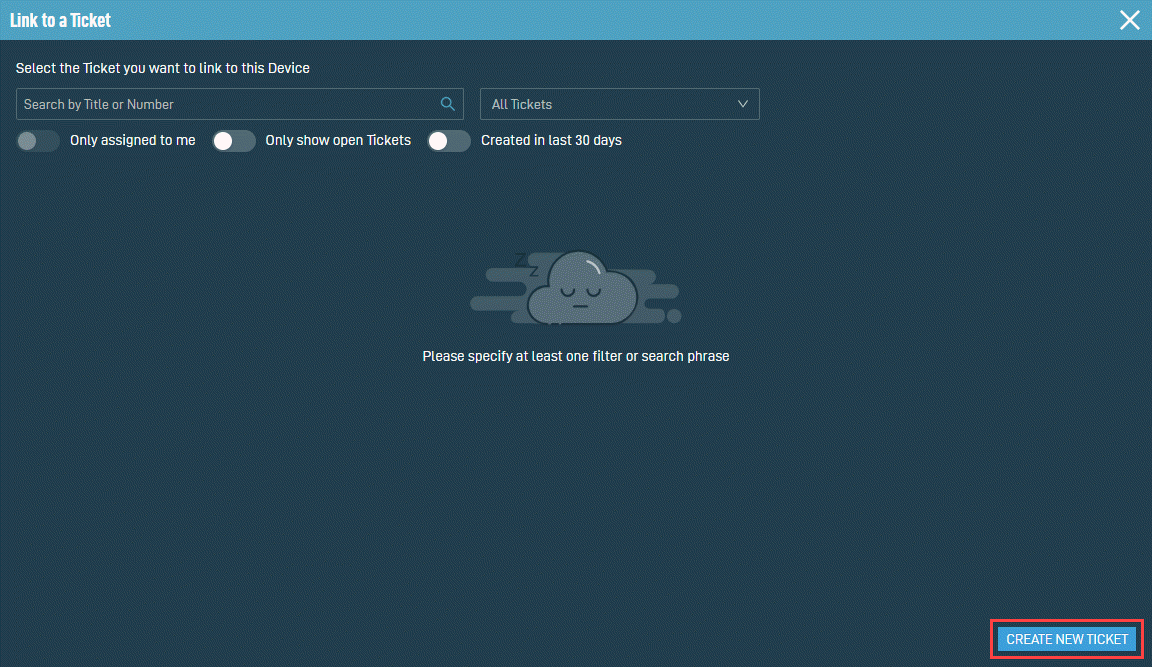
- Enter the ticket details via the Title field (required) and Description field (optional).
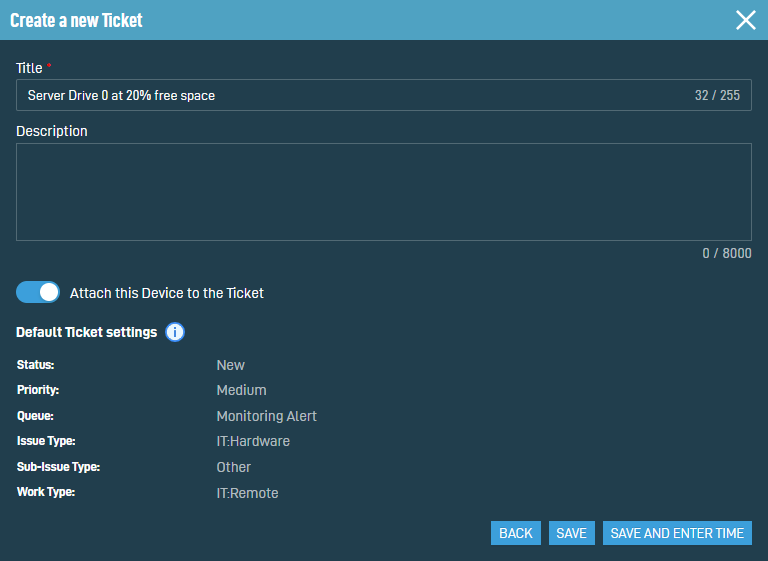
- Turn on the Attach this Device to the Ticket toggle to cause the remote device details to show in the Configuration Item Insight in the created Autotask ticket. For details about this insight, refer to Configuration Item Insight in Autotask Integration.
- The Default Ticket settings section shows the ticket attributes that will appear by default in the Autotask ticket. The Status value is not editable in Datto RMM and will default to New, but you can update this status as you work on the ticket. The rest of the values are based on the settings configured in the Alerts tab of the Autotask integration setup card.
As necessary, you can edit the following default ticket values for Web Remote-created tickets as follows: - Priority: Edit the Autotask Priority selection in the Moderate row and save the change.
- Queue, Issue Type, Sub-Issue Type, and Work Type: Edit the selections in the End Client Agent row and save your changes.
- If you do not wish to save your progress, click Back to return to the Link to a Ticket window.
You have the option to save and create the Autotask ticket either with or without immediately creating a time entry.
If you click Save and Enter Time, the New Ticket Time Entry page for the ticket will open. Refer to Adding a ticket time entry in the Autotask Help system.
NOTE If the feature appears unavailable, confirm you have configured the correct permissions for the Autotask user account used for the Autotask Integration in Datto RMM. For details, refer to the note at the top of this section.
NOTE If a ticket is already linked, you will find the option to create a new ticket after clicking Change Ticket.
NAVIGATION Setup > Integrations > Autotask > Alerts tab > Alert Mapping > Moderate row
NAVIGATION Setup > Integrations > Autotask > Alerts tab > Default Ticket Settings section > End Client Agent row
NOTE Ensure the issue type and sub-issue type you set in the End Client Agent row are available in your default Autotask ticket template.
For further instructions on how to select these values, refer to Default Ticket Settings section in Autotask Integration.
Any ticket attribute changes will be reflected in this Default Ticket settings section in Web Remote. As necessary, you can change the values in individual tickets once the tickets are created in Autotask.
NOTE To save the time entry, the Time Worked must be recorded as more than zero minutes, you must enter a note in the Summary Notes field, and you must change the status from New.
If you click Save instead, the ticket will be created without prompting you to create a time entry. You can always add a time entry later in the ticket or via the stopwatch in Web Remote. Refer to Manage Autotask tickets from Web Remote. A pop-up notification will confirm the ticket has been created.
The newly created ticket is automatically linked to your Web Remote session.
Upon disconnecting from the device, the linked ticket is automatically unlinked but can be relinked upon starting a new connection. Refer to Disconnect from a device.
IMPORTANT The Autotask ticket search results in Web Remote only include tickets within the Autotask company linked to the Datto RMM site the remote device belongs to.
You can open the Link to a Ticket window in Web Remote by clicking Link to a Ticket or Change Ticket in the Autotask Ticket section.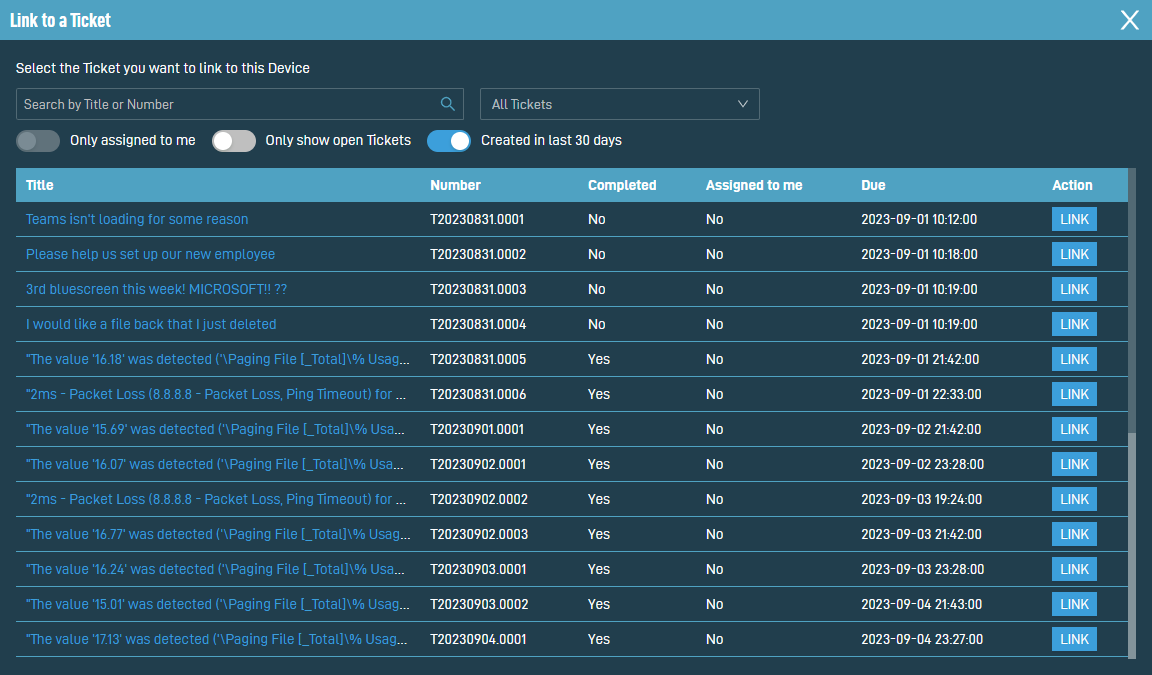
The table displays the following information:
- Title: The ticket title. Click the hyperlink to open the Autotask ticket in a new window and review its details. To learn how to manage and update the ticket, refer to The Ticket page in the Autotask Help system.
- Number: The ticket number.
- Completed: This column shows Yes if the ticket Status is set to Complete or No if it is set to any other status.
- Assigned to me: This column shows Yes if the current Datto RMM user is assigned as a resource in the ticket or No if the current Datto RMM user is not assigned as a resource in the ticket.
- Due: The Due Date set in the ticket.
- Action: Click Link to link the ticket to the Web Remote session. Refer to Manage Autotask tickets from Web Remote.
By default, the window lists all tickets created in the last 30 days, sorted by ticket number (which equates to date created). Continue scrolling to load all items in the list.
To search for a specific ticket, enter the ticket title or ticket number in the search bar. The search results are narrowed as you type.
You can filter the list in the following ways:
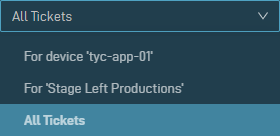
- In the All Tickets drop-down menu, select one of the following options:
- For device '[hostname]': Filter the list by tickets for the device. Refer to Configure device synchronization.
- For '[site]': Filter the list by tickets for the site (Autotask organization) the device belongs to. Refer to Configure organization (site) mapping.
- All Tickets: Filter the list by all tickets in the integrated account.
- Turn the following toggles on or off:
- Only assigned to me: This toggle is disabled if the current Datto RMM user is not mapped to an Autotask resource. Once enabled, turn on this toggle to only see tickets to which you are assigned as a resource.
- Only show open Tickets: Turn on this toggle to only see tickets with a Status that is not Complete.
- Created in last 30 days: Turn on this toggle to only see tickets created in the last 30 days.

NOTE You must specify at least one filter or search phrase.
NOTE The filter selection will persist the next time a Web Remote session is initiated.
Once a ticket is linked to the Web Remote session, the Autotask Ticket section displays the following information:
- The Autotask stopwatch: Refer to The task or ticket stopwatch in the Autotask Help system to learn how to work with the stopwatch. Click the Record button to open the New Ticket Time Entry page for the ticket.

The recorded time is automatically captured in the Time Entry Details section and can be edited. Refer to Adding a ticket time entry in the Autotask Help system. - Add Note:

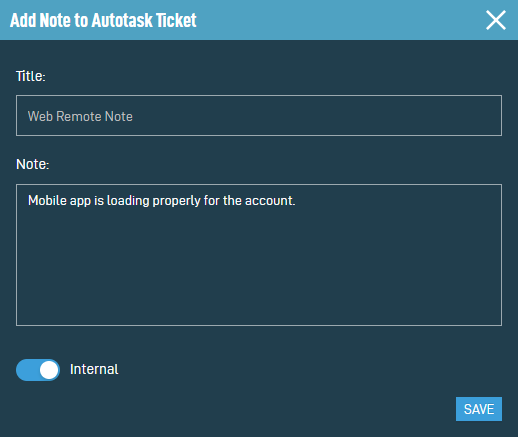
In the Note field, enter a note to be added to the Autotask ticket. The Title field is optional. If you do not enter a custom title, it will show as Web Remote Note in the ticket. Be sure the Internal toggle is turned on if you would like to publish the note to internal users only rather than all Autotask users. When ready, click Save to publish the note in the ticket. - Add Attachment:
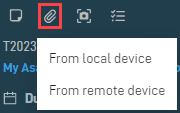
- From local device: Opens the file manager application on your local device.
- From remote device: Opens the file manager application on the screen of the remote device.
- Add Screenshot:

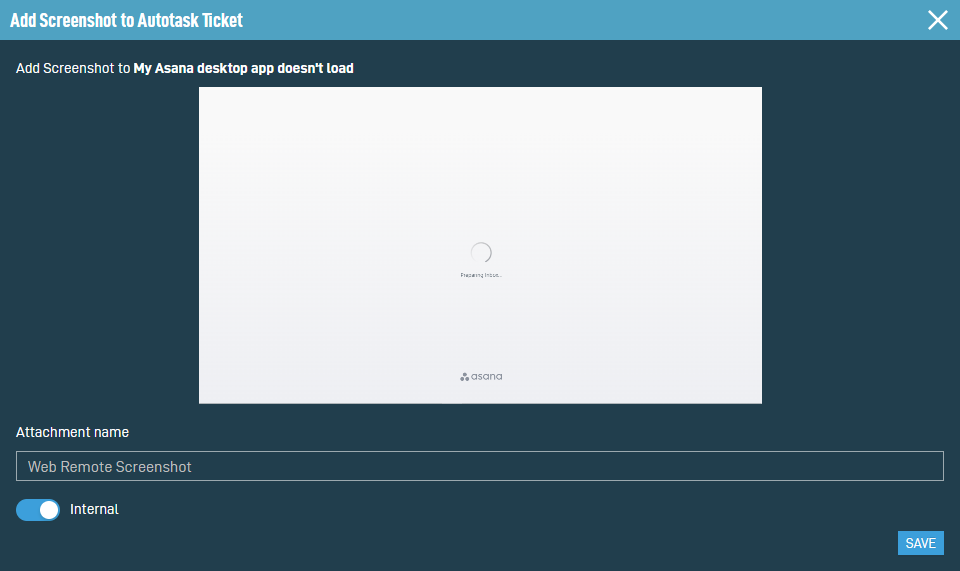
A screenshot of the current remote device screen will be automatically captured. The Attachment name field is optional. If you do not enter a custom name, it will show as Web Remote Screenshot in the ticket. Be sure the Internal toggle is turned on if you would like to publish the screenshot to internal users only rather than all Autotask users. When ready, click Save to publish the screenshot in the ticket. - Open Checklist:

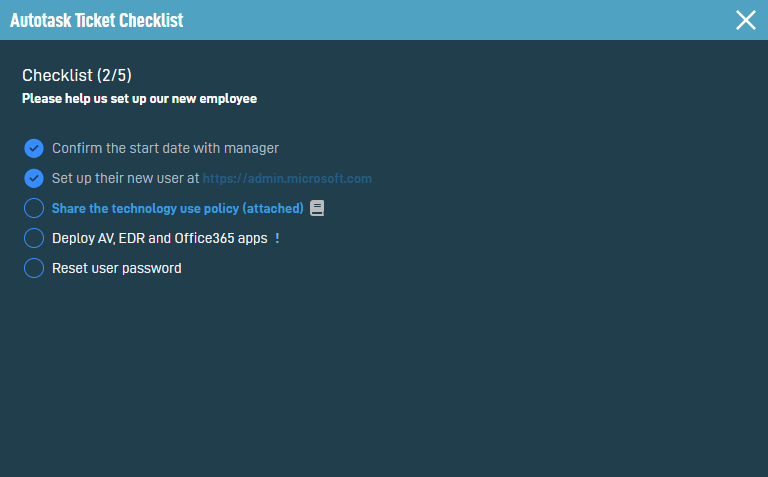
If the Autotask ticket contains a checklist, the list is displayed. Refer to The checklist in the Autotask Help system. Select or clear the check mark list items to mark the items as complete or incomplete. Changes are immediately reflected in the ticket.
The following checklist features that can be configured in Autotask are displayed in Web Remote as follows: - The ticket number.
- The ticket title. Click the hyperlink to open the Autotask ticket in a new window and review its details. To learn how to manage and update the ticket, refer to The Ticket page in the Autotask Help system.
- The due date set in the ticket.
- The contact assigned to the ticket. Refer to Adding and editing contacts in the Autotask Help system.
- Change Ticket: You can change the linked ticket at any time throughout the session by clicking Change Ticket. Refer to Search for an Autotask ticket in Web Remote.
- Make sure Autotask pop-ups are enabled: To ensure correct functionality of the Autotask platform, Datto recommends enabling pop-ups for Autotask in your browser. Refer to Allowing pop-ups in your browser in the Autotask Help system.
NOTE To save the time entry, the Time Worked must be recorded as more than zero minutes, you must enter a note in the Summary Notes field, and you must change the status from New.
NOTE The stopwatch will continue to run even if you change the linked ticket. At any point, you can suspend and save the stopwatch count by clicking the Pause button or clear any recorded time from the clock and reset it to 00:00:00 by clicking the Clear button.
When ready to continue or restart the count, click the Start button.
NOTE The Record button is disabled if the count on the clock is 00:00:00.
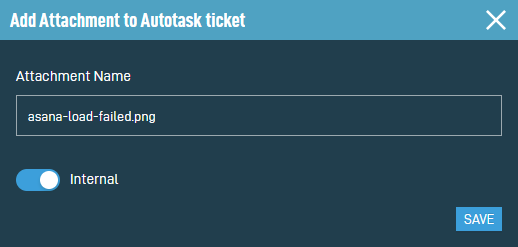
Select a file that is 4 MB or smaller from your local device to upload to the Autotask ticket. Be sure the Internal toggle is turned on if you would like to publish the attachment to internal users only rather than all Autotask users. When ready, click Save to publish the attachment in the ticket.
NOTE Checklist creation, addition or removal of items, item reordering, and other checklist editing actions must be performed in the Autotask ticket.
NOTE Web Remote displays both parent and child checklist items in the order in which they are arranged in Autotask, but child items do not appear indented underneath their parent items as they do in Autotask.


