Creating a Monitoring Maintenance Window policy - Legacy UI
PERMISSIONS Permission to manage policies at account and/or site level
NAVIGATION Legacy UI > Account > Policies
NAVIGATION Legacy UI > Sites > select a site > Policies
You can create a maintenance mode window in the New UI. Refer to Maintenance policy and Create a Maintenance Mode Window.
What is a Monitoring Maintenance Window policy?
A Monitoring Maintenance Window policy allows you to pause monitoring while doing scheduled maintenance work on your devices. Pausing monitoring lets you prevent false alerts, for example, during a backup. Monitoring Maintenance Window policies can be set up at both the account and site level. Refer to Create a policy.
During a maintenance window, the following actions will be taken if an alert condition is met:
- Monitors will be able to raise alerts; however, these alerts will not be listed as open alerts. You can only view them when selecting All Alerts from the Status drop-down list in the legacy UI. Refer to Manage alerts - Legacy UI. Alerts raised by webhooks will also be suppressed.
- Monitors will not create tickets or send email notifications; however, response components will be executed as normal.
- If the alert condition is still in effect when the maintenance window ends, the alert created during the maintenance window will become active and be listed under Open Alerts. Tickets and email notifications will be created and sent from this alert.
NOTE You can also suspend monitoring on individual devices manually. For more information, refer to Suspend or unsuspend monitoring.
How to...
- Navigate to Account > Policies or Sites > click on a site name > Policies.
- Click New account policy... or New site policy....
- Give the policy a Name.
- Under Type, select Monitoring Maintenance Window.
-
To copy an already existing policy to use it as a template, choose it from the Based on drop-down list. To create a new policy, select New Policy.
- Click Next and you will see the policy details.

-
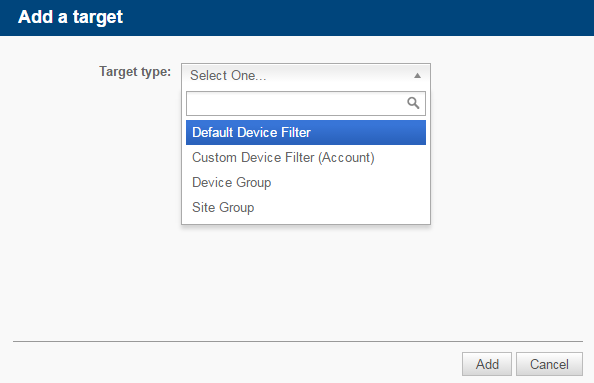
Click Add a target... to target your devices through a specific filter or group.

If you want to target more than one filter or group, add another target to the policy. Multiple targets will apply the "OR" logic, that is, the policy will be run on a device if it is included in any of the targets. For more information about target types, refer to Filters - Legacy UI and Groups - Legacy UI.NOTE Device filters contain all Default Device Filters and Custom Device Filters. Devices of Unknown device type will not be targeted by the policy.
- Click Add.
- Configure the Schedule Options:
| Field | Description |
|---|---|
| Schedule | Click Click to change... to choose when you want the policy to run. In the Schedule window, select one of the following: At selected date and time: The policy will run once at the selected date and time. Daily: The policy will run every day at the time indicated in the Start field. Weekly: The policy will run every week on all selected days at the time indicated in the Start field. Monthly: The policy will run in the selected months on the selected days. Monthly day of week: The policy will run in the selected months on the specified occurrence of the selected days of the week. Yearly: The policy will run on the selected day (1-365) each year. Click OK to close the scheduling window. |
| Duration | Specify the duration of the maintenance window (0-24 hours, 0-60 minutes). |
-
Click Save and Push Changes.
If you click Save Only, you'll be directed to your list of policies where you can click Push changes... next to the policy in question.
NOTE If you click Save Only (legacy UI) or Save and Deploy Later (New UI) instead of Save and Push Changes (legacy UI) or Save and Deploy Now (New UI) when creating or updating a policy, the changes will still be deployed at midnight in your time zone because policies are automatically deployed every 24 hours.
- Locate your policy in the list of account or site policies and click its name.
- Edit the policy details as specified above.
-
Click Save and Push Changes.
If you click Save Only, you'll be directed to your list of policies where you can click Push changes... next to the policy in question.
NOTE If you click Save Only (legacy UI) or Save and Deploy Later (New UI) instead of Save and Push Changes (legacy UI) or Save and Deploy Now (New UI) when creating or updating a policy, the changes will still be deployed at midnight in your time zone because policies are automatically deployed every 24 hours.
A few things to note:
-
Changes made to a Monitoring Maintenance Window policy while it is running or within 15 minutes of the start of a maintenance window will only take effect at the next run. For example, if you are creating a new Monitoring Maintenance Window policy with a daily schedule, and the start date and execution time is set to 10 minutes from now, the first run time will only occur on the following day.
-
You can end a scheduled maintenance mode window by updating the associated Monitoring Maintenance Window policy so that it no longer targets the device. Refer to Specify the policy details for Monitoring Maintenance Window policy.
-
You can also end a maintenance mode window on the device summary page or on a device list page in the New UI. Refer to Ending a maintenance mode window.


