Hardware
PERMISSIONS Refer to Global > Audit in Permissions.
PERMISSIONS Refer to Sites > Audit in Permissions.
NAVIGATION Global > Hardware
NAVIGATION Sites > All Sites > click the name of a site > Hardware (left navigation menu)
NAVIGATION Device summary page > Hardware card. To view the various navigation paths you can use to access the device summary page, refer to Device summary.
About
Lists of software and hardware installed on devices, as logged by the Datto RMM Agent, are available at the global and site levels. To learn about the list of software, refer to Software.
List of hardware
Navigate to the Hardware page by following either of the first two navigation paths described in Security and navigation.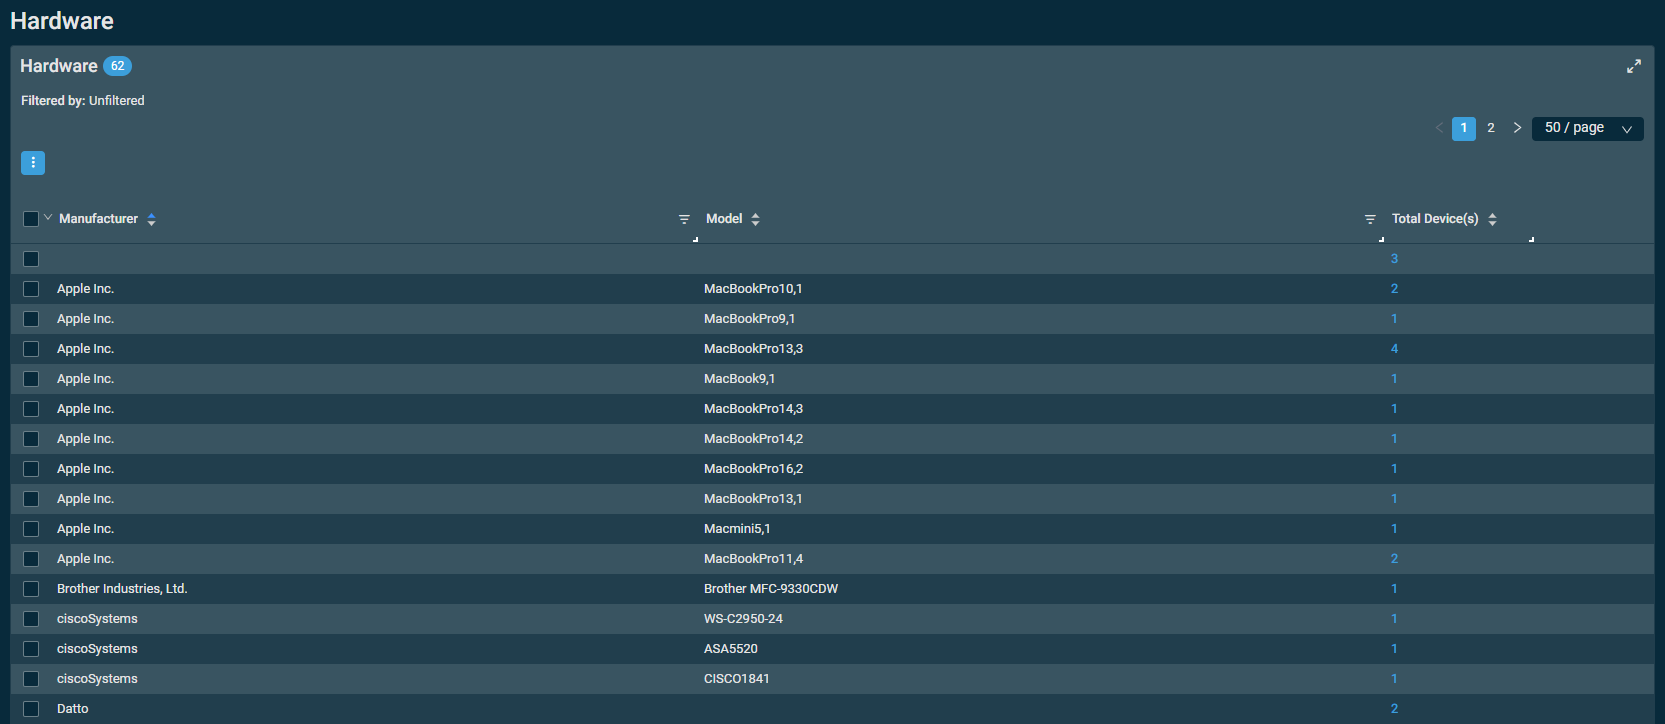
| Field | Sortable? | Exportable? | Description |
|---|---|---|---|
| Manufacturer |

|
|
Shows the complete list of hardware manufacturers. To narrow the list, click the filter icon  , enter a term, and click Apply. To see the full list, click Reset. , enter a term, and click Apply. To see the full list, click Reset. |
| Model |
|
|
Shows the complete list of hardware models. To narrow the list, click the filter icon , enter a term, and click Apply. To see the full list, click Reset. |
| Total Device(s) |
|
|
Displays the number of devices that belong to a particular hardware manufacturer and model. Click the number to open the Device Filter Results, which is a list of the devices. Refer to Devices. |
The columns can be reordered and resized. The order and size of the columns will persist the next time the page is accessed.
You can filter any columns with the filter icon . The Filtered by bar displays all applied column filters. If a filter search term includes wildcard characters (for example, underscores and percent signs), they serve as normal characters if they are preceded by a backslash. For details, refer to Wildcard characters. Click the X next to any filter to remove that filter or click Reset Filters to remove all filters. If no filter is applied, the Filtered by bar displays Unfiltered. The filter selection in the columns will persist the next time the page is accessed.
The table density is set to condensed theme by default. To change it to relaxed theme, click the density toggle icon.  The selection will persist across all pages.
The number of results displayed can be specified by selecting the desired number from the pagination control. This selection will persist the next time the page is accessed.
Action buttons
To access all action buttons, click the Row Actions icon.
The action buttons are grayed out or become unavailable if no row is selected in the table or if the action button is not applicable to the selected rows. The check boxes allow you to select one or more rows. Select all rows shown on a page by selecting the check box in the table header. You can also use the drop-down arrow next to the check box in the table header to choose one of the following options: Select none, Select all on page, or Select all rows across all pages. If you choose to select all rows across all pages, the check boxes of the rows will not be selected; however, the page will indicate that all rows have been selected.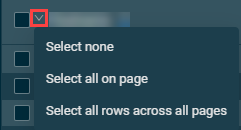
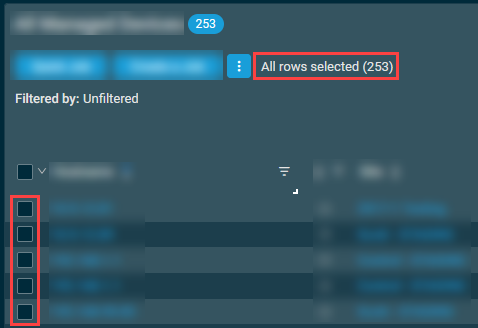
NOTE When all rows are selected across all pages, only certain action buttons are supported, which is indicated in the All Rows column in the table below.
| Action Button | All Rows | Description |
|---|---|---|
| Export Selected Rows to CSV |
|
In the confirmation dialog box that appears, select whether to show table headers in the file by turning on the toggle for Show table headers in the exported CSV. Click Confirm to download the file or Cancel to close out of the dialog box. Any column selections, filters, and sorting that have been applied to the table will also be applied in the CSV file.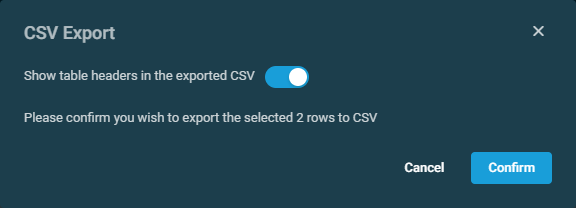 |
| Export All Rows to CSV |
|
This action button is available only if all rows have been selected across all pages in the table. In the confirmation dialog box that appears, click Confirm to download the file or Cancel to close out of the dialog box. Pop-up notifications will inform you of the start and completion of the CSV export action. Click the X to close the notification; otherwise, the notification will automatically be cleared after five minutes. Any column selections, filters, and sorting that have been applied to the table will also be applied in the CSV file. |
| Uncheck All |
|
Clears all selected rows. The number of selected rows is indicated next to the Row Actions icon. NOTE This action button is not available if all rows have been selected across all pages in the table. To clear all selected rows across all pages, use the Select none option from the drop-down arrow next to the check box in the table header. |

Hardware card
Navigate to the Hardware card by following the third navigation path described in Security and navigation.
The Hardware card, available only for ESXi devices, displays detailed device-specific hardware information.
Refer to Hardware in Device summary.


