Jobs overview
PERMISSIONS Refer to Jobs > Active Jobs in Permissions.
NAVIGATION Automation > Jobs
About
The Jobs page displays information about all of your jobs.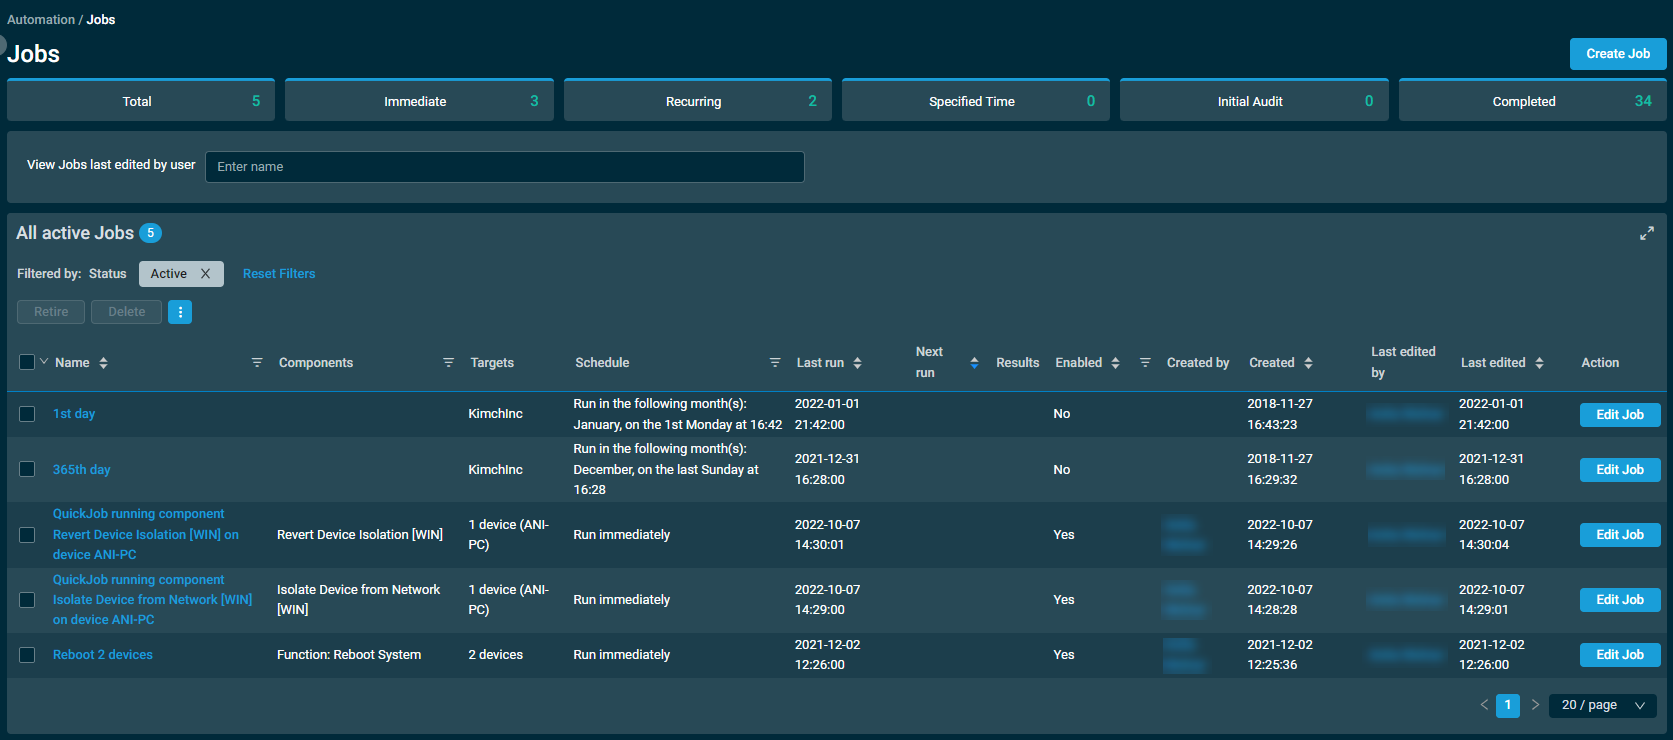
Criteria for automatic job deletion
A job will be automatically wiped from the database in the following scenarios:
- Six or more months have passed since the job expired or was completed, manually deleted, or retired.
- The Next Run date is six or months in the past, and no targeted devices have a status of Pending or Running.
Initial Audit jobs are excluded from this cleanup criteria unless last edited more than six months ago.
You can create a new job by clicking the Create Job action button displayed at the top of the page. Refer to Creating a job.
At the top of the page, jobs are sorted into categories. All categories list active jobs except for the Completed category. The categories are as follows:
Click a job in the list to go to the job results page. Refer to Job results.
Begin entering a first name, last name, or username to filter on jobs created by the selected user (the search results are narrowed as you type), then select the user from the list. Your name is automatically filled in by default when you navigate to this page.
To access all action buttons, click the Row Actions icon.
The action buttons are grayed out or become unavailable if no row is selected in the table or if the action button is not applicable to the selected rows. The check boxes allow you to select one or more rows. Select all rows shown on a page by selecting the check box in the table header. You can also use the drop-down arrow next to the check box in the table header to choose one of the following options: Select none, Select all on page, or Select all rows across all pages. If you choose to select all rows across all pages, the check boxes of the rows will not be selected; however, the page will indicate that all rows have been selected.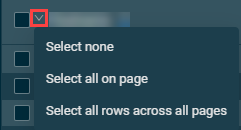
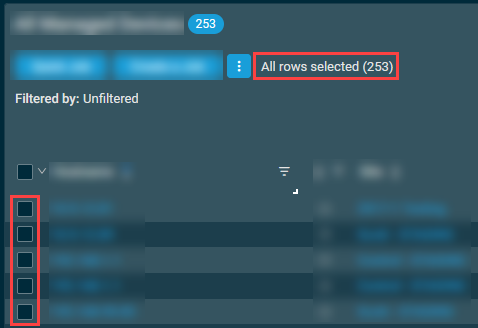
NOTE When all rows are selected across all pages, only certain action buttons are supported, which is indicated in the All Rows column in the table below.
| Action Button | All Rows | Description |
|---|---|---|
|
Retire |
|
Refer to Action buttons. |
|
Delete |
|
Refer to Action buttons.
NOTE Upon selecting multiple jobs to delete, the jobs are deleted asynchronously. After the process has finished, you will receive a notification indicating the number of job deletion successes and failures. |
| Export Selected Rows to CSV | In the confirmation dialog box that appears, select whether to show table headers in the file by turning on the toggle for Show table headers in the exported CSV. Click Confirm to download the file or Cancel to close out of the dialog box. Any column selections, filters, and sorting that have been applied to the table will also be applied in the CSV file.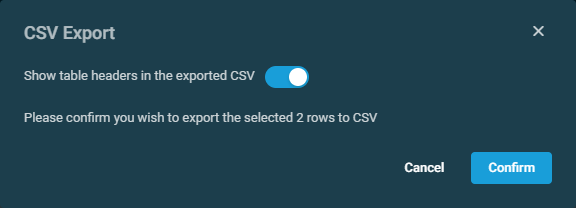 |
|
| Export All Rows to CSV |

|
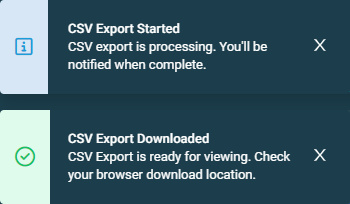
This action button is available only if all rows have been selected across all pages in the table. In the confirmation dialog box that appears, click Confirm to download the file or Cancel to close out of the dialog box. Pop-up notifications will inform you of the start and completion of the CSV export action. Click the X to close the notification; otherwise, the notification will automatically be cleared after five minutes. Any column selections, filters, and sorting that have been applied to the table will also be applied in the CSV file. |
| Uncheck All |
|
Clears all selected rows. The number of selected rows is indicated next to the Row Actions icon. NOTE This action button is not available if all rows have been selected across all pages in the table. To clear all selected rows across all pages, use the Select none option from the drop-down arrow next to the check box in the table header. |
The jobs table displays the following columns:
| Field | Sortable? | Description |
|---|---|---|
| Name |

|
The name of the job. Click the job name to go to the job results page and view more details. Refer to Job results. To narrow the list, click the filter icon  , enter a term, and click Apply. To see the full list, click Reset. , enter a term, and click Apply. To see the full list, click Reset. |
| Components | A list of the components included in the job. Refer to Components. To narrow the list, click the filter icon , enter a term, and click Apply. To see the full list, click Reset. |
|
| Targets | A list of targets the job will run against. Refer to Targets. | |
| Schedule | The schedule for the job. Refer to Schedule. Click the filter icon and choose from one of the following to filter by job schedule: Immediate, At selected date and time, Initial Audit, Daily, Weekly, Monthly, Monthly day of week, or On Connect. |
|
| Last Run |
|
How long ago the job was last scheduled to run. NOTE For scheduled jobs, this will update every time the job is executed on scheduled. For all other job types (Immediately/Initial Audit), this will show when the job was first send to the target, but does not continue to update as there is no next scheduled execution. Time stamps reflect the user time zone and preferred date format configured on the Setup > My Settings page. Hovering over any time stamp will show its date in the alternative format. Refer to User Time Zone and Date Format. |
| Next Run |
|
The next time the job is scheduled to run. Time stamps reflect the user time zone and preferred date format configured on the Setup > My Settings page. Hovering over any time stamp will show its date in the alternative format. Refer to User Time Zone and Date Format. |
| Results | The results of the components the job is scheduled to run. The results progress bar is continuously updated. Click any section of the bar to go to the Job results page and view more details. Refer to Job Status in Job results. | |
| Enabled |
|
Whether the job is enabled or disabled. Refer to Editing a job or Action buttons. Click the filter icon and click Yes or No to filter by the status of the jobs. To see the full list, click All. |
| Created By | The user who created the job. | |
| Created |
|
When the job was created. Time stamps reflect the user time zone and preferred date format configured on the Setup > My Settings page. Hovering over any time stamp will show its date in the alternative format. Refer to User Time Zone and Date Format. |
| Last Edited By | The user who last edited the job. | |
| Last Edited |
|
How long ago the job was edited. Time stamps reflect the user time zone and preferred date format configured on the Setup > My Settings page. Hovering over any time stamp will show its date in the alternative format. Refer to User Time Zone and Date Format. NOTE This column is not displayed on screens that are 980 pixels wide or smaller. |
| Action | Click Edit Job to modify the job. Only available for active jobs. Refer to Editing a job. |
You can filter any columns with the filter icon . The Filtered by bar displays all applied column filters. If a filter search term includes wildcard characters (for example, underscores and percent signs), they serve as normal characters if they are preceded by a backslash. For details, refer to Wildcard characters. Click the X next to any filter to remove that filter. Click Reset Filters to return to the default view (Status: Active, Last edited by: your name and username). If no filter is applied, the Filtered by bar displays Unfiltered. The filter selection in the columns will not persist the next time the page is accessed as the table will return to the default view.
The table density is set to condensed theme by default. To change it to relaxed theme, click the density toggle icon.  The selection will persist across all pages.
The number of results displayed can be specified by selecting the desired number from the pagination control. This selection will persist the next time the page is accessed.


