Microsoft 365 Integration
 Security and navigation
PERMISSIONS Administrator (to enable the integration)
PERMISSIONS To configure user access to this integration, refer to Microsoft 365 in Permissions.
NAVIGATION Setup > Integrations > Microsoft 365
NAVIGATION Microsoft 365
Setting up the integration
About the integration
The Microsoft 365 Integration provides the opportunity to administer your Microsoft 365 tasks through a single management platform. This integration streamlines otherwise complex workflows and gives technicians access to the most essential Microsoft 365 data, user management actions, and device management capabilities directly in Datto RMM.
Upon connecting a Cloud Solution Provider (CSP) tenant, Datto RMM automatically fetches all of your client tenants. You have the option to freely sync or unsync specific tenants to or from the integration at any time.
The integration offers quick access to the following resources:
- A dedicated Microsoft 365 menu in Datto RMM.
- An overview of synced tenants with clickable tenant detail cards and navigation to Microsoft client portals. Refer to All Tenants.
- A comprehensive user overview for each client tenant, including user details, roles, licenses, groups, devices, and sign-in logs. Refer to All Users.
- The option to edit, onboard, and offboard Microsoft 365 users directly from within Datto RMM, including shared mailbox conversion during offboarding. Refer to Microsoft 365 user management.
- Perform user Quick Actions from Datto RMM such as Reset Password, Create Temporary Access Password, Block/Unblock Sign In, and Revoke All User Sessions. Refer to Microsoft 365 Integration.
- A cross-tenant All Devices page showing all Intune-enrolled devices across synced tenants. Refer to All Devices.
- A dedicated details page for each user featuring a user summary, list of enrolled devices, information about the groups the user is added to, and sign-in logs. Refer to User details.
- Intune Quick Actions (Sync, Remote Lock, Wipe, Retire, Reboot) for enrolled Windows, Android, and iOS devices. Refer to Intune Quick Actions.
- Windows 365 Cloud PC agent deployment for automatic or ad-hoc RMM agent installation on Cloud PCs.
- Deployment of Datto RMM Agents automatically to enrolled Windows devices via Intune.
- Tiered security level permissions to control access to the integration features. Refer to Microsoft 365 in Permissions.
To learn more, refer to Microsoft 365 Integration FAQ.
Prerequisites
The Microsoft 365 Integration with Datto RMM requires a Microsoft Azure account with Cloud Solution Provider (CSP).
The Microsoft 365 Integration supports two connection methods: you can integrate either a Cloud Solution Provider (CSP) app registration or a single non-CSP Microsoft 365 account. Both methods follow the same setup process, including the same consent and authentication flow.
CSP integration
When connecting as a CSP partner, Datto RMM automatically discovers all client tenants associated with your CSP relationship. This is the recommended approach for Managed Service Providers managing multiple client organizations.
Non-CSP (single tenant) integration
When connecting a single non-CSP Microsoft 365 account, the integration operates against that individual tenant only. This approach is suitable for organizations that want to manage their own Microsoft 365 environment directly through Datto RMM without a CSP relationship.
NOTE Regardless of which method you choose, the setup process, authentication flow, and consent requirements are the same. The integrating account requires the same Entra roles and GDAP configuration described below.
NOTE Kaseya recommends setting up a service account specifically for the integration with Datto RMM, such as dattointegration@[your domain].com. This will ensure the integration bypasses your Conditional Access policies, remains active, and limits issues in the future.
Microsoft 365 configuration
For this integration to work, a certain configuration is required in Microsoft 365. For guidance, review the following steps and watch the video demonstration.
Step 1: Service account permissions
Configure the following settings in Microsoft Entra:
-
The authenticating user requires Microsoft Multi-factor Authentication (MFA), which can be enforced through Conditional Access or per-user MFA settings. The MFA for this user cannot be performed through a third-party application, such as Duo. (MFA through a third-party application is adequate for other users in the account.)
NOTE The user must be excluded from any policies enforcing sign-in restrictions outside the norm of requiring MFA.
NOTE The service account must successfully authenticate with MFA during the initial connection for the integration to work properly. If there are any exceptions in the Conditional Access policy that allow MFA to be bypassed during this connection, tenants will not be pulled in to Datto RMM.
Step 2: Service account role
Configure the following settings in Microsoft Entra:
- The integrating service account must be part of two security groups: the AdminAgents security group and the security group assigned to the GDAP relationship, as described in the next section, Step 3: GDAP relationship configuration.
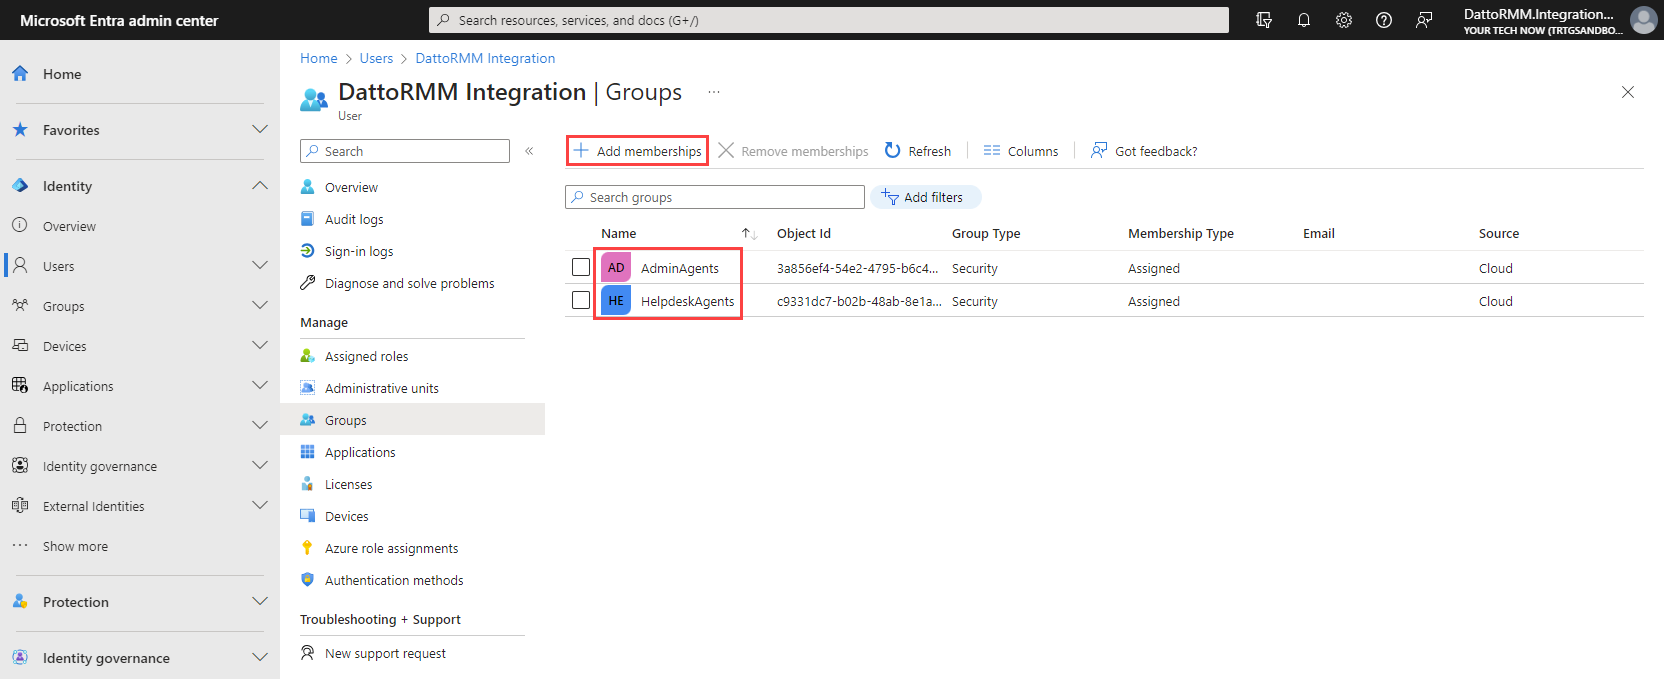
Step 3: GDAP relationship configuration
NAVIGATION Microsoft Partner Center > Customers > Administer > select a customer > select an admin relationship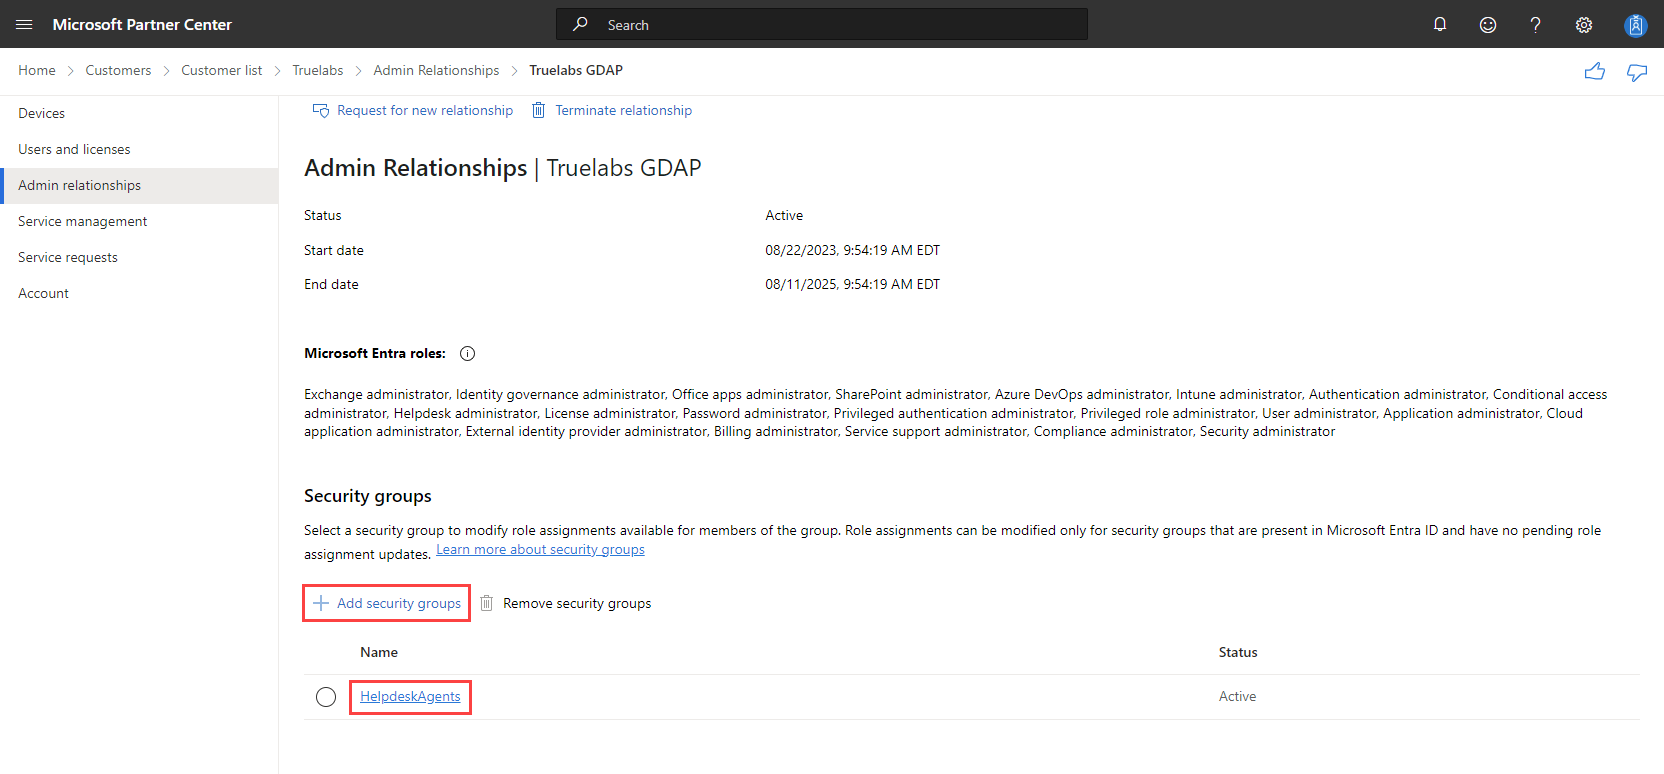
Configure the following settings in Microsoft Partner Center:
- The authenticating user must add a granular delegated admin privileges (GDAP) relationship with all client tenants.
NOTE If a client tenant has more than one GDAP relationship, Microsoft observes only the GDAP relationship that was created most recently. As mentioned, the Microsoft authentication requires the security group on the integrating account and GDAP relationship to be the same. If such is the case on one of the GDAP relationships but not on the one most recently created, then the sync will fail.
NOTE As of RMM 14.7, Global Admin privileges are no longer required for GDAP relationships. While existing integrations using Global Admin GDAP will continue to work, transitioning to GDAP without Global Admin is recommended as it follows the principle of least privilege. Non-Global Admin GDAP relationships also have the ability to be auto-renewed, eliminating the need for recurring manual renewal process.
Required Microsoft Entra Roles
The following list contains the required Microsoft Entra Roles for supporting the Microsoft 365 Integration:
|
Microsoft Entra Roles |
Description |
|---|---|
| Application Administrator | Manage applications in the directory |
| Authentication policy administrator | Can create and manage the authentication methods policy, tenant-wide MFA settings, password protection policy, and verifiable credentials. |
| Cloud app security administrator | Can manage all aspects of the Defender for Cloud Apps product |
| Cloud device administrator | Limited access to manage devices in Microsoft Entra ID. |
| Exchange administrator | Manage Exchange Online. |
| Intune administrator | Can manage all aspects of the Intune product. |
| Privileged authentication administrator | Can access to view, set and reset authentication method information for any user (admin or non-admin). |
| Privileged role administrator | Can manage role assignments in Microsoft Entra ID, and all aspects of Privileged Identity Management. |
| Security administrator | Can read security information and reports, and manage configuration in Microsoft Entra ID and Office 365. |
| SharePoint administrator | Can manage all aspects of the SharePoint service. |
| Teams administrator | Can manage the Microsoft Teams service. |
| User administrator | Can manage all aspects of users and groups, including resetting passwords for limited admins. |
API permissions
In Microsoft Entra ID, applications are authorized to call APIs when they are granted permissions as part of the consent process. Upon setting up the Microsoft 365 Integration from within Datto RMM, you will be required to accept a few Microsoft API permissions to ensure adequate functionality.
The following table lists the base permissions configured automatically when you accept.
| API | Permission Category | Permission | Type | Description |
|---|---|---|---|---|
| Microsoft Graph | Application | Application.ReadWrite.All | Delegated | Read and write all applications. |
| Microsoft Graph | DelegatedAdminRelationship | DelegatedAdminRelationship.ReadWrite.All | Delegated | Manage Delegated Admin relationships with customers. |
| Microsoft Graph | Directory | Directory.ReadWrite.All | Delegated | Read and write directory data. |
| Microsoft Graph | OpenId permissions | offline_access | Delegated | Maintain access to data you have given it access to. |
| Microsoft Graph | OpenId permissions | openid | Delegated | Sign users in. |
| Microsoft Partner Center | Permissions | user_impersonation | Delegated | Access Partner Center. |
Additional permissions by feature
Features introduced since RMM 14.6 require additional Microsoft Graph API permissions. After upgrading, you may need to reconfigure the integration to consent to new permissions. The system will notify you when new permissions are needed.
| Feature (RMM version) | Required permissions | Description |
|---|---|---|
| All Devices (14.6) | DeviceManagementManagedDevices.Read.All | Read Intune managed device properties. |
| Intune Quick Actions (14.7) | DeviceManagementManagedDevices.ReadWrite.All | Perform MDM actions on Intune-enrolled devices. |
| Cloud PC Deployment (14.9) | CloudPc.ReadWrite.All, Windows 365 Admin | Deploy agents to Windows 365 Cloud PCs. |
Enable the Microsoft 365 Integration
Complete the following steps in Datto RMM to enable the integration:
- Navigate to Setup > Integrations > Microsoft 365.
- In the Authenticate tab, which is selected by default, click Turn On.
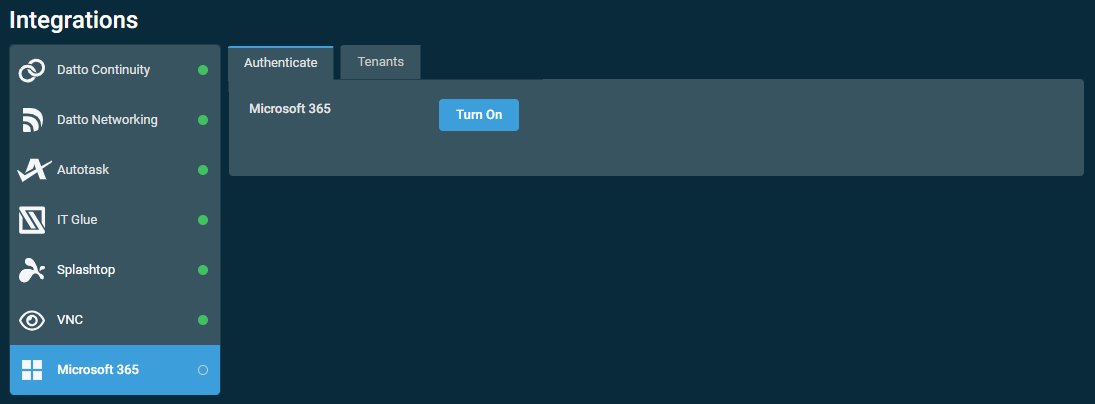
- In the Tenant ID field that appears, enter your tenant ID for the CSP tenant you wish to integrate. This tenant ID must match the CSP tenant of the account you authenticate with in step 6.
- Click Save.
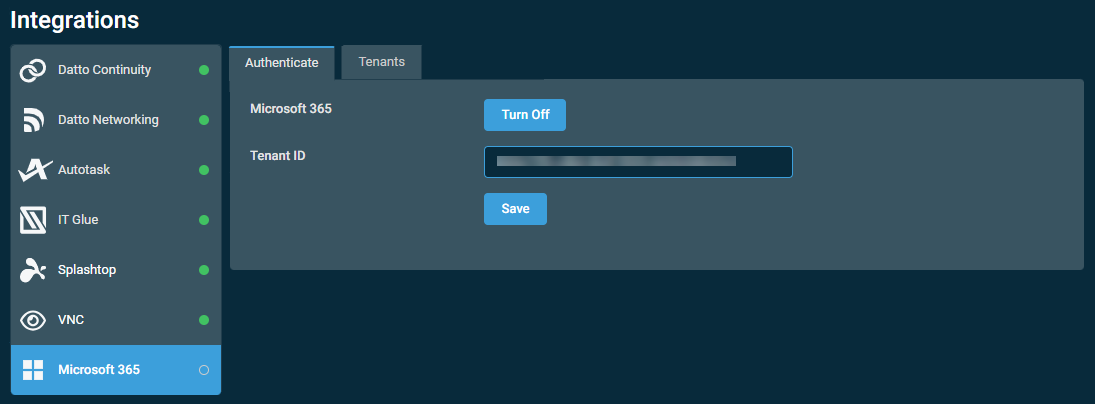
- The button will change in appearance and show that Datto RMM is in the process of integrating.
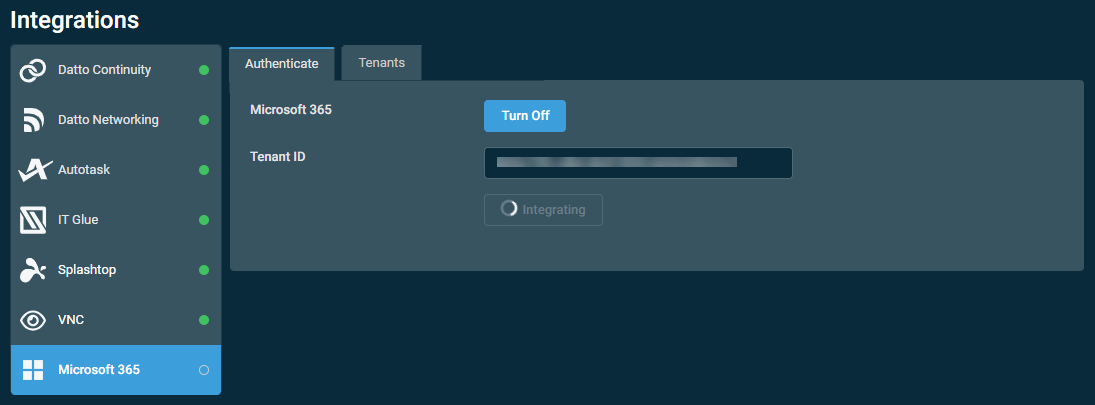
- Datto RMM will redirect to the Microsoft login page. Select or add the account that corresponds with the tenant ID entered in step 3.
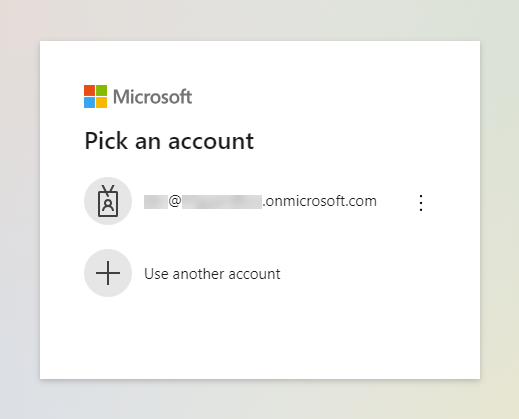
- If not already signed in, sign in to the account.
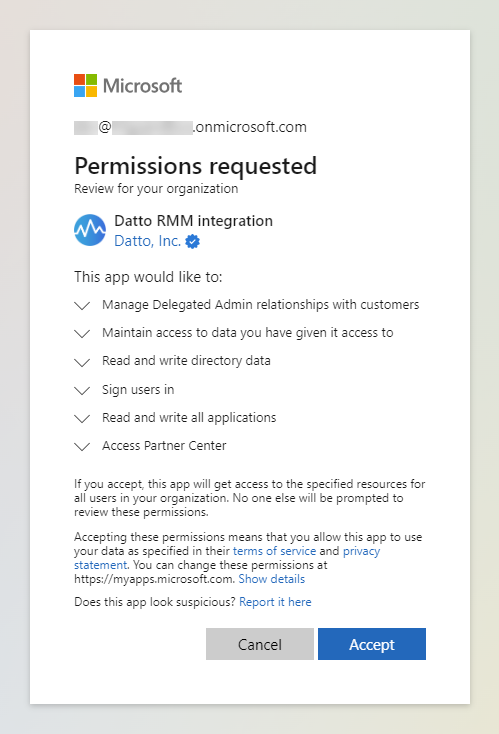
- Once successfully signed in, Microsoft will display a list of requested permissions. For more information, refer to API permissions in Prerequisites. Click Accept.
- The page will redirect to Datto RMM, where you will see a list of client tenants in the Tenants tab of the Microsoft 365 card. You must manually sync tenants to begin using the integration. For instructions, refer to Sync Microsoft 365 client tenants to Datto RMM.
NOTE To learn how to find your tenant ID, refer to this Microsoft article.
NOTE You can check the status of the integration any time from the Authenticate tab in the Microsoft 365 card. If enabled, the button in the card displays Saved and authenticated.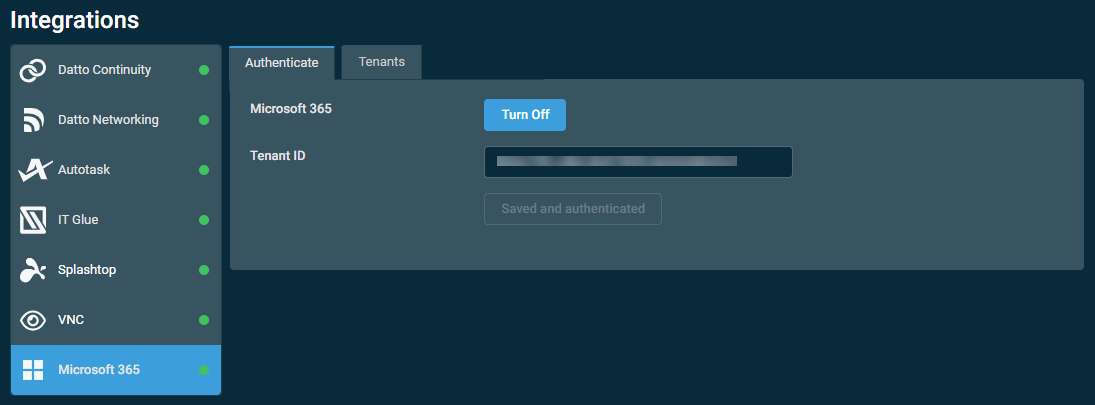
Sync Microsoft 365 client tenants to Datto RMM
NAVIGATION Setup > Integrations > Microsoft 365 > Tenants
Once the Microsoft 365 Integration is enabled, Datto RMM automatically fetches all of your Microsoft 365 client tenants. Any tenants in this list can be freely synced to or unsynced from Datto RMM while the integration is active.
The status of all tenants remains Deactivated in the tenant sync table until manually synced.
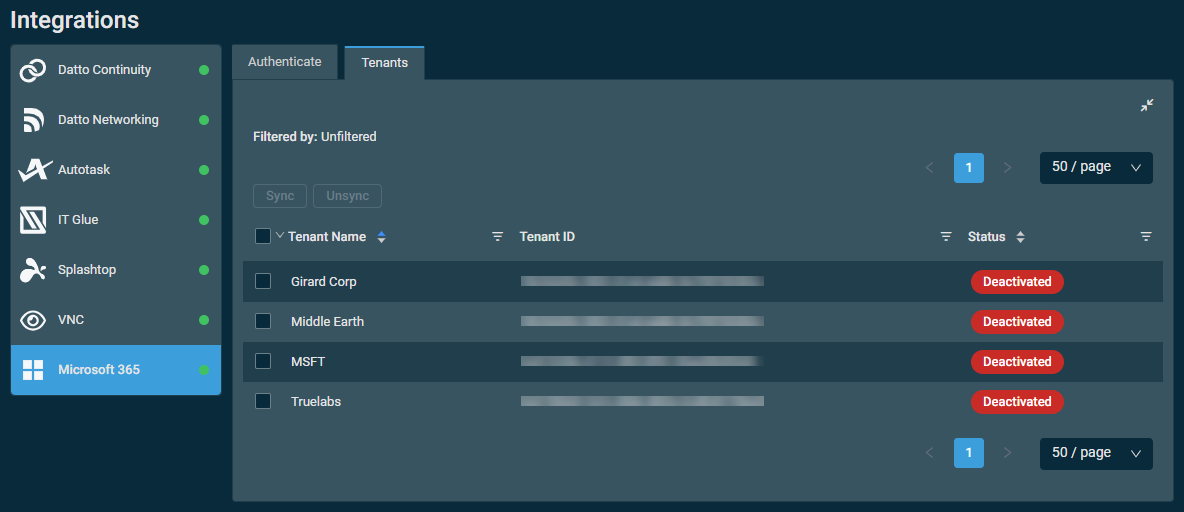
NOTE Your own tenant (the primary tenant) can be synced but cannot be unsynced.
Tenant sync table
The tenant sync table displays the following information:
| Field | Sortable? | Description |
|---|---|---|
| Tenant Name |

|
The name of the tenant as it exists in Microsoft Entra ID. To narrow the list, click the filter icon  , enter a term, and click Apply. To see the full list, click Reset. , enter a term, and click Apply. To see the full list, click Reset. |
| Tenant ID | Displays the tenant ID. To narrow the list, click the filter icon , enter a term, and click Apply. To see the full list, click Reset. |
|
| Status |
|
Displays the sync status as one of the following values: Synced, Deactivated, GDAPNotAvailable, Failed, or Pending. For more details, refer to Sync status values. To narrow the list, click the filter icon |
Sync status values
Tenant sync status messages provide human-readable error details with suggested remediation steps:
| Status | Description |
|---|---|
| Synced | The tenant is successfully synced and data is up to date. |
| Deactivated | The tenant has been deactivated in Microsoft Partner Center or is not yet synced. |
| Failed | An attempt to sync or unsync the tenant to or from Datto RMM was unsuccessful. An expanded error message with specific details and a link to the relevant troubleshooting KB article is displayed. Hover over the status to reveal the error details. |
| GDAP Not Available | The required GDAP relationship is not configured or has expired for this tenant. Navigate to Microsoft Partner Center to configure or renew the GDAP relationship. |
| Pending | The tenant is in the process of syncing to Datto RMM. |
NOTE Each error message includes a direct link to the relevant troubleshooting article with step-by-step remediation instructions.
Sync tenants
To sync tenants, complete the following steps:
- Navigate to Setup > Integrations > Microsoft 365 > Tenants.
- Select the tenants you wish to sync. For details about check box selection functionality, refer to Microsoft 365 Integration.
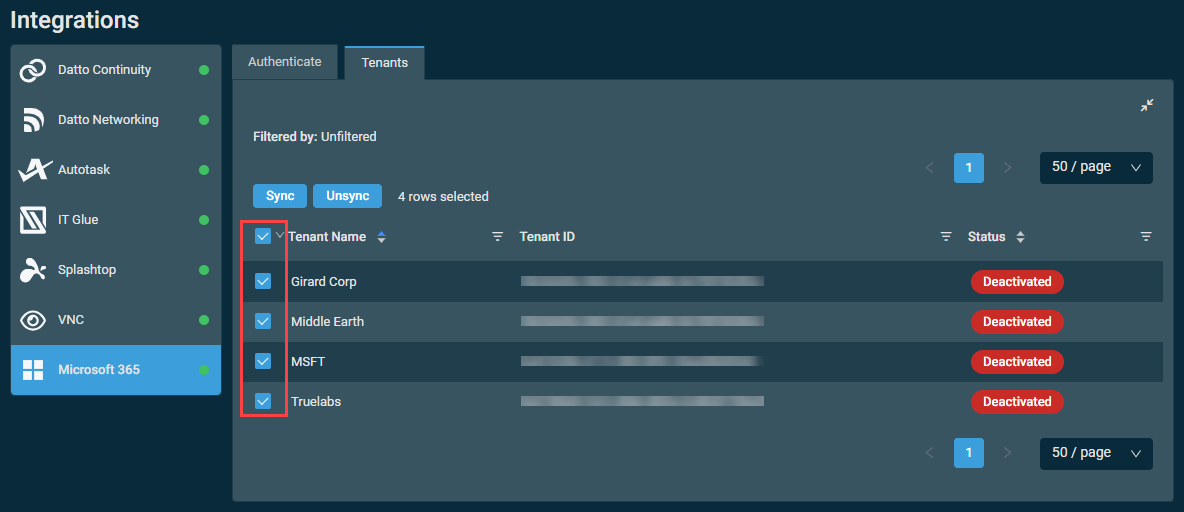
- Click Sync.
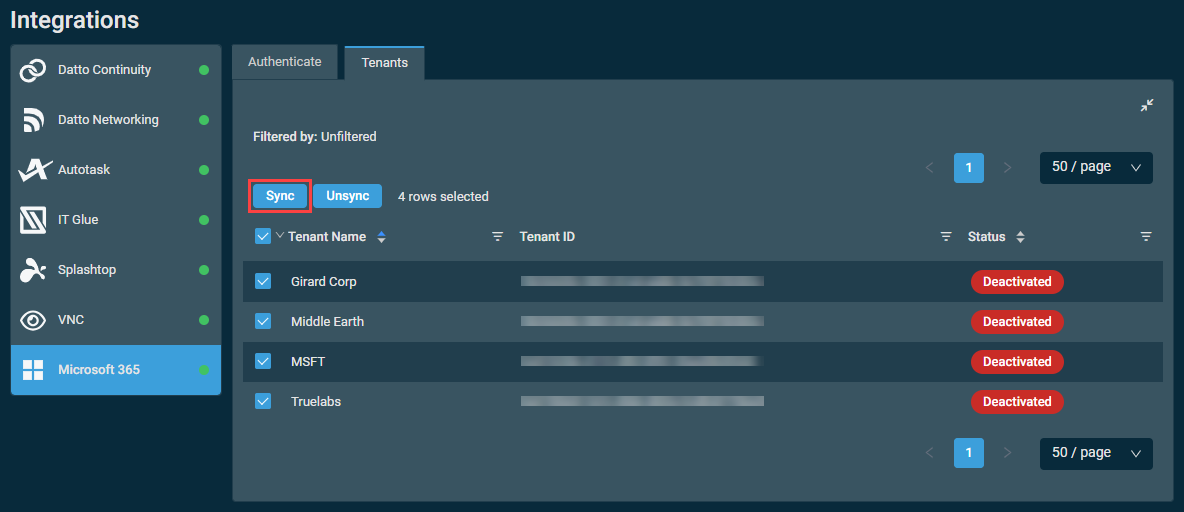
- In the confirmation dialog box that appears, click Confirm to complete the action or Cancel to close out of the dialog box. A pop-up notification will indicate if the tenant sync operation has initiated.
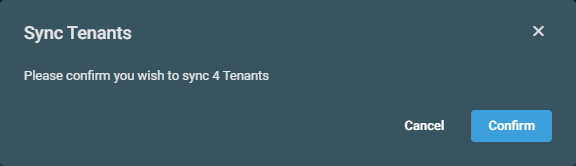
- The sync process may take some time. The status will change to Pending, then Synced on success.
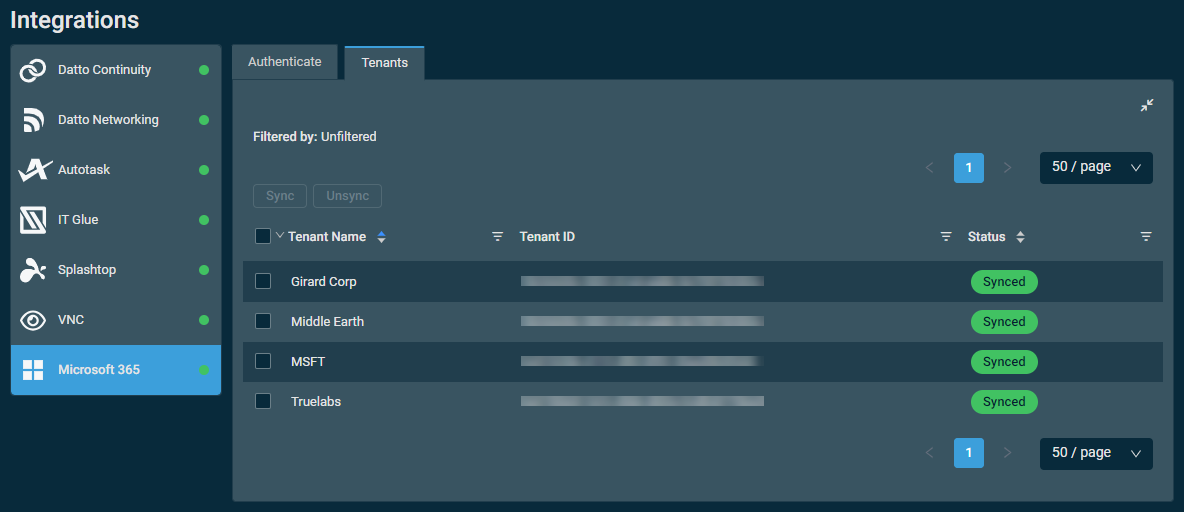
NOTE Datto RMM automatically creates an enterprise application in Microsoft Entra ID for each of the client tenants you have GDAP access to. Learn about GDAP. Application creation requires a couple seconds per tenant.
NOTE If a synced tenant does not show on the All Tenants page, verify your Microsoft configuration meets the prerequisites of this integration. Refer to Prerequisites.
Unsync tenants
To unsync tenants, complete the following steps:
- Navigate to Setup > Integrations > Microsoft 365 > Tenants.
- Select the tenants you wish to unsync.
- Click Unsync.
- In the confirmation dialog box that appears, click Confirm to complete the action. A pop-up notification will indicate if the tenant unsync operation has initiated.
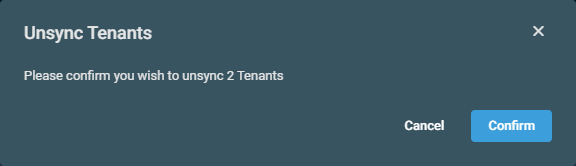
- The status Deactivated indicates a tenant has been successfully unsynced.
Data for any unsynced tenants are no longer accessible from the Microsoft 365 menu in the left navigation menu.
NOTE If your own tenant (the primary tenant) is synced, it cannot be unsynced.
Disable the Microsoft 365 Integration
If you disable the integration, all of the integration and authentication settings will be deleted. Any enterprise applications that had been created for previously synced client tenants will be automatically deleted from Microsoft Entra ID. You can re-enable the integration at any time.
- In Datto RMM, navigate to Setup > Integrations.
- The Datto Continuity tab is selected by default. Click the Microsoft 365 tab.
- Click Turn Off.
- Click Confirm to execute the action or Cancel to close out of the dialog box.
Security levels for Microsoft 365
Security Levels allow Datto RMM administrators to control which Microsoft 365 features and actions each technician can access. The Microsoft 365 permission model is configured under the Microsoft 365 section of Security Levels.
Permission categories
The Microsoft 365 section in security levels provides the following permission categories:
| Category | Options | Description |
|---|---|---|
| Tenants | None / View / Manage | Controls access to the All Tenants page and tenant properties. View allows browsing tenant details; Manage adds the ability to sync or unsync tenants. |
| Users | None / View / Manage | Controls access to All Users, user details, roles, licenses, groups, and sign-in logs. Manage enables user actions such as Reset Password, Create TAP, Block/Unblock Sign In, and Offboard User. |
| Devices | None / View / Manage | Controls access to the All Devices page and user-level Devices tab. View allows browsing device properties; Manage enables Intune Quick Actions. |
For more details on these permissions, refer to Microsoft 365 in Security levels.
Activity logging
All Microsoft 365 actions performed through the integration are recorded in the Datto RMM Activity Log. The log entry includes the action name, target user or device, triggering technician, tenant, and timestamp. This includes both user management actions (Reset Password, Offboard User, license changes, role assignments, group modifications) and device management actions (Sync, Lock, Wipe, Retire, Reboot).
User Management
This section covers all user-facing features of the Microsoft 365 integration, including the Microsoft 365 menu, All Tenants page, All Users page, user details, and user management actions.
Microsoft 365 menu
Once the Microsoft 365 Integration is enabled and tenants are synced, the All Tenants, All Users, and All Devices pages can be accessed from Microsoft 365 in the left navigation menu. Refer to Enable the Microsoft 365 Integration and Sync Microsoft 365 client tenants to Datto RMM.
Within the Microsoft 365 menu, up to five of the most recently viewed users are listed for quick access.
All Tenants
NAVIGATION Microsoft 365 > All Tenants.
The All Tenants page displays all synced client tenants and provides quick access to Microsoft client portals, tenant details, and filtered views of users and devices per tenant.
List of tenants
IMPORTANT Only the tenants you have manually synced will appear in this list. Refer to Sync Microsoft 365 client tenants to Datto RMM.
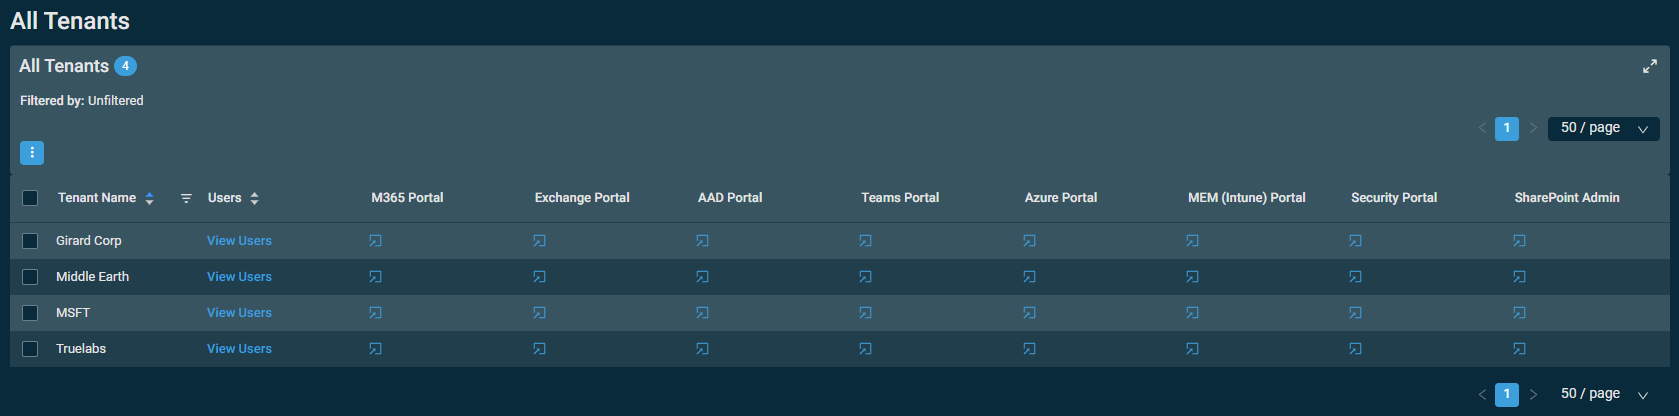
The badge in the table header shows the number of synced client tenants. The table displays the following information:
| Field | Sortable? | Description |
|---|---|---|
| Tenant Name |
|
The name of the tenant as it exists in Microsoft Entra ID. To narrow the list, click the filter icon , enter a term, and click Apply. To see the full list, click Reset.Click the name to open an overview of the tenant details in Datto RMM. |
| Users | Click View Users to open the list of users that belong to the tenant. Refer to All Users. | |
|
|
Click View Devices to open the list of devices that belong to the tenant. Refer to All Devices. |
|
| Entra Admin Portal* | Click the arrow to manage the tenant in this portal. | |
| Azure Portal* | Click the arrow to manage the tenant in this portal. | |
| Exchange Admin* | Click the arrow to manage the tenant in this portal. | |
| M365 Admin* | Click the arrow to manage the tenant in this portal. | |
| Intune Admin* | Click the arrow to manage the tenant in this portal. | |
| M365 Defender* | Click the arrow to manage the tenant in this portal. | |
| SharePoint Admin* | Click the arrow to manage the tenant in this portal. | |
| Teams Admin* | Click the arrow to manage the tenant in this portal. | |
| Auto-deploy RMM Agents to Cloud PCs | Enable this to automatically deploy the RMM Agent to Cloud PCs in the tenant. NOTE Tenants require eligible Windows 365 licenses. NOTE |
|
| Auto-deploy RMM Agents from Intune | Enable this to deploy Datto RMM Agents automatically to enrolled Windows devices via Intune. Once enabled, newly enrolled devices in that tenant will automatically have the Datto RMM Agent installed to them via Intune. NOTE Enabled tenants require an eligible Intune license, typically a Microsoft 365 Business Premium, E3, and E5, or a standalone license. NOTE To enable Datto RMM Agent deployment through Intune for a Microsoft 365 integration established before the 15.1.0 release, you need to disable and re-enable the integration. Refer to Disable the Microsoft 365 Integration and Enable the Microsoft 365 Integration. NOTE |
|
| Associated Site | Use the drop-down to establish a relationship between a Datto RMM site and a Microsoft 365 tenant. This is required for Auto-deploy RMM Agents to Cloud PCs or Auto-deploy RMM Agents from Intune to work, however you do not need any specific license to associate a Datto RMM site to a tenant. |
NOTE *Users with the proper access in Datto RMM will be able to see and click these links but will require the proper permissions in Microsoft 365 to access the related areas within the tenant.
The columns can be reordered and resized. The order and size of the columns will persist the next time the page is accessed.
You can filter the Tenant Name column. The Filtered by bar displays all applied column filters.If a filter search term includes wildcard characters (for example, underscores and percent signs), they serve as normal characters if they are preceded by a backslash. For details, refer to Wildcard characters.Click the X next to any filter to remove that filter or click Reset Filters to remove all filters.If no filter is applied, the Filtered by bar displays Unfiltered.The filter selection will not persist the next time the page is accessed as the table will return to the default view (unfiltered).
The table density is set to condensed theme by default. To change it to relaxed theme, click the density toggle icon.  The selection will persist across all pages.
The number of results displayed can be specified by selecting the desired number from the pagination control. This selection will persist the next time the page is accessed.
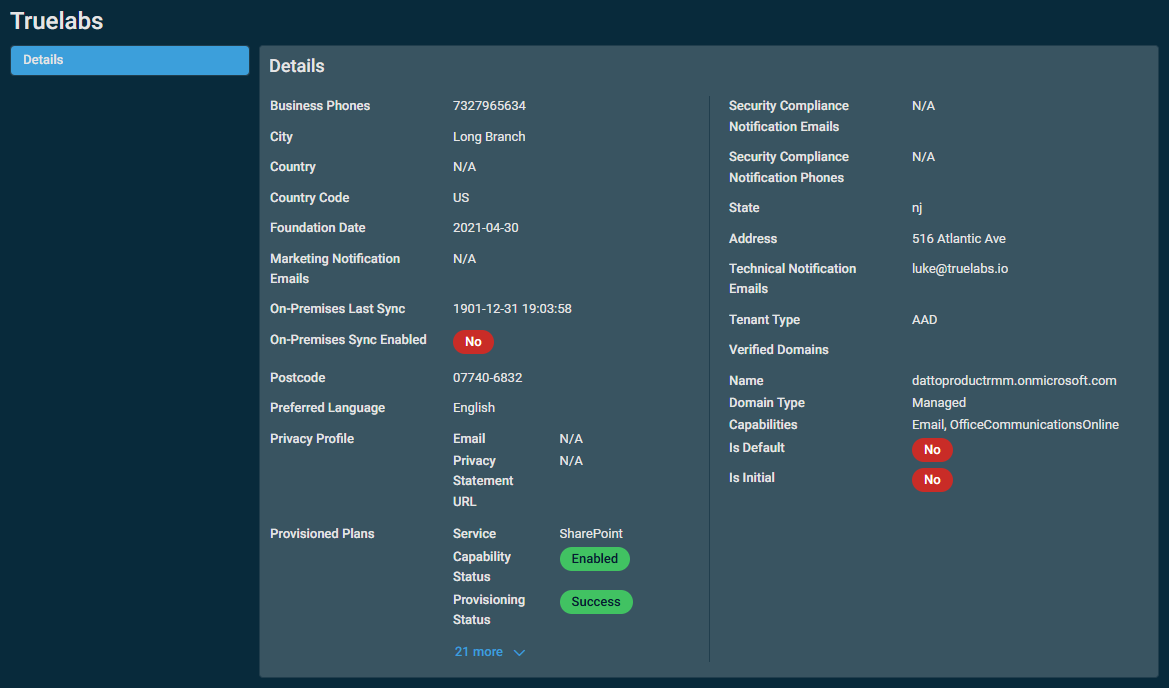
Tenant detail card
Each tenant name in the All Tenants list is a clickable hyperlink. Clicking a tenant name opens the tenant's detail card, which displays comprehensive properties retrieved from Microsoft Graph:
| Property | Description |
|---|---|
| Business Phones | The telephone numbers for the organization. |
| City | The city where the organization is located. |
| Country | The country/region where the organization is located. |
| Country Code | The country/region abbreviation in ISO 3166-2 format. |
| Foundation Date | The date and time the organization was created. |
| Marketing Notification Emails | Email addresses for marketing notifications. |
| On-Premises Last Sync | The last time the on-premises directory was synced with Azure AD. |
| On-Premises Sync Enabled | Whether this organization is synced from an on-premises directory (Yes/No). |
| Postcode | The postal code for the organization's address. |
| Preferred Language | The organization's preferred language, in ISO 639-1 format. |
| Privacy Profile | Contains privacy profile information (email, statement URL). |
| Provisioned Plans | The plans provisioned for the organization, including service name, capability status, and provisioning status. |
Tenant actions
To access the available tenant action buttons, click the Row Actions icon. The action buttons are unavailable if no row is selected or if the action is not applicable to the selected rows. The check boxes allow you to select one or more rows. Select all rows shown on the page by selecting the check box in the table header.
The following table lists all available action buttons:
| Action Button | Description |
|---|---|
| Export Selected Rows to CSV | In the confirmation dialog box, select whether to show table headers in the file by toggling the Show table headers in the exported CSV button. Click Confirm to download the file. Any column selections, filters, and sorting that have been applied to the table will also be applied in the CSV file. A maximum number of 500 rows can be exported to a single CSV file. The Export All (Max. 500) Rows to CSV action is available without selecting any row in the table.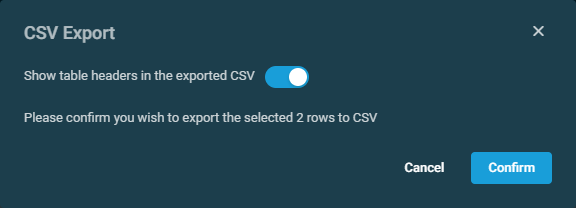 |
| Export All (Max. 500) Rows to CSV | |
| Uncheck All | Clears all selected rows. The number of selected rows is indicated next to the Row Actions icon. |
All Users
NAVIGATION Microsoft 365 > All Users
The All Users page displays all users across all synced tenants by default. To populate a list of users from specific tenants, select one or more tenants from the Select Tenant drop-down menu.
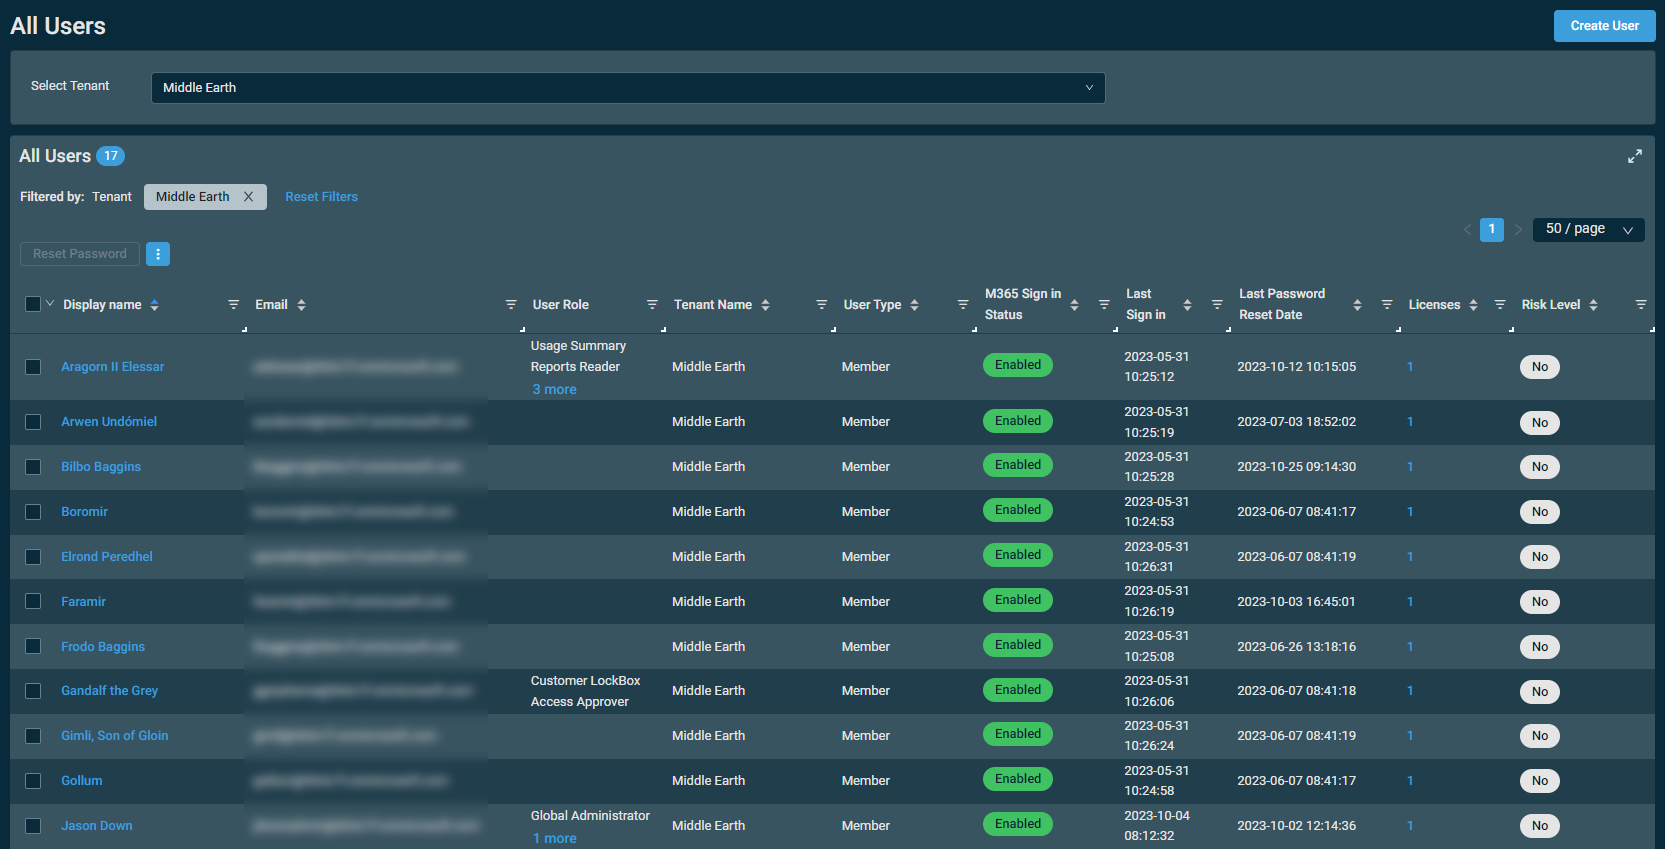
NOTE This list supports up to 999 users. The first 999 users fetched by Microsoft are those that sync to the integration.
Available columns
The table on the All Users page displays the following information:
| Field | Sortable? | Description |
|---|---|---|
| Display Name |
|
The display name of the user as it exists in Microsoft. To narrow the list, click the filter icon , enter a term, and click Apply. To see the full list, click Reset.NOTE This field is searchable via global search. Refer to Global search. |
|
|
The user name/user principal name (user email address) as it exists in Microsoft. To narrow the list, click the filter icon , enter a term, and click Apply. To see the full list, click Reset.NOTE This field is searchable via global search. Refer to Global search. |
|
| Tenant Name |
|
The name of the client tenant the user belongs to, as it exists in Microsoft Entra ID. To narrow the list, click the filter icon , enter a term, and click Apply. To see the full list, click Reset.NOTE You can change the selected tenant from the Select Tenant drop-down menu at the top of the page. |
| User Role |
|
The user role(s) assigned to the user in Microsoft. To narrow the list, click the filter icon , enter a term, and click Apply. To see the full list, click Reset. |
| User Type |
|
The user type assigned to the user in Microsoft. To narrow the list, click the filter icon , enter a term, and click Apply. To see the full list, click Reset. |
| M365 Sign In Status |
|
Displays whether or not signing into this user account has been blocked, as follows:
Click the filter icon and click All, Enabled, or Blocked to filter by the sign-in status. |
| MFA Status |
|
Displays whether or not the user has registered for MFA. Click the filter icon and click All, Yes, or No to filter by the MFA status.NOTE MFA Status is not available for all Microsoft 365 tenants. Refer to MFA Status and Conditional Access Status requirements. |
| Conditional Access Status |
|
Displays whether MFA is enforced via a Conditional Access policy. Click the filter icon and click All, Not Enforced, Enforced (All Apps) or Enforced (Some Apps) to filter by Conditional Access status. NOTE Conditional Access Status is not available for all Microsoft 365 tenants. Refer to MFA Status and Conditional Access Status requirements. |
| Last Sign In |
|
Displays how long ago the user's latest sign-in occurred. Time stamps reflect the user time zone and preferred date format configured on the Setup > My Settings page. Hovering over any time stamp will show its date in the alternative format. Refer to User Time Zone and Date Format. Click the filter icon and select one of the following options: Last 24 Hours, Last 7 Days, Last 14 Days, Last 30 Days, Last 60 Days, Last 90 Days, Last 180 Days, or Custom where you can specify a custom start/end date and time by using the calendar.The Sign in Logs card displays additional sign-in information. Refer to Signin Logs card. |
| Last Password Reset Date |
|
Displays how long ago the user's latest password reset occurred. Time stamps reflect the user time zone and preferred date format configured on the Setup > My Settings page. Hovering over any time stamp will show its date in the alternative format. Refer to User Time Zone and Date Format. Click the filter icon and select one of the following options: Last 24 Hours, Last 7 Days, Last 14 Days, Last 30 Days, Last 60 Days, Last 90 Days, Last 180 Days, or Custom where you can specify a custom start/end date and time by using the calendar. |
| Licenses |
|
Displays the Microsoft licenses assigned to this user. To narrow the list, click the filter icon , enter a term, and click Apply. To see the full list, click Reset. |
The columns can be reordered and resized. The order and size of the columns will persist the next time the page is accessed.
You can filter any columns with the filter icon . The Filtered by bar displays all applied column filters.If a filter search term includes wildcard characters (for example, underscores and percent signs), they serve as normal characters if they are preceded by a backslash. For details, refer to Wildcard characters.Click the X next to any filter to remove that filter or click Reset Filters to remove all filters.If no filter is applied, the Filtered by bar displays Unfiltered.The filter selection in the columns will persist the next time the page is accessed.
The table density is set to condensed theme by default. To change it to relaxed theme, click the density toggle icon. The selection will persist across all pages.
The number of results displayed can be specified by selecting the desired number from the pagination control. This selection will persist the next time the page is accessed.
MFA Status and Conditional Access Status requirements
To view MFA Status and Conditional Access Status in the All Users page, a Microsoft 365 license with Entra ID P1 or above is required.
Entra ID P1 or above is included in the following licenses:
- Microsoft 365 E3: Includes Entra ID P1. Microsoft Entra ID P1 is included with Microsoft 365 E3 for enterprise customers and Microsoft 365 Business Premium for small to medium businesses.
- Microsoft 365 Business Premium: Includes Entra ID P1 (same source as above)
- Microsoft 365 E5: Includes Entra ID P2 (which supersedes P1) — Microsoft Entra ID P2 is available as a standalone product or included with Microsoft 365 E5 for enterprise customers. microsoft
- Enterprise Mobility + Security (EMS) E3: Includes P1; EMS E5 — includes P2. These aren't "M365 bundles" per se, but are commonly bundled alongside M365 E3/E5 as part of the same SKU family.
Entra ID P1 is not included in the following licenses (Entra ID Free only):
- Microsoft 365 Business Standard
- Microsoft 365 Apps for Business
- Microsoft 365 Family/Personal
In summary: MFA Status and Conditional Access Status can only be viewed properly for users on Microsoft 365 Business Premium or above.
User actions
User actions are available from the Row Actions icon on the All Users page and from the More icon on individual user detail pages.
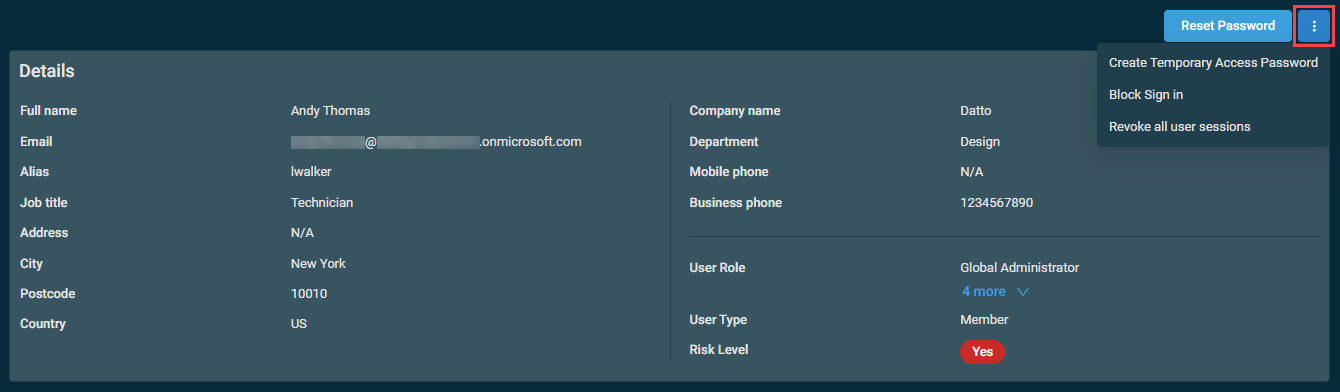
User actions are also available in User details.
The following table lists all available action buttons:
| Action Button | Description |
|---|---|
| Reset Password | Upon confirmation, creates a new reset password for the selected user. Click Confirm to execute the action or Cancel to close out of the dialog box.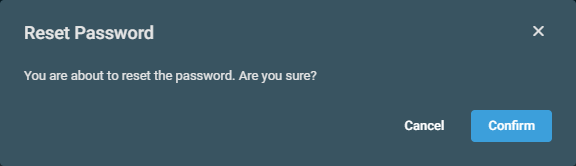 In the next dialog box that appears, click Copy Reset Password to copy the password to your clipboard. 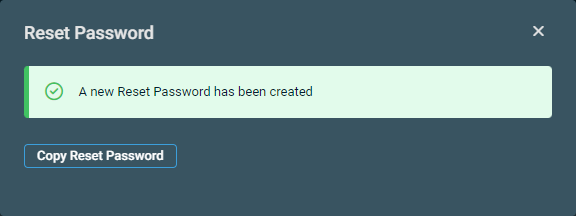 The following description from Microsoft explains the results of this action: "Copy the password and give it to the user. The user will be required to change the password during the next sign-in process. The temporary password never expires. The next time the user signs in, the password will still work, regardless how much time has passed since the temporary password was generated." |
| Create Temporary Access Password |
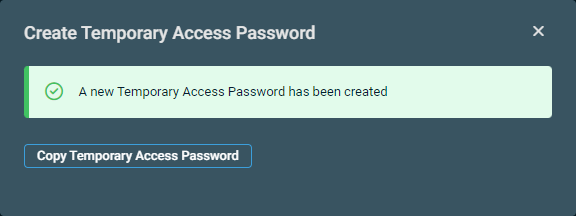
IMPORTANT To successfully create a Temporary Access Password (TAP) for a user, their tenant must have the Temporary Access Pass policy enabled in Microsoft Entra ID, and the user must not be excluded from the policy. Learn how to enable the Temporary Access Pass policy in Microsoft Entra ID. Automatically creates a new TAP for the selected user. In the dialog box that appears, click Copy Temporary Access Password to copy the password to your clipboard.
|
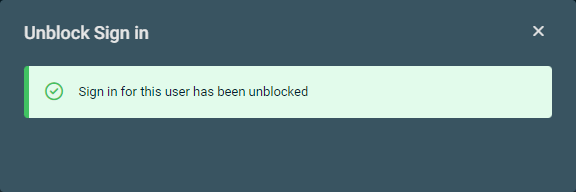
| Block Sign In/Unblock Sign In | Instantly blocks sign-ins into the user account.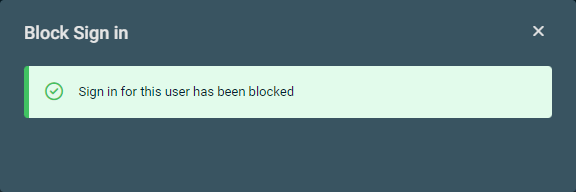 The following description from Microsoft explains the results of this action: "Blocking someone prevents anyone from signing in as this user and is a good idea when you think their password or user name may have been compromised. When you block someone, it immediately stops any new sign-ins for that account, and if they're signed in, they'll be automatically signed out from all Microsoft services within 60 minutes." If sign-ins are currently blocked for the selected user, this option changes to Unblock Sign in, which instantly turns off the block. NOTE In the Microsoft 365 admin center, these same options are available upon selecting a user from the Active users page, and changes to this setting are immediately reflected in Datto RMM. The sign-in status of a user is displayed in the M365 Sign in Status field on the All Users page and user details page. Refer to M365 Sign In Status in All Users and M365 Sign In Status in User details. |
| Revoke All User Sessions |
Instantly revokes all user sessions for the selected user.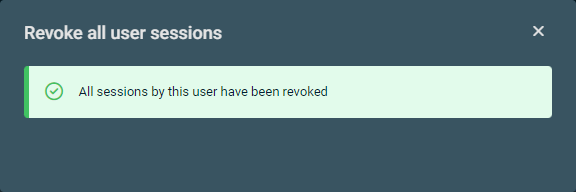 The following description from Microsoft explains the result of this action: "This will revoke all sessions for the user, requiring the user to re-sign in from all devices." |
| Edit User | |
| Offboard User | |
| Export to CSV |
Export selected rows or all rows to a Comma-separated Values (CSV) file with applied filters and sorting. |
 User details
NAVIGATION Microsoft 365 > All Users > select a tenant > select a user
To access the details page for a specific user, click their User Name.
When a user details page is open, you can view each of the available cards by scrolling down on the page or jump to a specific card by selecting it in the upper-left corner of the page underneath the user's name.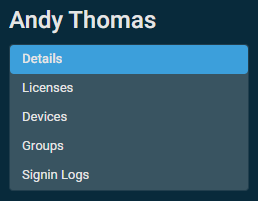
NOTE Within the Microsoft 365 menu in the left navigation menu, up to five of the most recently viewed users are listed for quick access.
Details card
The Details card provides a summary of the selected user.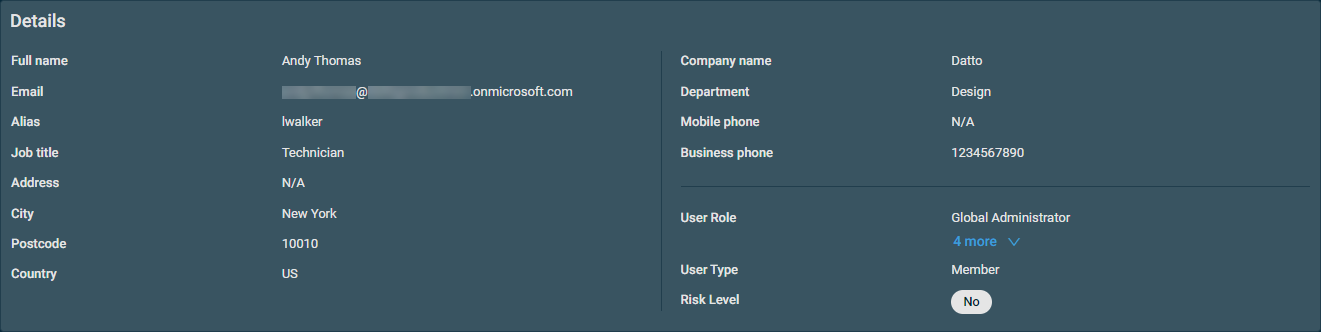
These details are retrieved from Microsoft and can be managed from the following areas:
-
NAVIGATION Microsoft 365 admin center > Users > Active users > select a user > Account tab
-
NAVIGATION Microsoft Entra ID > Users > select a user > Properties tab
The following table displays the information available in the Details card:
| Field | Description |
|---|---|
| Full Name | The Display name of the user as it exists in Microsoft. NOTE This field is searchable via global search. Refer to Global search. |
| User Principal Name | The user name/user principal name as it exists in Microsoft. NOTE This field is searchable via global search. Refer to Global search. |
| Alias | Displayed if configured in Microsoft or via Datto RMM. Refer to Microsoft 365 user management. |
| User Type | Displays Member or Guest. |
| MFA Status | Displays Yes or No. Refer to MFA Status and Conditional Access Status requirements. |
| Job Title | Displayed if configured in Microsoft or via Datto RMM. Refer to Microsoft 365 user management. |
| Company Name | Displayed if configured in Microsoft or via Datto RMM. Refer to Microsoft 365 user management. |
| Department | Displayed if configured in Microsoft or via Datto RMM. Refer to Microsoft 365 user management. |
| Employee ID | Displayed if configured in Microsoft or via Datto RMM. Refer to Microsoft 365 user management. |
| Employee Type | Displayed if configured in Microsoft or via Datto RMM. Refer to Microsoft 365 user management. |
| Employee Hire Date | Displayed if configured in Microsoft or via Datto RMM. Refer to Microsoft 365 user management. |
| Office Location | Displayed if configured in Microsoft or via Datto RMM. Refer to Microsoft 365 user management. |
| Manager | Displayed if configured in Microsoft or via Datto RMM. Refer to Microsoft 365 user management. |
| Address | Displayed if configured in Microsoft or via Datto RMM. Refer to Microsoft 365 user management. |
| City | Displayed if configured in Microsoft or via Datto RMM. Refer to Microsoft 365 user management. |
| State | Displayed if configured in Microsoft or via Datto RMM. Refer to Microsoft 365 user management. |
| Postcode | Displayed if configured in Microsoft or via Datto RMM. Refer to Microsoft 365 user management. |
| Country | Displayed if configured in Microsoft or via Datto RMM. Refer to Microsoft 365 user management. |
| Business Phone | Displayed if configured in Microsoft or via Datto RMM. Refer to Microsoft 365 user management. |
| Mobile Phone | Displayed if configured in Microsoft or via Datto RMM. Refer to Microsoft 365 user management. |
| Displayed if configured in Microsoft or via Datto RMM. Refer to Microsoft 365 user management. | |
| Usage Location | Displayed if configured in Microsoft or via Datto RMM. Refer to Microsoft 365 user management. |
Roles card
The Roles card provides a summary of the selected user's assigned roles.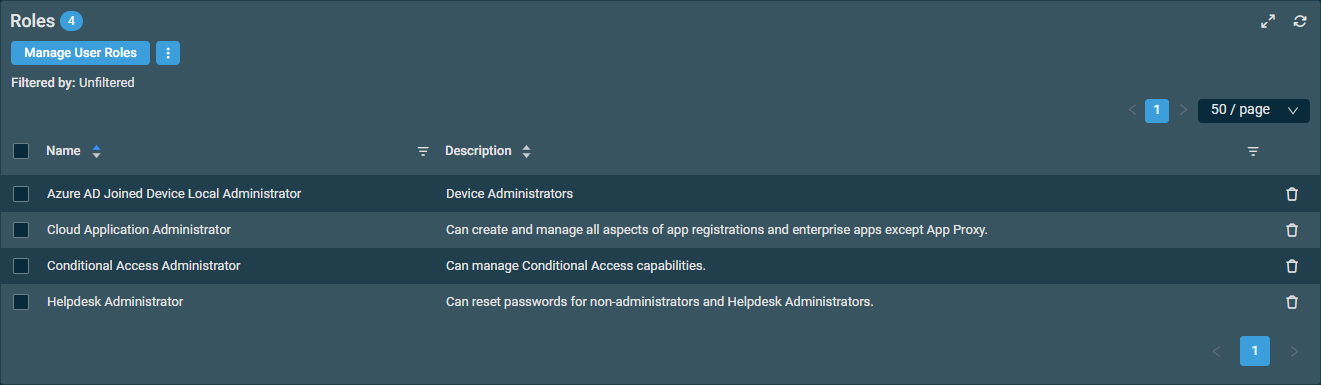
Click Manage User Roles to add or remove user roles.
The table displays the role name and description.
You can filter any columns with the filter icon . The Filtered by bar displays all applied column filters.If a filter search term includes wildcard characters (for example, underscores and percent signs), they serve as normal characters if they are preceded by a backslash. For details, refer to Wildcard characters.Click the X next to any filter to remove that filter or click Reset Filters to remove all filters.If no filter is applied, the Filtered by bar displays Unfiltered.The filter selection in the columns will not persist the next time the page is accessed as the table will return to the default view.
The table density is set to condensed theme by default. To change it to relaxed theme, click the density toggle icon. The selection will persist across all pages.
The number of results displayed can be specified by selecting the desired number from the pagination control. This selection will persist the next time the page is accessed.
Action buttons
To access the available action buttons, click the Row Actions icon. The action buttons are unavailable if no row is selected or if the action is not applicable to the selected rows. The check boxes allow you to select one or more rows. Select all rows shown on the page by selecting the check box in the table header.
The following table lists all available action buttons:
| Action Button | Description |
|---|---|
| Export Selected Rows to CSV | In the confirmation dialog box, select whether to show table headers in the file by toggling the Show table headers in the exported CSV button. Click Confirm to download the file. Any column selections, filters, and sorting that have been applied to the table will also be applied in the CSV file. A maximum number of 500 rows can be exported to a single CSV file. The Export All (Max. 500) Rows to CSV action is available without selecting any row in the table. |
| Export All (Max. 500) Rows to CSV | |
| Uncheck All | Clears all selected rows. The number of selected rows is indicated next to the Row Actions icon. |
Licenses card
The Licenses card provides a license summary of the selected user.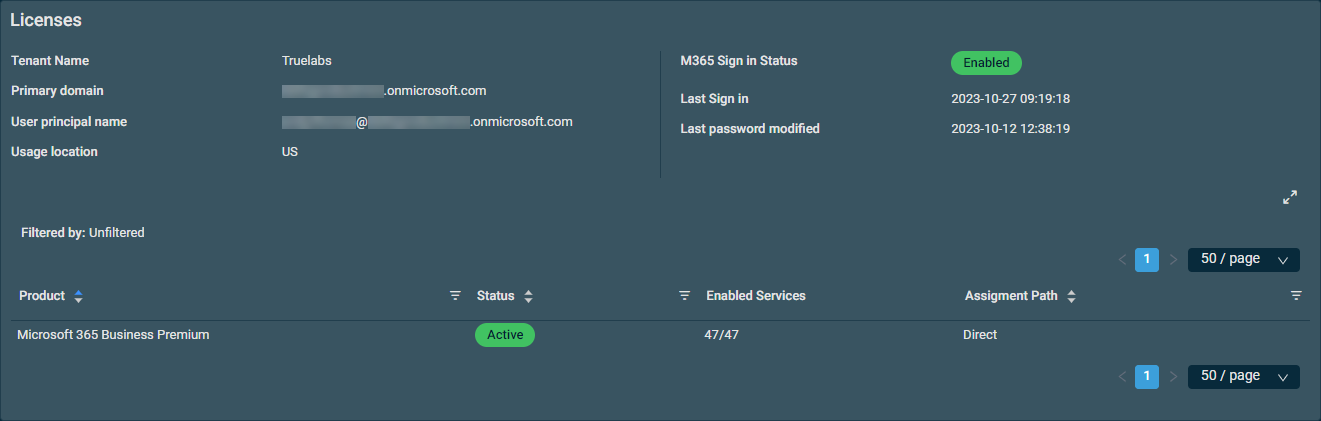
Click Manage User Licenses to add or remove user licenses.
NOTE Upon adding a license, the license will be applied instantaneously to the user account.
These details are retrieved from Microsoft and can be managed from the following areas:
-
NAVIGATION Microsoft 365 admin center > Users > Active users > select a user > Account tab
-
NAVIGATION Microsoft Entra ID > Users > select a user > Properties tab
The following table displays the information available in the Licenses card:
| Field | Description |
|---|---|
| Tenant Name | The name of the client tenant the user belongs to, as it exists in Microsoft Entra ID. Refer to All Tenants. |
| Primary Domain | The Primary domain of the client tenant the user belongs to, as it exists in Microsoft Entra ID. |
| User Principal Name | The User principal name/Username of the user as it exists in Microsoft. |
| Usage Location | The Usage location of the user as it exists in Microsoft. |
| M365 Sign In Status |
Displays whether or not signing into this user account has been blocked, as follows:
Refer to Block Sign In/Unblock Sign In in Microsoft 365 Integration. |
| Last Sign In | Displays how long ago the user's latest sign-in occurred. Time stamps reflect the user time zone and preferred date format configured on the Setup > My Settings page. Hovering over any time stamp will show its date in the alternative format. Refer to User Time Zone and Date Format. The Sign in Logs card displays additional sign-in information. Refer to Signin Logs card. |
| Last Password Modification | Displays how long ago the user's latest password change occurred. Time stamps reflect the user time zone and preferred date format configured on the Setup > My Settings page. Hovering over any time stamp will show its date in the alternative format. Refer to User Time Zone and Date Format. |
|
List of licenses assigned to the user |
Displays the license details, including the product, status, service enablement, and assignment path. You can filter any columns with the filter icon The table density is set to condensed theme by default. To change it to relaxed theme, click the density toggle icon. The number of results displayed can be specified by selecting the desired number from the pagination control. This selection will persist the next time the page is accessed. |
Groups card
The details of any groups the user is assigned to are retrieved from Microsoft. Learn about groups and access rights in Microsoft Entra ID.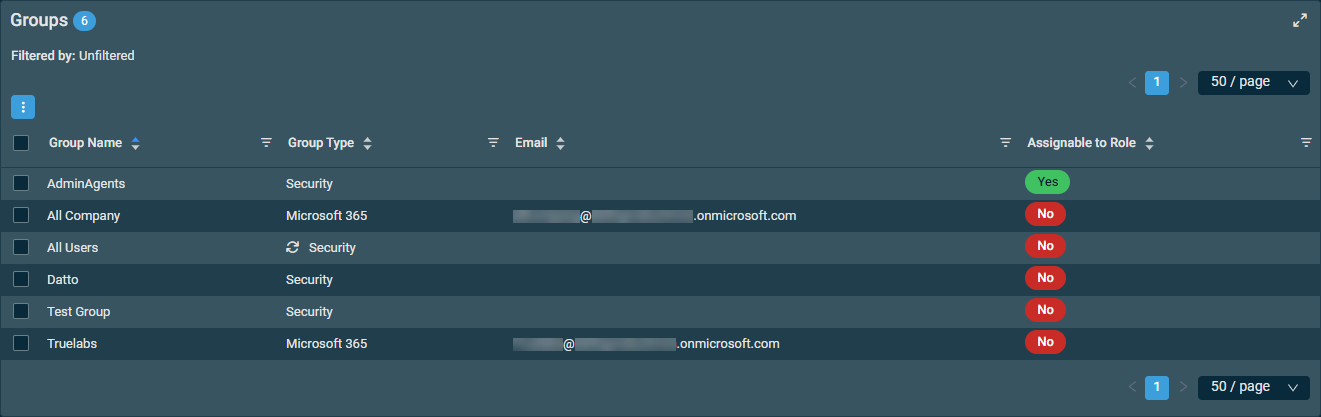
Click Manage User Groups to add or remove groups.
The badge in the table header shows the number of groups the user is assigned to. If the user is not assigned to any groups, the list is empty.
The table displays the following information:
| Field | Sortable? | Description |
|---|---|---|
| Group Name |
|
The name of the group as it exists in Microsoft. To narrow the list, click the filter icon , enter a term, and click Apply. To see the full list, click Reset. |
| Group Type |
|
The group type, as set in Microsoft. To narrow the list, click the filter icon , enter a term, and click Apply. To see the full list, click Reset. |
|
|
The email address of the group as it exists in Microsoft. To narrow the list, click the filter icon , enter a term, and click Apply. To see the full list, click Reset. |
|
| Assignable to Role |
|
Displays whether or not the group can be assigned to roles, as follows:
Learn about using Azure AD groups to manage role assignments. Click the filter icon |
You can filter any columns with the filter icon . The Filtered by bar displays all applied column filters.If a filter search term includes wildcard characters (for example, underscores and percent signs), they serve as normal characters if they are preceded by a backslash. For details, refer to Wildcard characters.Click the X next to any filter to remove that filter or click Reset Filters to remove all filters.If no filter is applied, the Filtered by bar displays Unfiltered.The filter selection in the columns will not persist the next time the page is accessed as the table will return to the default view.
The table density is set to condensed theme by default. To change it to relaxed theme, click the density toggle icon. The selection will persist across all pages.
The number of results displayed can be specified by selecting the desired number from the pagination control. This selection will persist the next time the page is accessed.
Action buttons
To access the available action buttons, click the Row Actions icon. The action buttons are unavailable if no row is selected or if the action is not applicable to the selected rows. The check boxes allow you to select one or more rows. Select all rows shown on the page by selecting the check box in the table header.
The following table lists all available action buttons:
| Action Button | Description |
|---|---|
| Export Selected Rows to CSV | In the confirmation dialog box, select whether to show table headers in the file by toggling the Show table headers in the exported CSV button. Click Confirm to download the file. Any column selections, filters, and sorting that have been applied to the table will also be applied in the CSV file. A maximum number of 500 rows can be exported to a single CSV file. The Export All (Max. 500) Rows to CSV action is available without selecting any row in the table. |
| Export All (Max. 500) Rows to CSV | |
| Uncheck All | Clears all selected rows. The number of selected rows is indicated next to the Row Actions icon. |
Devices card
The Devices card shows all Intune-enrolled devices assigned to the user. 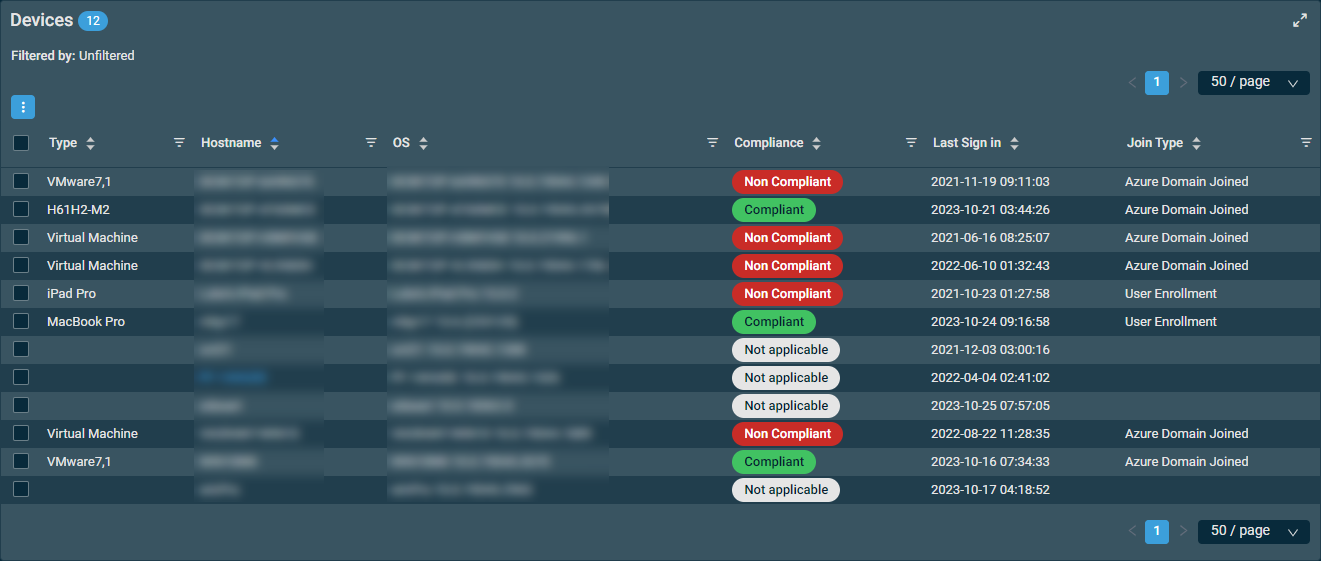
The Devices card displays the same columns available on the All Devices page. Refer to All Devices.
Intune Quick Actions can be performed for a single device from the Devices card. Refer to Intune Quick Actions.
Action buttons
To access the available action buttons, click the Row Actions icon. The action buttons are unavailable if no row is selected or if the action is not applicable to the selected rows. The check boxes allow you to select one or more rows. Select all rows shown on the page by selecting the check box in the table header.
The following table lists all available action buttons:
| Action Button | Description |
|---|---|
| Export Selected Rows to CSV | In the confirmation dialog box, select whether to show table headers in the file by toggling the Show table headers in the exported CSV button. Click Confirm to download the file. Any column selections, filters, and sorting that have been applied to the table will also be applied in the CSV file. A maximum number of 500 rows can be exported to a single CSV file. The Export All (Max. 500) Rows to CSV action is available without selecting any row in the table. |
| Export All (Max. 500) Rows to CSV | |
| Uncheck All | Clears all selected rows. The number of selected rows is indicated next to the Row Actions icon. |
Device to Datto RMM interlinking
For Intune-enrolled Windows and macOS devices that also have the Datto RMM agent installed, the Hostname column is displayed as a clickable link. Clicking the hostname navigates directly to the device card in Datto RMM, enabling cross-platform navigation between Microsoft 365 device management and RMM device management.
RMM Agent status
The RMM Agent Status column indicates the relationship between the Intune-enrolled device and the Datto RMM agent:
| Status | Description |
|---|---|
| Device is online | The Datto RMM agent is installed and currently online. |
| Device is offline | The Datto RMM agent is installed but the device is currently offline. |
| RMM agent not installed | The Datto RMM agent is not installed on this device. |
| RMM agent not supported | The Datto RMM agent cannot be installed on this device type (for example, mobile device or tablet). |
Signin Logs card
The Signin Logs card displays the user's sign-in history as retrieved from Microsoft. Learn about sign-in logs in Microsoft Entra ID.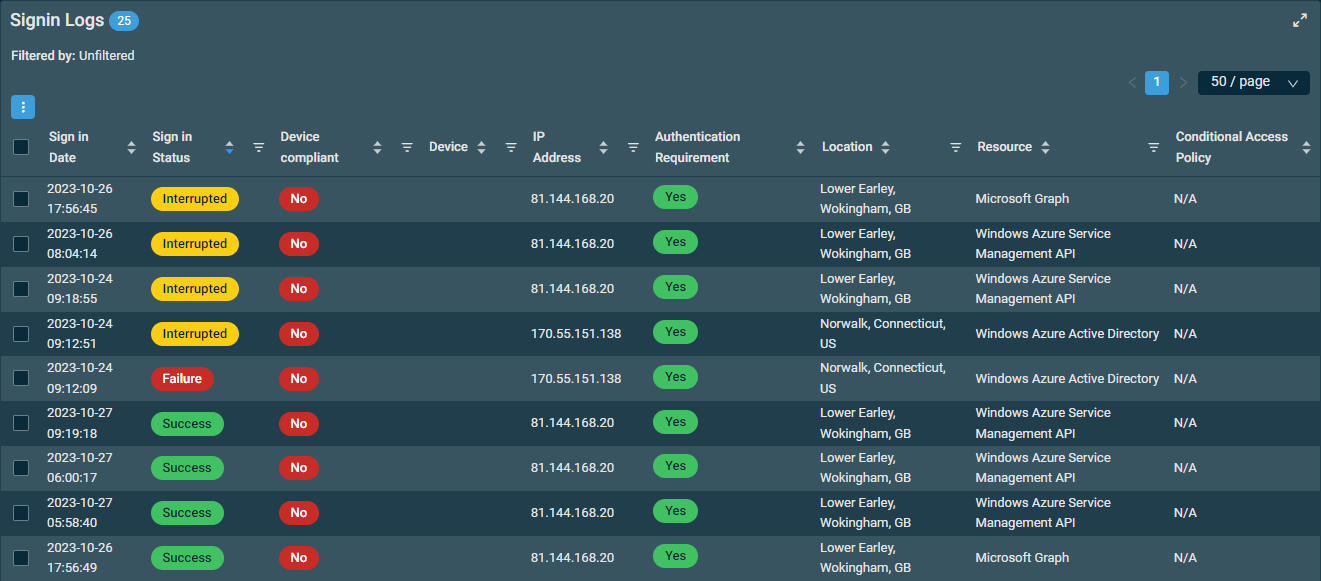
The badge in the table header shows the number of user sign-ins logged. If no sign-ins are logged, the list is empty.
The table displays the following information:
| Field | Sortable? | Description |
|---|---|---|
| Sign In Date |
|
Displays how long ago the sign-in occurred. Time stamps reflect the user time zone and preferred date format configured on the Setup > My Settings page. Hovering over any time stamp will show its date in the alternative format. Refer to User Time Zone and Date Format. |
| Sign In Status |
|
Displays if the sign-in occurred with or without errors. Click the filter icon and select Failure, Interrupted, or Success to filter by the status. |
| Device compliant |
|
Indicates whether the device the user logged in to is compliant. Click the filter icon and select No, Yes, or N/A to filter by device compliance. You can select more than one option at a time. |
| Device |
|
The hostname of the device, if available from Microsoft. To narrow the list, click the filter icon , enter a term, and click Apply. To see the full list, click Reset. |
| IP Address |
|
The IP address the sign-in occurred from. Microsoft provides the following description of IP addresses in relation to sign-ins: "There's no definitive connection between an IP address and where the computer with that address is physically located. Mobile providers and VPNs issue IP addresses from central pools that are often far from where the client device is actually used. Currently, converting IP address to a physical location is a best effort based on traces, registry data, reverse lookups and other information." To narrow the list, click the filter icon , enter a term, and click Apply. To see the full list, click Reset. |
| Authentication Requirement |
|
Displays if authentication was required for the sign-in. |
| Location |
|
The town, state, and country associated with the IP address the sign-in occurred from. To narrow the list, click the filter icon , enter a term, and click Apply. To see the full list, click Reset. |
| Resource |
|
The resource used to sign in. To narrow the list, click the filter icon , enter a term, and click Apply. To see the full list, click Reset. |
| Conditional Access Policy |
|
Displays any Microsoft Conditional Access policies that applied to the user and application during sign-in. If no policy applied, the field displays N/A. Refer to Conditional Access Status. To narrow the list, click the filter icon , enter a term, and click Apply. To see the full list, click Reset. |
You can filter any columns with the filter icon . The Filtered by bar displays all applied column filters.If a filter search term includes wildcard characters (for example, underscores and percent signs), they serve as normal characters if they are preceded by a backslash. For details, refer to Wildcard characters.The Filtered by bar displays all applied column filters.Click the X next to any filter to remove that filter or click Reset Filters to remove all filters.If no filter is applied, the Filtered by bar displays Unfiltered.The filter selection in the columns will not persist the next time the page is accessed as the table will return to the default view.
The table density is set to condensed theme by default. To change it to relaxed theme, click the density toggle icon. The selection will persist across all pages.
The number of results displayed can be specified by selecting the desired number from the pagination control. This selection will persist the next time the page is accessed.
Action buttons
To access the available action buttons, click the Row Actions icon. The action buttons are unavailable if no row is selected or if the action is not applicable to the selected rows. The check boxes allow you to select one or more rows. Select all rows shown on the page by selecting the check box in the table header.
The following table lists all available action buttons:
| Action Button | Description |
|---|---|
| Export Selected Rows to CSV | In the confirmation dialog box, select whether to show table headers in the file by toggling the Show table headers in the exported CSV button. Click Confirm to download the file. Any column selections, filters, and sorting that have been applied to the table will also be applied in the CSV file. A maximum number of 500 rows can be exported to a single CSV file. The Export All (Max. 500) Rows to CSV action is available without selecting any row in the table. |
| Export All (Max. 500) Rows to CSV | |
| Uncheck All | Clears all selected rows. The number of selected rows is indicated next to the Row Actions icon. |
Offboarding a user
To learn about how to offboard a user, and create a shared mailbox if needed, refer to Offboarding a user or revoking a user's access.
Device Management
Device Management is a dedicated area within the Microsoft 365 Integration that provides cross-tenant visibility into all Intune-enrolled devices managed through your connected Microsoft 365 tenants. This section covers the All Devices page, Intune Quick Actions, and Windows 365 Cloud PC agent deployment.
All Devices
NAVIGATION Microsoft 365 > All Devices.
By default, the page displays all devices across all tenants. To populate a list of devices from specific tenants, select one or more tenants from the Select Tenant drop-down menu.

You can filter by one or more tenants using the filter icon in the Tenant Name column. Refer to Tenant Name.
You can also open this list from the All Tenants page. Click View Devices in the Devices column next to a tenant to view a list of all devices in that tenant. Refer to Devices in List of tenants.
The badge in the table header shows the number of devices in the currently displayed list, whether filtered or unfiltered.
The Column Chooser icon  allows you to select which columns should be visible in the list. The following columns are available:
| Field | Sortable? | Description |
|---|---|---|
| Hostname (default, always visible) |
|
The display name of the device as it exists in Microsoft. To narrow the list, click the filter icon , enter a term, and click Apply. To see the full list, click Reset. |
| Tenant (default) |
|
The name of the client tenant the device belongs to, as it exists in Microsoft Entra ID. To narrow the list, click the filter icon , enter a term, and click Apply. To see the full list, click Reset.NOTE You can change the selected tenant from the Select Tenant drop-down menu at the top of the page. |
| User Principal Name (default) |
|
The user name/user principal name (user email address) as it exists in Microsoft. |
| Compliant (default) |
|
Displays whether or not the device is compliant, as follows:
Click the filter icon |
| Operating System (default) | The version of the Operating System (OS) on the device. To narrow the list, click the filter icon , enter a term, and click Apply. To see the full list, click Reset. |
|
| Join Type (default) |
|
The method used to enroll the device. To narrow the list, click the filter icon , enter a term, and click Apply. To see the full list, click Reset. |
| Enrollment Date (default) |
|
Displays the date the device was enrolled in Microsoft 365 |
| Last Sign In (default) |
|
Displays how long ago the device was last signed into. Time stamps reflect the user time zone and preferred date format configured on the Setup > My Settings page. Hovering over any time stamp will show its date in the alternative format. Refer to User Time Zone and Date Format. |
| Android Security Patch Level |
|
Displays the security patch level for any Microsoft 365 managed Android devices. |
| Azure AD Device ID | Displays the Azure AD device ID for the device. | |
| Device Category |
|
Displays the device's assigned category in Microsoft 365, if assigned. |
| Device Registration State |
|
Displays the device's registration state. |
| Disk Encryption State | Displays the device's disk encryption status and model. | |
| Display Name | Displays the device's display name, if configured. | |
| Email Address |
|
Displays the email address or addresses for the user associated with the device. |
| Enrollment Profile Name |
|
Displays the name of the device's enrollment profile, if one is assigned. |
| Ethernet MAC Address | Displays the device's Ethernet MAC address. | |
| Free Storage Space |
|
Displays the device's free storage space. |
| Grace Period End Date | Displays the end date of a device's service if the Microsoft 365 subscription has lapsed. | |
| Image Display Name | Displays the display name of the device's installed OS. | |
| IMEI | Displays the IMEI number for mobile devices. | |
| Is Encrypted |
|
Displays the device's encryption status. |
| Is Supervised |
|
Displays the device's supervision status. |
| Jail Broken | Displays if the device has been identified as jail broken. | |
| Join Type |
|
The method used to enroll the device. To narrow the list, click the filter icon , enter a term, and click Apply. To see the full list, click Reset. |
| Last Modified Date | Displays how long ago the device was last modified. Time stamps reflect the user time zone and preferred date format configured on the Setup > My Settings page. Hovering over any time stamp will show its date in the alternative format. Refer to User Time Zone and Date Format. |
|
| Last Sync Date Time |
|
Displays the last time the device's data was synced with Microsoft. |
| Managed Device ID | Displays the device's ID. | |
| Managed Device Name | Displays the device's management name. This is in the format of User_OS_JoinedDate_JoinedTime. EXAMPLE A Windows device that joined with user Andy Thomas at 10:44AM on February 2, 2026 would show as andy.thomas_Windows_2/2/2026_10:44 AM. |
|
| Managed Device Owner Type |
|
Displays the ownership of the device. This can be Company, Personal, or Unknown. |
| Management Agent |
|
Displays the management channel of the device. EXAMPLE This field has several possible values, which include EAS, MDM, intuneClient, etc. The default value for this field is Unknown. |
| Management Certificate Expiration Date |
|
Displays the device management certificate expiration date. |
| Model |
|
Displays the device model. To narrow the list, click the filter icon , enter a term, and click Apply. To see the full list, click Reset. |
| On-Premises Connection | Displays the device's on-premises connection data. | |
| OS Version | Displays the device's OS version. | |
| Partner Reported Threat State |
|
Indicates the threat state of a device when a Mobile Threat Defense partner is in use by the account and device. |
| Physical Memory |
|
Displays the total memory of the device. |
| Provisioning Policy ID | Displays the device's provisioning policy ID. | |
| Provisioning Policy Name | Displays the device's provisioning policy name. | |
| Provisioning Type | Displays the device's provisioning type. | |
| Registration Date | Displays the device's registration date. | |
| Require User Enrollment Approval |
|
Displays if a managed iOS device is configured for user approval enrollment. |
| Serial Number | Displays the device's serial number. | |
| Service Plan ID | Displays the device's service plan ID. | |
| Service Plan Name | Displays the device's service plan name. | |
| Service Plan Type | Displays the device's service plan type. | |
| Status | Displays the device's provisioning status. | |
| Total Storage Space |
|
Displays the device's total storage. |
| WiFi MAC Address | Displays the device's Wi-Fi MAC address. |
The columns can be reordered and resized. The order and size of the columns will persist the next time the page is accessed.
You can filter any columns with the filter icon . The Filtered by bar displays all applied column filters.If a filter search term includes wildcard characters (for example, underscores and percent signs), they serve as normal characters if they are preceded by a backslash. For details, refer to Wildcard characters.Click the X next to any filter to remove that filter or click Reset Filters to remove all filters.If no filter is applied, the Filtered by bar displays Unfiltered.The filter selection in the columns will persist the next time the page is accessed.
The table density is set to condensed theme by default. To change it to relaxed theme, click the density toggle icon. The selection will persist across all pages.
The number of results displayed can be specified by selecting the desired number from the pagination control. This selection will persist the next time the page is accessed.
Security Level requirements
Access to the All Devices page is controlled by the Devices permission in Security Levels:
- None: The All Devices page and user-level device cards are hidden.
- View: The user can see the All Devices page and browse device properties.
- Manage: Same as View, plus the ability to perform Intune Quick Actions.
Device actions
To access the device actions, click the Row Actions icon.
The action buttons are unavailable or become unavailable if no row is selected in the table or if the action button is not applicable to the selected rows. The check boxes allow you to select one or more rows. Select all rows shown on a page by selecting the check box in the table header.
| Action Button | All Rows | Description |
|---|---|---|
| Export all (max. 500) rows to CSV |
|
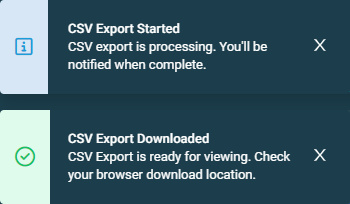
In the confirmation dialog box that appears, click Confirm to download the file or Cancel to close out of the dialog box. Pop-up notifications will inform you of the start and completion of the CSV export action. Click the X to close the notification; otherwise, the notification will automatically be cleared after five minutes. Any column selections, filters, and sorting that have been applied to the table will also be applied in the CSV file. |
| Export selected rows to CSV | In the confirmation dialog box that appears, select whether to show table headers in the file by turning on the toggle for Show table headers in the exported CSV. Click Confirm to download the file or Cancel to close out of the dialog box. Any column selections, filters, and sorting that have been applied to the table will also be applied in the CSV file. |
|
| Uncheck All |
|
Clears all selected rows. The number of selected rows is indicated next to the Row Actions icon. |
 Intune Quick Actions
Intune Quick Actions can be performed within the Microsoft 365 Integration for Intune-enrolled devices. This feature is supported for Windows, Android, and iOS devices, with macOS and additional functionality to follow in a future release.
Prerequisites
- Reconfigure integration permissions: After upgrading to RMM 14.7 or later, navigate to Setup > Integrations > Microsoft 365 and reconfigure the integration to consent to the new Intune device management permissions.
- DRMM agent for Windows: To perform Quick Actions on Intune-enrolled Windows devices, the Datto RMM agent must be installed on the device.
- No additional license for mobile: You can perform Quick Actions on Intune and Entra ID user-enrolled Android and iOS devices without an additional license.
- macOS not supported: Intune Quick Actions are not currently available for macOS devices.
- Security Level: The user's Security Level must have the Devices permission set to Manage (not just View).
Intune Quick Actions allow you to perform the following actions:
| Action | Description | Confirmation | Destructive | Supported OS |
|---|---|---|---|---|
| Sync Device | Triggers an immediate check-in with Intune to retrieve the latest policies and configurations. | Cancel / Confirm | No | Windows, Android, iOS |
| Remote Lock | Locks the device remotely, requiring the user to enter their PIN or password to unlock. | Cancel / Confirm | No | Windows, Android, iOS |
| Wipe Device | Restores the device to factory default settings. The device will need to be re-enrolled with the same or a different Microsoft 365 user. | Cancel / Confirm + options | Yes | Windows, Android, iOS |
| Retire Device | Removes corporate data and unenrolls the device from Intune management. Personal data is preserved. | Cancel / Confirm + options | Yes | Windows, Android, iOS |
| Reboot Now | Immediately restarts the device. | Cancel / Confirm | No | Windows |
IMPORTANT The Wipe Device and Retire Device options are destructive actions that cannot be undone. Always verify you are targeting the correct device before confirming.
Wipe Device options
The Wipe Device confirmation dialog includes two additional options that allow you to override the complete wipe behavior:
| Option | Behavior |
|---|---|
| Keep enrollment data | Resets the device to factory settings while keeping existing Intune and Entra ID enrollment. All user data and apps are removed, and the device is automatically re-provisioned without requiring manual re-enrollment. |
| Keep user data | Removes Intune management and corporate policies while keeping the user's personal data. During the reset, the device will remain in Intune and Entra ID, but user files and profiles are preserved on the device. |
NOTE If neither option is selected, the standard full wipe is performed: all data, apps, settings, and enrollment are removed, and the device returns to an out-of-box state.
MDM Action Status
After triggering an Intune Quick Action, the MDM Action Status column on the Devices card shows the real-time status of the operation in the format:
[Action Name] — [State] at [Timestamp]
Possible states include: Pending, In Progress, Completed, and Failed. When no action is pending or recently completed, the column displays No pending action.
Windows 365 Cloud PC Agent Deployment
Datto RMM agents can be deployed automatically to Windows 365 Business Cloud PCs through the Microsoft 365 integration. This provides full visibility and management of both physical and virtual endpoints from a single platform, removing blind spots for MSPs managing cloud-first or hybrid device estates.
NOTE Cloud PC operations use the Microsoft Graph Beta API, which has a lower availability SLA than General Availability (GA) endpoints. While the feature is stable, occasional API availability fluctuations from Microsoft may affect Cloud PC discovery or deployment operations.
Prerequisites
- Refresh integration permissions: Navigate to Setup > Integrations > Microsoft 365 and refresh the integration authentication to add the required Windows 365 API permissions.
- Map Microsoft 365 tenants to DRMM Sites: Each Microsoft 365 tenant must be mapped to a Datto RMM site so that deployed agents are assigned to the correct site.
- GDAP or customer consent: The MSP must have GDAP or customer consent for the managed tenant.
- Required permissions: CloudPc.ReadWrite.All permission and Windows 365 Admin permission are required. Refer to API permissions.
Ad-hoc deployment (manual)
Deploy the Datto RMM agent to specific Cloud PCs on demand:
- Navigate to a managed Microsoft 365 tenant's Intune devices (via the user's Devices card or All Devices page).
- Filter for Windows 365 Cloud PCs (identifiable by device type or model).
- Select one or more Cloud PC devices.
- Click the Deploy Datto RMM Agent button.
- Monitor deployment progress in the status tracking view.
Automatic deployment
Enable automatic deployment to ensure all discovered Windows 365 Cloud PCs receive the Datto RMM agent without manual intervention:
- Navigate to the Microsoft 365 CSP account settings or configuration page.
- Enable Automatically deploy Datto RMM agents to all discovered Windows 365 Cloud PCs.
- Click Save/Apply.
Once enabled, Datto RMM will automatically discover new Cloud PCs during each device sync cycle (approximately every 15–30 minutes) and deploy the agent to any Cloud PC that does not already have it installed. The system automatically skips devices that already have the agent installed.
Deployment status tracking
After initiating a deployment, you can track the status of each device in real time:
| Status | Description |
|---|---|
| Pending | Deployment request queued, waiting to be processed. |
| Deploying | Agent installation is in progress on the Cloud PC. |
| Succeeded | Agent installed successfully. |
| Failed | Deployment failed. Check the error code and message for details. |
NOTE Deployments are batched in groups of up to 50 Cloud PCs per API call. For larger selections, the system automatically splits the deployment into sequential batches.
Cloud PC deployment errors
If a deployment fails, the status will show an error code and message. Common errors include:
| Error Code | Resolution |
|---|---|
| executeActionFailed | Deploy agent with expected error. Check Cloud PC logs; may be a permission or network issue. |
| executeActionTimeout | Deploy agent timed out. Retry the deployment; may indicate slow network or high load. |
| deviceNotExist | Cloud PC does not exist. Remove from Datto inventory. |
| deviceNotAvailable | Cloud PC is in unavailable status or not ready. Wait and retry later. |
| checkDiskSpaceFailed | Insufficient disk space on Cloud PC. User action needed to free disk space. |
| checkNetworkConnectionFailed | Cloud PC network check failed. Troubleshoot network connectivity on the Cloud PC. |
| agentNotExist | Agent URL not accessible. Verify the agentUrl configuration in Configure Agent Settings. |
| agentFormatInvalid | Invalid agent file type. Must be EXE, MSI, or MSIx. Contact Datto support. |
| agentChecksumInvalid | Agent file checksum failed. Re-upload the agent binary and verify file integrity. |
Troubleshooting
To learn more about troubleshooting the Microsoft 365 integration, refer to Microsoft 365 Integration troubleshooting.
Known limitations
User filtering
The All Users list supports up to 999 users per tenant. Server-side filtering is limited to the createdAfter parameter. Filtering by license type, department, or other attributes requires loading the full user list first. For tenants with very large user counts, consider using the tenant filter to narrow results.
Audit trail scope
The Activity Log captures a 90-day audit trail of user-related changes, including user creation, deletion, account disabling, role assignment changes, and group membership changes. The 90-day retention period is fixed and cannot be customized.
The following change types are not captured in the Microsoft 365 integration audit trail and require their respective Microsoft portals:
- Device changes: Use Intune audit logs.
- Group property changes: Use Microsoft Graph AuditLogs.
- License assignment changes: Use Microsoft Graph License APIs.
- Mailbox access changes: Use Exchange audit logs.
Cloud PC operations
Cloud PC discovery and agent deployment operations use the Microsoft Graph Beta API, which has a lower availability SLA than General Availability endpoints. Use these capabilities for standard operational workflows and be aware that occasional API availability fluctuations from Microsoft may affect responsiveness.
Mailbox operations
Mailbox operations such as shared mailbox conversion, mailbox access delegation, and identity sharing are asynchronous. The integration tracks the operation using an ActivityId and will report the final status upon completion. Operations may take a few moments to propagate across Microsoft services.


