Deploying the Datto Endpoint Backup Agent and monitoring backup via Datto RMM
This article provides step-by-step instructions for deploying Datto Endpoint Backup via Datto RMM using the Datto Endpoint Backup Agent [WIN] component and then monitoring backup using the Datto Endpoint Backup Monitor [WIN] component.
IMPORTANT To track changes between backups, you must schedule a one-time reboot after the initial installation of the Datto Endpoint Backup Agent. The reboot is required to run incremental backups. Subsequent agent updates do not require a reboot.
This workflow installs the latest version of the Datto Endpoint Backup, Endpoint Backup with Disaster Recovery, or Endpoint Backup for Workstations (legacy) agent onto a Windows system.
NOTE For traditional PC installation steps, refer to Installing and Registering the Datto Endpoint Backup Agent in the Unified Backup Help.
How to...
Navigate to Policy Management
-
Log in to the UniView Portal.
-
Go to Endpoint Backup > Policy Management.
-
Select + Policy and use the provided smart defaults or customize the policy according to your requirements.
For more information on configuring a backup policy, refer to the Datto Endpoint Backup documentation on creating Backup Policies.
- In the UniView Portal, navigate to Endpoint Backup > Deployment Tokens.
- From here, you can generate a deployment token.
NOTE This copied token is required for agent deployment in Datto RMM, which is detailed in Deploy the Datto Endpoint Backup Agent .
NOTE This token is different than the one used in the legacy (v1) deployment. For information on generating a token for the legacy deployment, refer to Access your RMM token .
- In your Datto RMM account, navigate to the ComStore. Refer to ComStore.
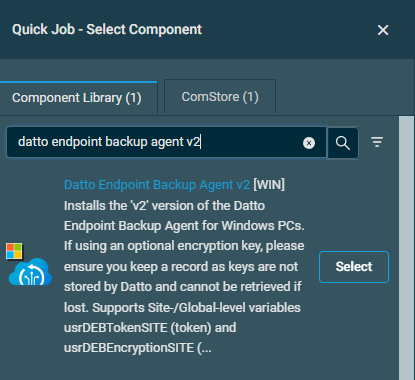
- Search for the Datto Endpoint Backup Agent v2 [WIN] component. This Datto RMM package component will allow you to deploy the Datto Endpoint Backup Agent to multiple devices from a single source.
- Click Add to add the component to your Component Library. Refer to Component Library.
- In your Datto RMM account, navigate to Sites > All Sites and click the name of a site in the list. Refer to Sites.
- In the list of devices that belong to the selected site, select the check box(es) of the device(s) on which you'd like to install the Datto Endpoint Backup Agent. Refer to List of devices.
- Click Quick Job. Refer to Action buttons and Quick jobs.
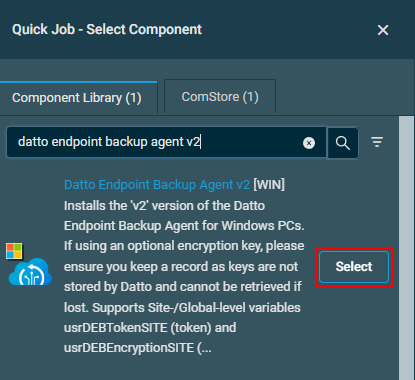
- In the pane that opens on the right side of the page, you'll see the list of components available to run as quick jobs. If you've added the Datto Endpoint Backup Agent v2 [WIN] component to your Component Library, it will appear in the default Component Library tab in the pane. If necessary, enter the component name in the search bar to narrow the list of results.
- Click Select.
- In the Quick Job dialog box, you can configure how you want to deploy the agent.
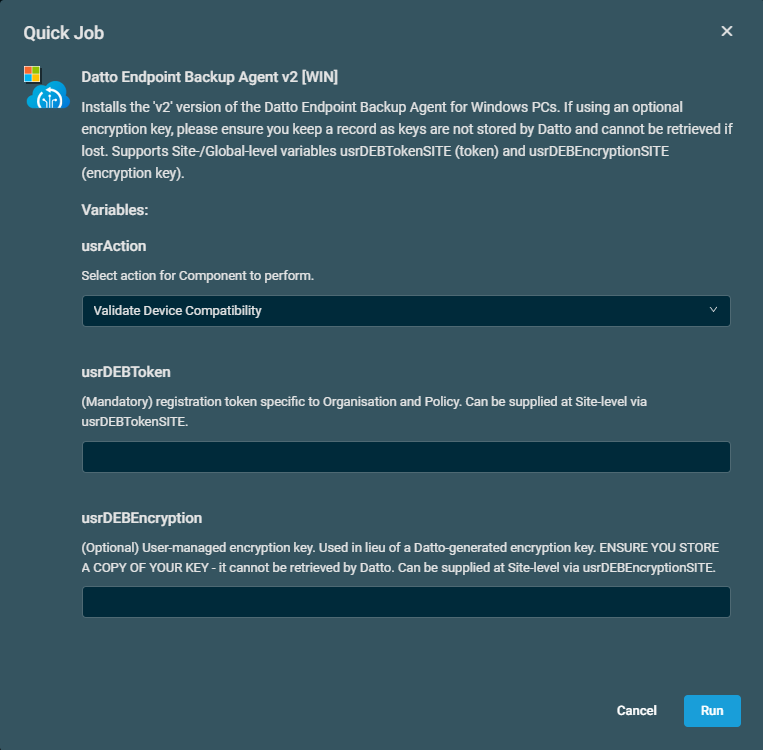
- For the usrAction variable, select which action you want the component to perform from the following three options:
- Validate Device Compatability: Checks the device to make sure that there are no blockers to installing the Datto Endpoint Backup agent. If there are, they will be in the output of the job.
- Install Datto Endpoint Backup: Installs the Datto Endpoint Backup Agent on the targeted device(s).
- Uninstall Datto Endpoint Backup (Any): Uninstalls any installs of Datto Endpoint Backup on the targeted device(s).
- For the usrDEBToken variable, paste the registration token you generated when you created the RMM template in Datto Partner Portal and copied it to your clipboard. Refer to Create your RMM template and Access your RMM token .
- For the optional usrDEBEncryption variable, you can enter in a user-managed encryption key, in lieu of a Datto-generated encryption key.
- For the usrAction variable, select which action you want the component to perform from the following three options:
NOTE If you wish to target jobs against filters or perform more in-depth deployments, you should schedule the job to run. Refer to Scheduled jobs.
NOTE Ensure that you keep a copy of this key separately, as it cannot be retrieved by Datto.
- Click Run to run the quick job or Cancel to close out of the dialog box.
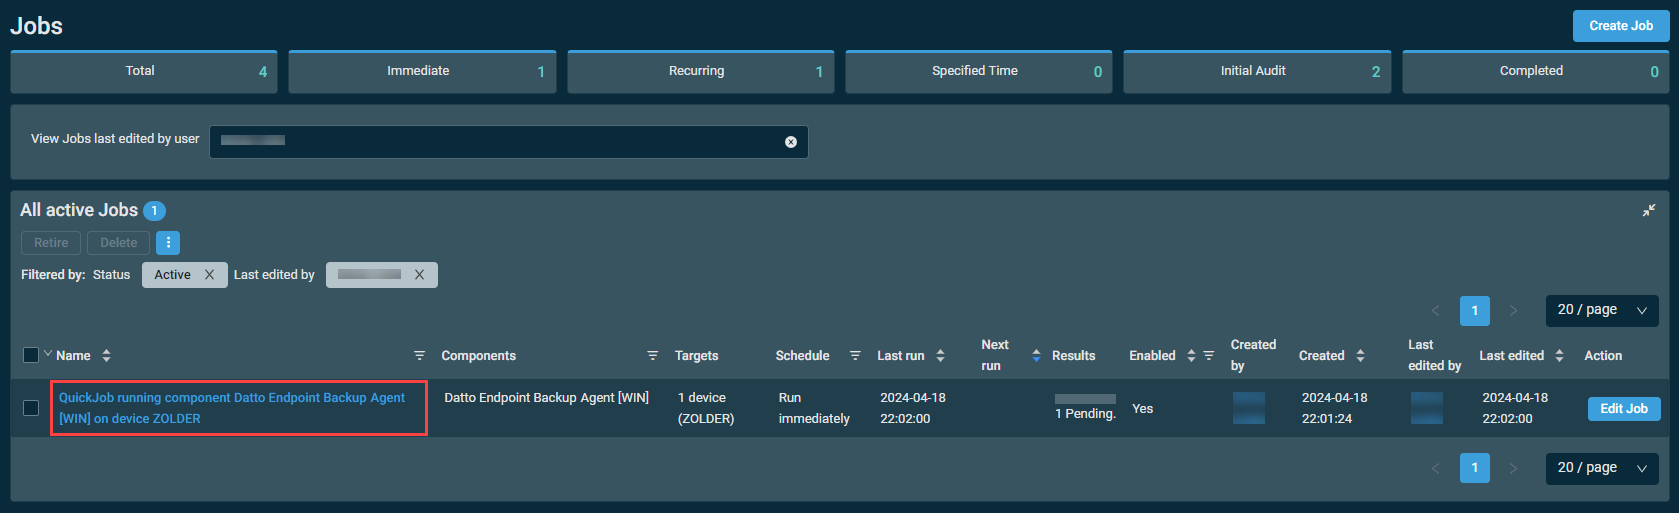
- Allow a few minutes for the installation to finish. To learn how to track the status of the job, refer to Jobs overview.
- For optimal performance, you must schedule a reboot of the endpoint following agent installation.
- From the Jobs page in Datto RMM, click the name of the job for your Datto Endpoint Backup deployment. Refer to Jobs overview.
- In the Devices section at the bottom of the Job Results page, once the job is completed, click the link in the StdOut/StdErr column to view the job results. Refer to StdOut/StdErr in Job results.
The purpose of the Create RMM Template feature in Datto Partner Portal is to generate a token for RMM use. A token is a key that registers a device against a subscription and ensures it receives the correct configuration.
Complete the following steps:
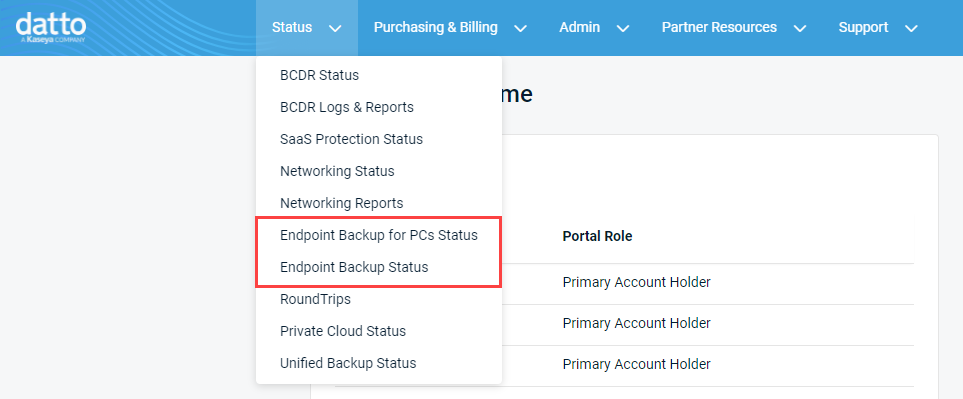
- In Datto Partner Portal, click the Status tab, then select the applicable Endpoint Backup status page from the drop-down menu.
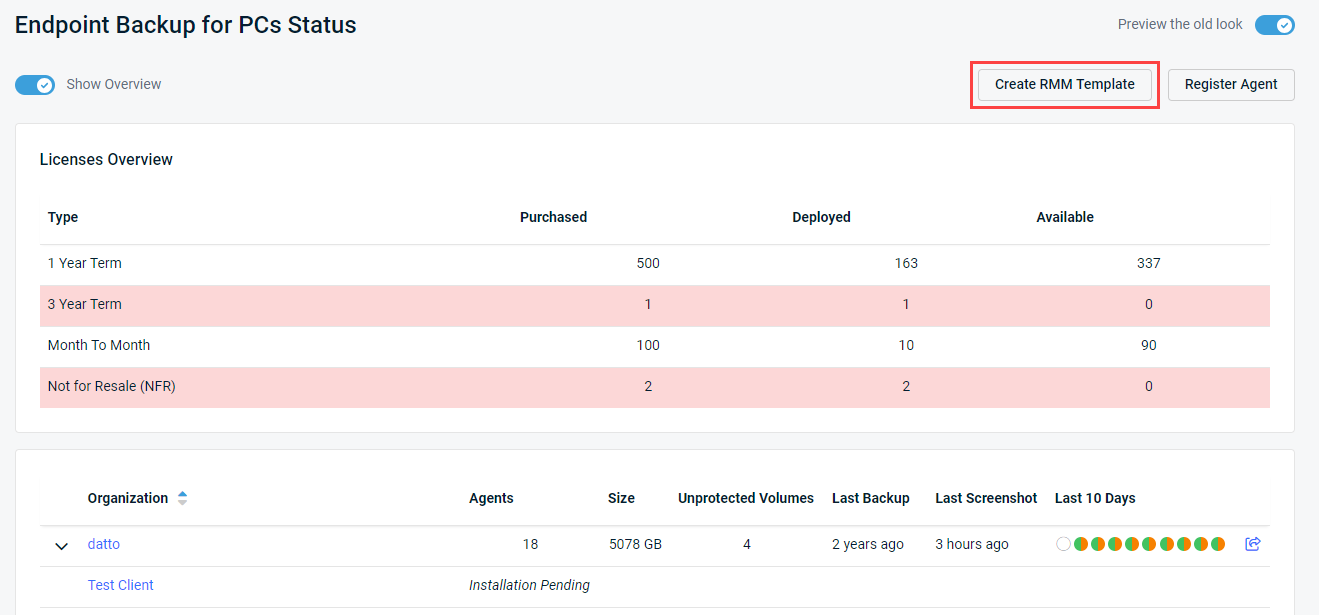
- Click Create RMM Template.
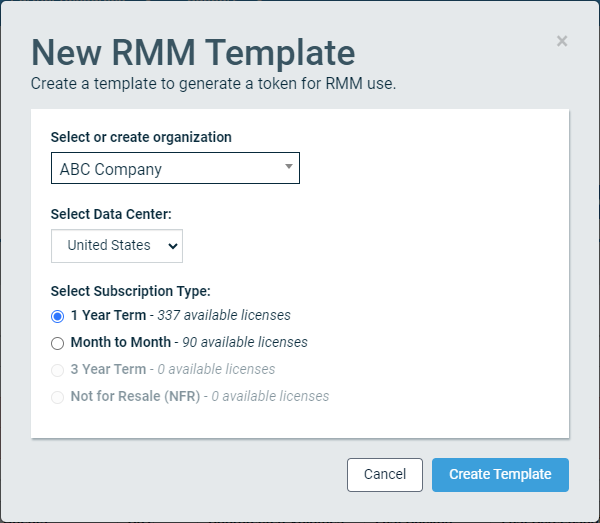
In the New RMM Template dialog box that opens, create a template to generate a token for Datto RMM use as follows: - Select the organization from the Select or Create Organization drop-down menu.
- If you have not already created an organization, select Create New at the top of the list and type an organization name in the text box.
- From the Select Data Center drop-down menu, select the storage location for your backups.
- In the Select Subscription Type section, select the type of subscription you would like to deploy.
- Click Create to create the new RMM template or Cancel to close out of the dialog box.
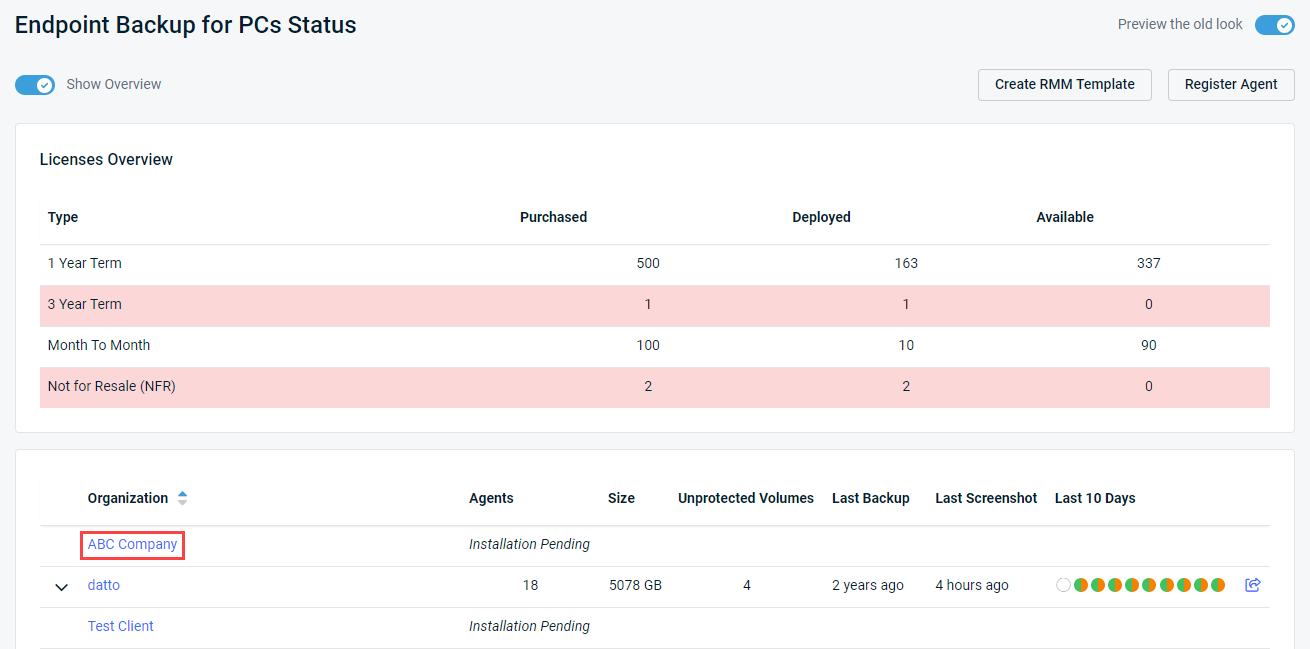
- From the status page in Datto Partner Portal, click the name of your organization in the Organization column. The settings page for the selected organization will open.
- In the RMM Templates panel, locate the Token field, then click the Copy to clipboard icon
 .
.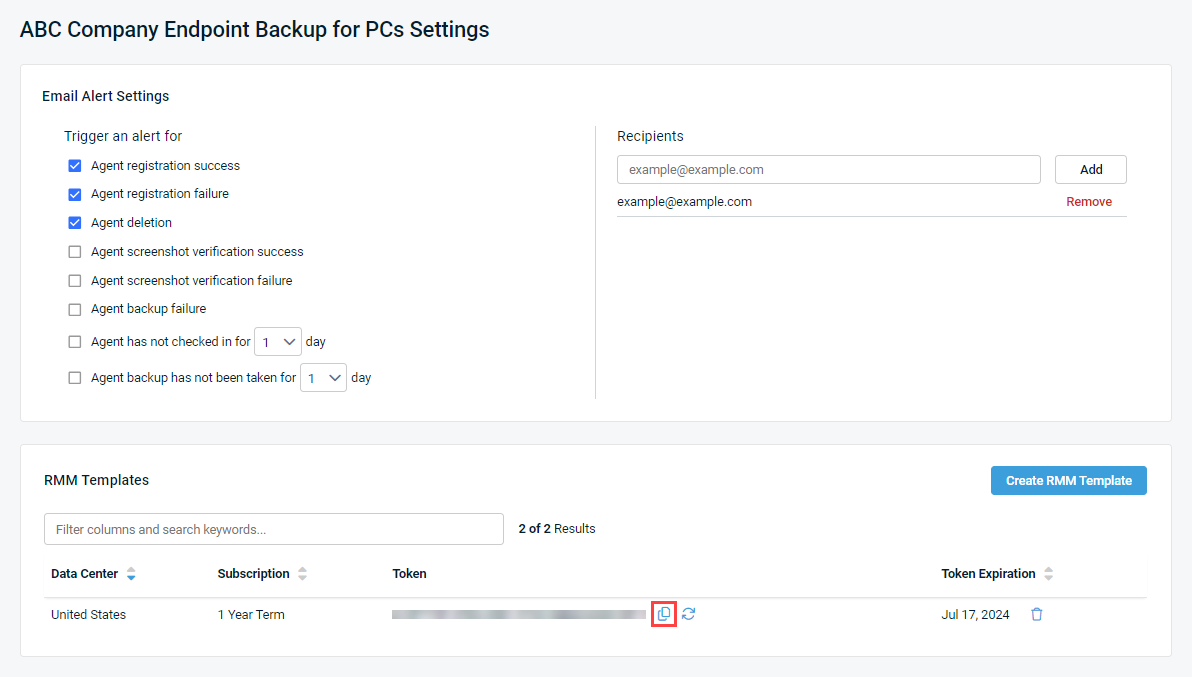
NOTE This copied token is required for agent deployment in Datto RMM, which is detailed in Deploy the Datto Endpoint Backup Agent via Datto RMM .
- In your Datto RMM account, navigate to the ComStore. Refer to ComStore.
- Search for the Datto Endpoint Backup Agent v1 [WIN] component. This Datto RMM package component will allow you to deploy the Datto Endpoint Backup Agent to multiple devices from a single source.
- Click Add to add the component to your Component Library. Refer to Component Library.
- In your Datto RMM account, navigate to Sites > All Sites and click the name of a site in the list. Refer to Sites.
- In the list of devices that belong to the selected site, select the check box(es) of the device(s) on which you'd like to install the Datto Endpoint Backup Agent. Refer to List of devices.
- Click Quick Job. Refer to Action buttons and Quick jobs.
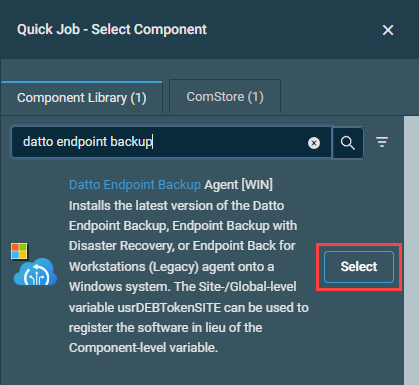
- In the pane that opens on the right side of the page, you'll see the list of components available to run as quick jobs. If you've added the Datto Endpoint Backup Agent [WIN] component to your Component Library, it will appear in the default Component Library tab in the pane. If necessary, enter the component name in the search bar to narrow the list of results.
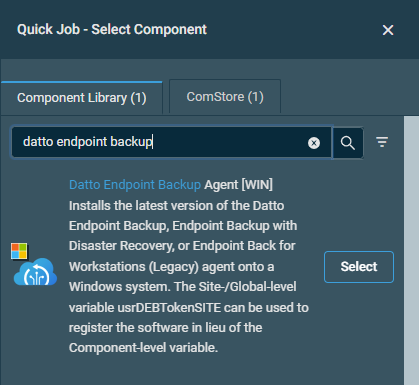
- Click Select.
- In the Quick Job dialog box, you can configure how you want to deploy the agent.
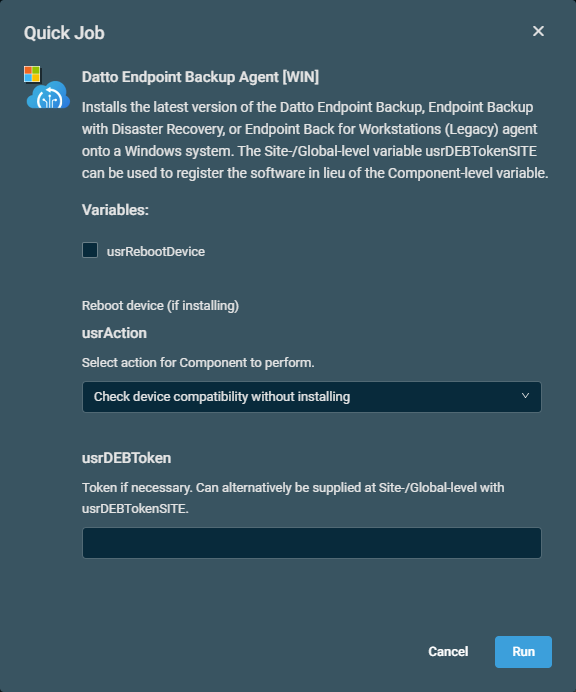
- For the usrRebootDevice variable, select the check box to reboot the endpoint once the installation is complete or clear it to avoid rebooting the endpoint.
- For the usrDEBToken variable, paste the registration token you generated when you created the RMM template in Datto Partner Portal and copied it to your clipboard. Refer to Create your RMM template and Access your RMM token .
- For the usrAction variable, select the action for the component to perform from the drop-down menu.
- Click Run to run the quick job or Cancel to close out of the dialog box.
- Allow a few minutes for the installation to finish. To learn how to track the status of the job, refer to Jobs overview.
- For optimal performance, you must schedule a reboot of the endpoint following agent installation.
NOTE If you wish to target jobs against filters or perform more in-depth deployments, you should schedule the job to run. Refer to Scheduled jobs.
- From the Jobs page in Datto RMM, click the name of the job for your Datto Endpoint Backup deployment. Refer to Jobs overview.
- In the Devices section at the bottom of the Job Results page, once the job is completed, click the link in the StdOut/StdErr column to view the job results. Refer to StdOut/StdErr in Job results.
Error troubleshooting
If you confront an error when attempting to install Datto Endpoint Backup via Datto RMM, refer to the following article for troubleshooting instructions:
Datto Endpoint Backup monitoring
After completing the preceding workflow to deploy Datto Endpoint Backup, installing the Datto Endpoint Backup (Unified) Monitor [WIN] component from the ComStore allows you to ensure backups have been performed within a set threshold and passed verification. The component can be copied and configured to raise an alert if backups are paused on the local endpoint or to adjust the alert threshold. This component will work to monitor both v1 and v2 endpoints.
Apply the component monitor either as part of a policy or directly to devices running Datto Endpoint Backup. Refer to Monitoring policy and Scheduled jobs.


