Agent Browser tools
PERMISSIONS Your security level permissions define your access to the Agent Browser tools. Refer to Remote control tools.
The Datto RMM Agent Browser allows you to connect to a remote device and execute a variety of actions on it. This topic will explain the function of the Agent Browser tools that are at your disposal once the connection to a device has been established.
While the Agent Browser is only available for Managed devices on Windows operating system, it can connect to Managed and OnDemand devices on Windows, macOS, and Linux operating systems, with varying options available to each. You can also initiate a browser connection, a direct connection, or a custom tunnel connection to devices managed by a Network Node device. Refer to List of Agent Browser tools.
IMPORTANT The Agent Browser is only available for Managed Agents on Microsoft Windows devices. OnDemand Agents and operating systems other than Windows do not have an Agent Browser.
For information on how to install the Agent on Windows devices, refer to Installing or uninstalling the Windows Agent.
Video
How to...
IMPORTANT The Agent Browser is only available for Managed Agents on Microsoft Windows devices. OnDemand Agents and operating systems other than Windows do not have an Agent Browser.
In order to access the Agent Browser tools, follow these steps:
- Log in to the Agent Browser and search for the device you would like to connect to. For more information, refer to Log in to the Agent Browser and Connect to a device.
- Once the connection has been established, collapse the Search area and click on the device in the Connected Devices section. This will activate the Agent Browser tools available for the device on the left of the screen and the device Summary page on the right of the screen.
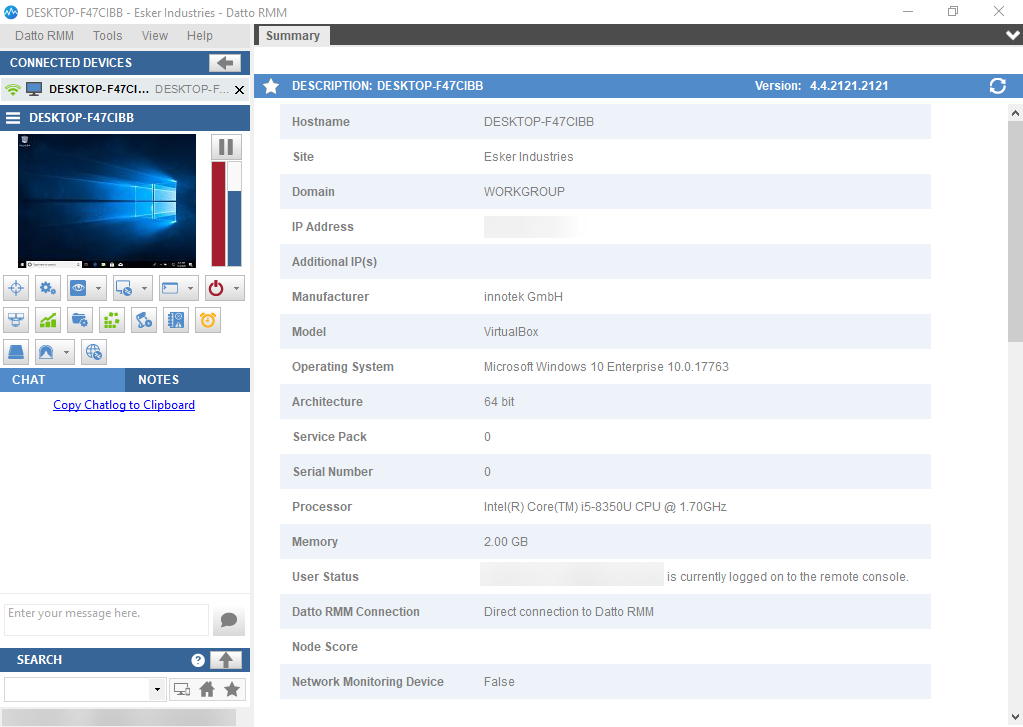
TIP You can specify in the Agent Browser settings if the connected device should be selected automatically in order to activate the Agent Browser tools. Refer to Configure the Agent and Agent Browser.
NOTE The Summary page will display the Agent version installed on the device and basic information including hostname, description, site name, domain, IP address, and more. Network devices and printers show limited information.
NOTE You can refresh the information by clicking the Refresh button ![]() in the upper-right corner, and you can mark this device as a Favorite
in the upper-right corner, and you can mark this device as a Favorite ![]() in the upper-left corner. The following fields are updated when the refresh button is clicked:
in the upper-left corner. The following fields are updated when the refresh button is clicked:
Labels:
• Profile Name
• Description
• Version
• Hostname
• Domain
• IP Address
• Manufacturer
• Model
• Operating System
• Architecture
• Service Pack
• Serial Number
• Processor
• Memory
• User Status
• Datto RMM Connection
• Node Score
• Network Monitoring Device
• Custom fields
Icons:
• Favorite
• Network Monitor
- Clicking on a tool on the left of the screen will open it on the right of the screen, next to Summary. You can have multiple tools open at the same time. You can navigate between the tabs by clicking on their name or by choosing them from the drop-down in the upper-right corner. You can close each tab by clicking on X in the upper-right corner of the tab.
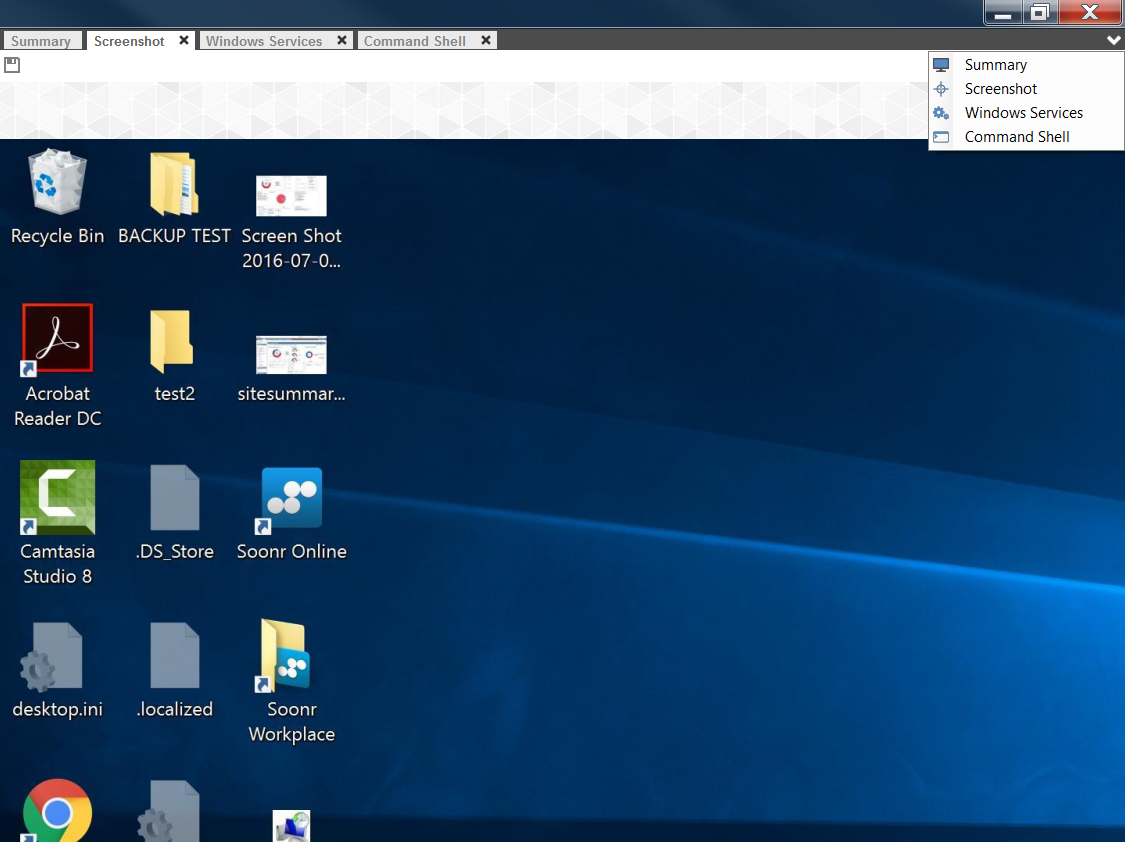
- You can open the tools by clicking on their icon on the left of the screen or by clicking on the Tools menu in the menu bar and selecting the required tools.
- Double-click on any tab or drag and drop it to break it out into a separate window. These windows can then be arranged on your screen as required.
- Drag a tab and drop it on the top, bottom, left, or right of the screen to dock it.
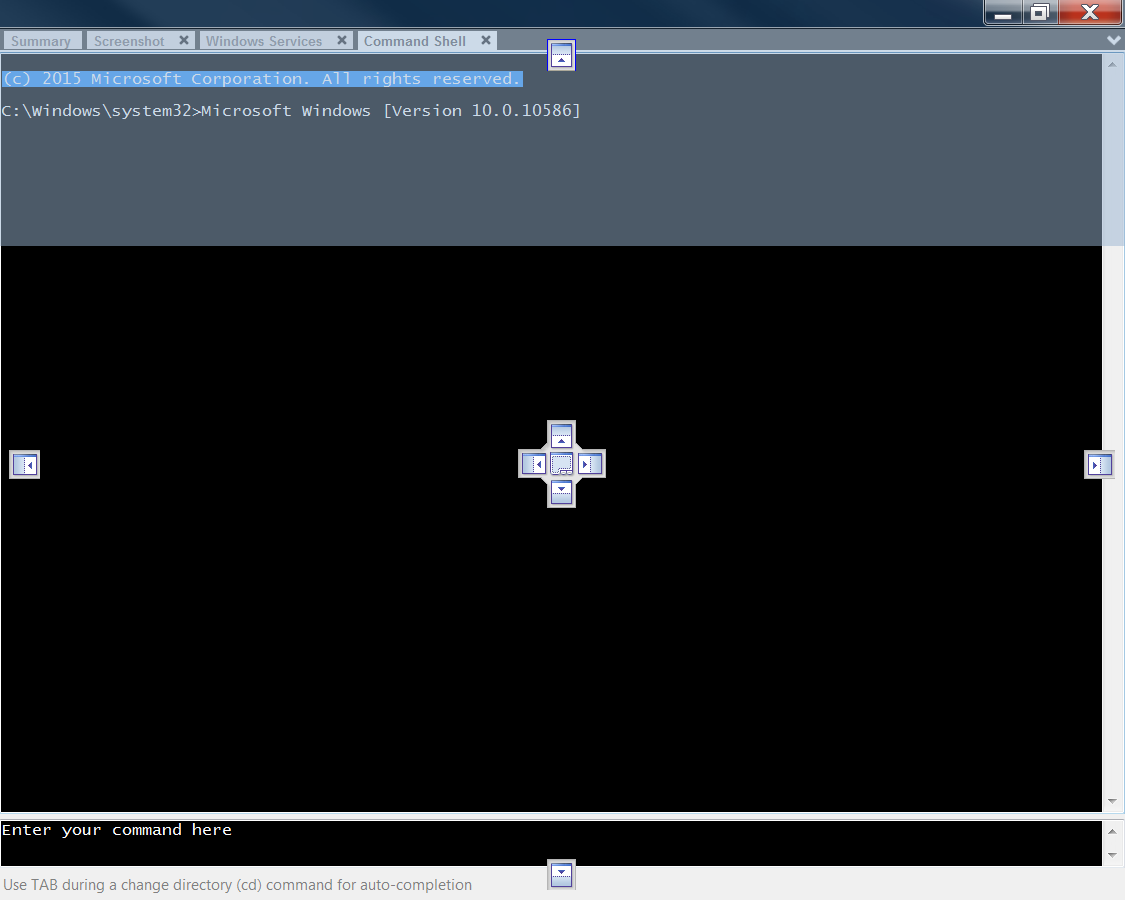
- Once a tab is docked, you can auto-hide it by clicking on the Auto-Hide icon
 in the upper-right corner.
- This will hide your tab. Hover over the tab to expand it and click on the Auto-Hide icon
 to dock it again.
IMPORTANT The Agent Browser is only available for Managed Agents on Microsoft Windows devices. OnDemand Agents and operating systems other than Windows do not have an Agent Browser.
NOTE Your security level permissions control which tools you have access to. Refer to Remote control tools.
The tables below display the list of available Agent Browser tools, depending on the device type you are connecting to.
| Icon | Name | Description | Windows | macOS | Linux | ESXi Host | Network Device/Printer |
|---|---|---|---|---|---|---|---|
|
|
Context menu | Click the context menu and select a device shortcut to open that specific page in the web interface.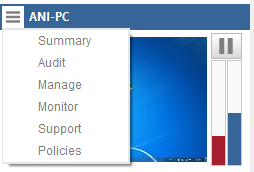 NOTE You must have correct security level permissions to the web interface to access these shortcuts. Refer to Permissions in Security levels. |
|
|
|
|
|
| Thumbnail Screen | Thumbnail image of the device you are connecting to.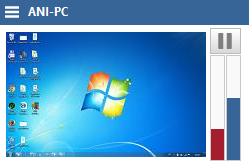 |
|
|
||||
|
|
Screenshot | Takes a screenshot of the remote device. Save the image by clicking on the Save icon NOTE Screenshots can only be taken on the main monitor. |
|
|
|||
|
|
Windows Services | Allows you to control services on the remote device. Select a service from the list to: • Review its description • Check its properties • Restart the service • Pause the service • Stop the service • Start the service |
|
||||
|
|
Command Shell | Opens a command shell on the remote device where you can enter your commands. NOTE The command line or terminal applet does not show the output of commands that need to redraw the screen, such as the commands |
|
|
|
||
|
|
Agent Deployment | Allows you to deploy the Datto RMM Agent to devices on the remote network. For more information, refer to LAN deployment using the Agent Browser (Windows only). |
|
|
|||
|
|
Task Manager | Monitors resources such as CPU, memory, disk usage or network traffic in real time on the remote device. It allows you to: • Select a process and kill it by clicking on the End Process icon • Highlight a process in the CPU area and click the Search Online button TIP You can have a quick look at the CPU and memory usage of the remote device next to the thumbnail image of the device on the left of the screen just above the Agent Browser tool icons. The red bar indicates the CPU usage, and the blue bar indicates the memory usage. Click on the pause button |
|
||||
|
|
File Management |
IMPORTANT The File Manager tool requires SYSTEM permissions to any file or folder you wish to take actions against. Refer to How do I enable SYSTEM access to files or folders?. The File Management tool presents you with a tree structure of folders of the remote device and a number of icons that allow you to perform the following actions: TIP When an action cannot be performed on the selected item(s) or in the selected location, the corresponding button and right-click option are disabled. The File Management tool also allows you to:• Drag and drop any file or folder from your device to the remote device. • Sort the files and folders of the remote device by Name, Size, and Last Modified date by clicking on any of the column headers. • Follow up on the progress of file transfer and management below the file and folder structure of the remote device. You can also cancel any or all actions by clicking on Cancel or Cancel All.  |
|
|
|
||
|
|
Registry Editor | Allows you to add and edit registry items on the remote device. |
|
||||
|
|
Quick Jobs | Allows you to run quick jobs on the remote device. Click on Execute Job to run the component or application as a quick job. For more information, refer to Quick jobs. |
|
|
|
||
|
|
Event Viewer | Allows you to view the event logs on the remote device. |
|
||||
|
|
Wake Up | Allows you to wake up devices that are in the same site and subnet as the device you are connected to. For more information, refer to Wake-on-LAN. |
|
|
|
||
|
|
Drive Information |
Allows you to view the following information about the current local drives of the remote device: Name, Drive, Type, Size, Free, File System, % (percentage used). Click on any of the column headers to sort the information by that column. NOTE Network drives that are defined per user cannot be seen or modified with this tool. Refer to Windows user account permissions. TIP The changes will be applied when the end user next logs onto the remote device. The Operations Log area will display details on your drive mapping operations. Right-click anywhere in the Operations Log area and click Clear to delete all of the log entries. Sort the log information by clicking on any of the column headers: Time, Operation, Drive, User, Message, Action. |
|
||||
|
|
PowerShell | Click the arrow next to the Command Shell icon to access this option. It allows you to connect to a full PowerShell interface on the remote device to execute PowerShell commands. Multiple connections can be opened to the same endpoint, and multiple different PowerShell connections can be open at the same time. NOTE PowerShell version 2.0 and later are supported. IMPORTANT PowerShell desktop version 5.1 is required on any device initiating a session from the Agent Browser. The PowerShell connection requires authentication much like an RDP connection. You need local Windows administrator credentials to establish the connection. Once a connection has been established, the title of the PowerShell window will display the hostname of the remote device.NOTE If you encounter the error message "Login or password is invalid" even when using local Windows administrator credentials, this could be because Powershell Remoting is disabled by default on the remote device. This can be resolved by running the PowerShell command You can also execute a PowerShell session via Web Remote. To learn more, refer to Initiate a Web Remote PowerShell session. |
|
||||
|
|
Shut Down | Allows you to shut down the device. Click on the arrow next to the icon to access both the Shut down and the Restart tools. |
|
|
|
||
|
|
Restart | Allows you to restart the device. You can access it by clicking on the arrow next to the Shut down icon. |
|
|
|
||
|
|
SNMP Test Tool | Only available if the device you are connected to is a Network Node device. It allows you to test network devices using SNMP. For more information, refer to Test SNMP monitoring in the Agent Browser. |
|
|
|
Remote takeover tools
If Privacy Mode is set on the remote device, the end user will be prompted to accept or decline a connection request via a dialog box that includes the requesting technician's name in order for the technician to connect to the device. Refer to Privacy Mode.
NOTE For Web Remote, if Privacy Mode is set on the remote device and Only require permission from the device when connecting with Restricted Tools is selected in the Agent policy targeting the device, end user permission will be required to initiate remote takeover sessions but will not be required to initiate PowerShell sessions. Refer to Privacy mode options in Agent policy.
Once the connection is in progress, a message will be displayed to the end user that a remote takeover is currently in progress. This message will only appear once the end user has accepted the connection request.
NOTE Notifications must first be enabled under System > Notifications & actions (Windows devices only).
Web Remote will reconnect with the same session should a brief interruption in Internet connectivity occur; a second Privacy Mode prompt will not appear as the end user has already accepted the connection.
If the end user's screen is locked (indicated by the padlock icon), selecting Control Screen will not establish a Web Remote session; instead a message will be displayed stating that the screen is locked.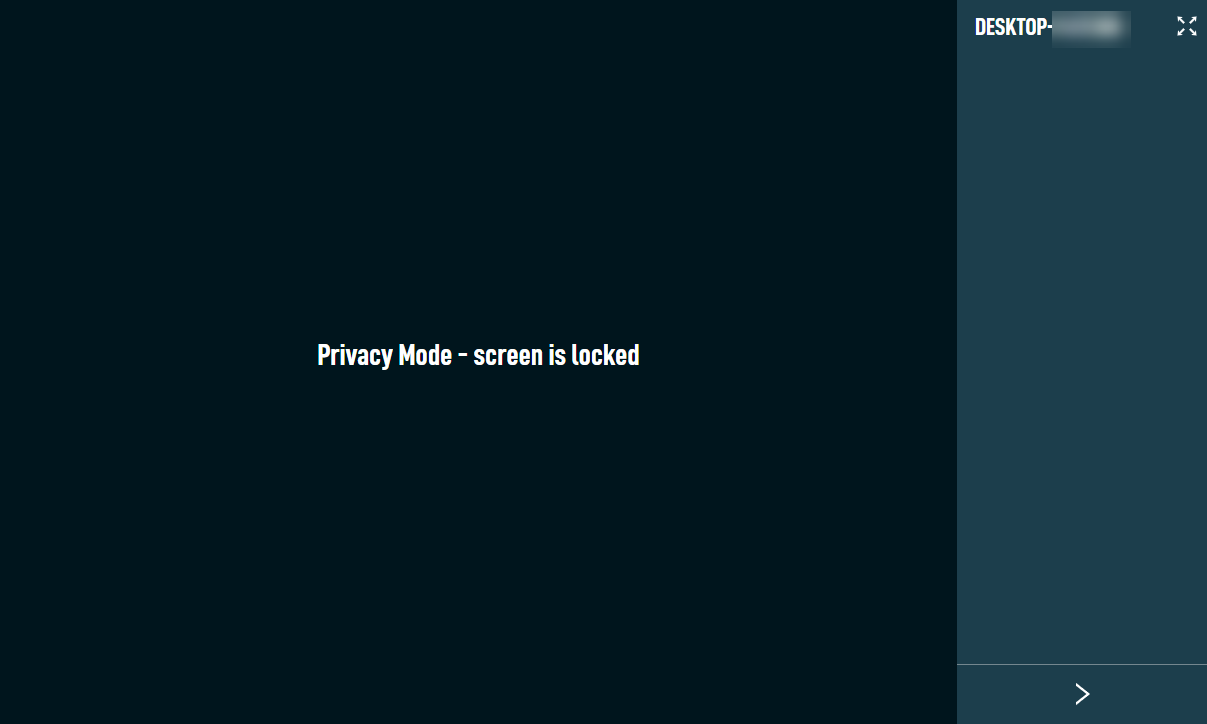
If the end user logs out, selecting Control Screen will not establish a Web Remote session; instead a message will be displayed stating that there is no end user currently logged in.
| Icon | Name | Description | Windows | macOS | Linux | ESXi Host | Network Device / Printer |
|---|---|---|---|---|---|---|---|
|
|
VNC | Opens a Virtual Network Computing (VNC) shared screen session on the remote device. Click the icon to use the remote user's desktop, mouse, and keyboard. VNC does not allow user switching, and you cannot connect to a device where no user is logged in. To learn how to change the default password used in a VNC remote takeover session, refer to Configure the Agent and Agent Browser. If VNC is disallowed on a target device, the VNC connection will fail. On Windows devices, you can control whether VNC is allowed globally. Refer to VNC Integration IMPORTANT In order for VNC to function properly on macOS devices running Mojave and newer, the following applications must be listed and checked under System Preferences > Security & Privacy > Privacy in the following sections: If you would like to open a VNC session without the ability to control the remote device, click the arrow next to the VNC icon and click Connect in View Only Mode. NOTE If connecting to a remote user's device in View Only Mode, a pop-up notification will be displayed to the user that their machine is being accessed, even though you are not actually taking control of the device. There is no way to prevent this notification from being displayed. |
|
|
|||
|
|
RDP | Opens a Remote Desktop Protocol (RDP) session when clicking on the icon. RDP will create a new desktop on the remote device, that is, it will create a separate (not shared) session and will prompt you to log in. If you would like to see what is shown on the remote device's screen using RDP, click on the arrow next to the RDP icon and click Connect to Console Session.  TIP The Agent Browser lets you save RDP credentials upon launching an RDP session to a device. When opting to Remember passwords for this device, the credentials are saved in a file under the current user profile. This file can only be used by the Datto RMM Agent and the local user profile that created it. Attempting to reuse this file under a different user profile on the same device or a different device will fail and may lead to Agent instability. TIP To learn how to configure your RDP remote takeover settings, refer to Configure the Agent and Agent Browser. TIP For information about Network Level Authentication in RDP sessions, refer to Network Level Authentication. NOTE You can administer a number of concurrent RDP connections to devices, but the exact number possible varies depending on factors such as the hardware and screen resolution of the local device. NOTE If there is not enough memory to connect via RDP to a remote device, the error "Device does not have enough virtual memory" will display. This will typically only display when connected to several devices simultaneously, and is by design. |
|
||||
|
|
Splashtop | Opens a remote takeover session via Splashtop. Refer to Splashtop Remote Screen Share Integration. IMPORTANT In order for Splashtop to function properly on macOS devices running Mojave and newer, the following applications must be listed and checked under System Preferences > Security & Privacy > Privacy in the following sections: |
|
|
|||
| Web Remote | Select to initiate a remote takeover session or chat via Web Remote. Refer to Web Remote. |
|
|
Network control
You can use any of the network control tools listed below to connect to Windows, macOS, and Linux devices, ESXi hosts, network devices, and printers.
| Icon | Name | Description |
|---|---|---|
|
|
Connect (HTTP) | This option lets you set up a browser connection to any managed device in Datto RMM. The device's Network Node will be used to set up the connection without the need of a VPN or any additional tool. Multiple simultaneous sessions can be open at the same time. The following information is displayed and/or configurable: • Hostname: The name of the device you are connected to in the Agent Browser. • Description: The description of the device you are connected to in the Agent Browser. • IP address: The IP address of the device you are connected to in the Agent Browser. It is automatically filled in, but you can edit it to enter a port number if necessary (for example, 192.168.1.3:8080). • Connection type: Select HTTP or HTTPS from the drop-down list. HTTP is selected by default. • Open browser automatically after successful connection: Select the check box to apply this setting. If the connection is initiated from the Agent Browser, this setting is OFF by default. However, if the connection is initiated from the web interface, this setting is ON by default. • Start connection automatically next time: Select the check box to apply this setting. If the connection is initiated from the Agent Browser, this setting is OFF by default. However, if the connection is initiated from the web interface, this setting is ON by default. • Network Node: Shows the Network Node that is used to establish the connection. • Status: Displays the status as per the log details. Once the status is active, a clickable URL will be displayed based on the selected connection type and the IP address and port information (for example, https://192.168.1.3:8080). • Start/Stop: Allows you to start or stop the connection. • Save Defaults: Click to save the current settings as default settings for future connections for this device. • Logging: Displays the activity log. This tool uses a proxy auto-config (PAC) file to automatically configure your browser. The PAC file allows your browser to use a different proxy server when connecting to your target devices, as opposed to other internet sites. It only overrides the way the connection is established with these particular devices, while the rest of the internet is accessed using the default connection method. The PAC file is hosted inside the Agent Service and is activated either automatically at user logon or when starting an HTTP/S session. When you click the Start button to initiate the connection from within the Agent Browser, a dialog box appears to let you decide when you want the proxy settings to be applied. The dialog box also lets you set the activation method to automatic by selecting the Never ask again check box. 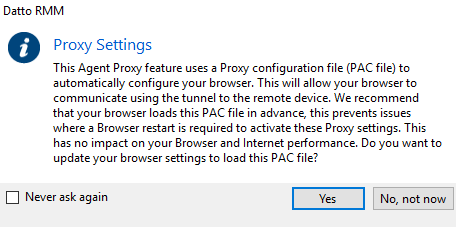 If you click Yes, the Agent will activate the embedded PAC server at user logon. This will have no impact on your browser and internet performance. If you click No, not now, the embedded PAC server will be launched when the first session is started and stopped when the last session is stopped, after which the original proxy settings will be restored. Please note that with this approach, your browser may need to be restarted to apply the proxy configuration changes. NOTE For the best user experience, we recommend setting Google Chrome as your default browser. |
|
|
Connect (Telnet/SSH) | This option lets you connect to the terminal interface of any managed device in Datto RMM. The device's Network Node will be used to set up the connection through PuTTY. Once the connection is established, Datto RMM will launch the remote shell. The following information is displayed and/or configurable: • Hostname: The name of the device you are connected to in the Agent Browser. • Description: The description of the device you are connected to in the Agent Browser. • URL and port number: The IP address of the device you are connected to in the Agent Browser and port number 22 are automatically filled in. You can edit these details. • Connection Type: Select SSH or Telnet. SSH is selected by default. • Open PuTTY automatically after successful connection: Select the check box to apply this setting. If the connection is initiated from the Agent Browser, this setting is OFF by default. However, if the connection is initiated from the web interface, this setting is ON by default. • Start connection automatically next time: Select the check box to apply this setting. If the connection is initiated from the Agent Browser, this setting is OFF by default. However, if the connection is initiated from the web interface, this setting is ON by default. • Network Node: Shows the Network Node that is used to establish the connection. NOTE When an SSH connection is initiated and the target device is used as a Network Node, the Network Node's Privacy Mode settings will be respected. Refer to Privacy Mode. • Status: Displays the status as per the log details.• Start/Stop - Allows you to start or stop the connection. • Save Defaults - Click to save the current settings as default settings for future connections for this device. • Logging - Displays the activity log. |
|
|
Connect (Custom Tunnel) | This option lets you use any application directly on any device. A common use case is using a third-party management console on a Windows Device. The following information is displayed and/or configurable: • Hostname: The name of the device you are connected to in the Agent Browser. • Description - The description of the device you are connected to in the Agent Browser. • URL and port number - The IP address of the device you are connected to in the Agent Browser and port number 1 are automatically filled in. You can edit these details. • Connection Type - Custom • After connected, run the following command - Select the check box to apply this setting, and enter a command you would like to run on the device being used to initiate the connection. This setting is OFF by default. • Start connection automatically next time - Select the check box to apply this setting. This setting is OFF by default. • Network Node: Shows the Network Node that is used to establish the connection. • Status - Displays the status as per the log details. • Start/Stop - Allows you to start or stop the connection. • Save Defaults - Click to save the current settings as default settings for future connections for this device. • Logging - Displays the activity log. NOTE RDP connections made via the agent's Custom Tunnelling feature will not respect the Agent's Privacy Mode setting. Users will still be required to enter the Username and Password of the device they are connecting to. NOTE When using Custom Tunnel to initiate a connection to a managed device using |
Chat and notes
| Name | Description | Windows | macOS | Linux | ESXi Host | Network Device / Printer |
|---|---|---|---|---|---|---|
| Chat | Send messages to the end user of the connected device. Enter your message and hit Enter or click the chat icon You can click the Copy Chatlog to Clipboard button to copy the conversation. This button will not appear in the chat window of the connected device. 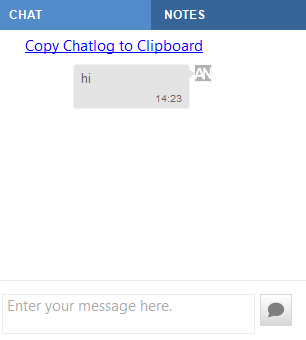 TIP You can specify in the Agent Browser settings if you want to play a sound when you receive a new chat message. Refer to Configure the Agent and Agent Browser. |
|
|
|||
| Notes | Add notes to the connected device. Enter your message and hit Enter or click the save button • Yesterday • 7 days / 30 days ago • 3 months / 6 months ago • 1 year ago • From beginning Any note added here will be visible in the Notes section on the device summary page. Refer to Device summary. Notes will also be visible in the Device Activity report. Refer to Device Activity report. 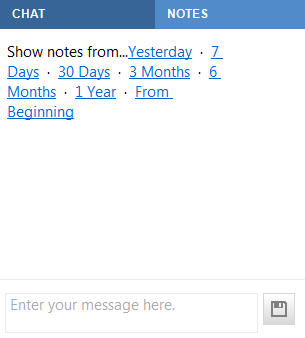 TIP You can also add a note when closing the connection to a device. For more information, refer to Disconnect from a device. |
|
|
|


